Automotive / Motorcycle Accessories
User Manual for VEVOR 170W-120V Mini Grinder
Quick guide for the VEVOR 170W-120V Mini Grinder. Includes setup, accessory installation, speed settings, safety tips, and maintenance instructions.
Quick answers from the manual
Quick answer
- The VEVOR 170W-120V Mini Grinder is a rotary tool for drilling, grinding, sanding, polishing, engraving, and cutting. It features variable speed control (8,000-35,000 RPM) and supports various attachments like a cutting guide, shield, and flexible driver. p. 4
Key actions
- Installing Accessories p. 8
- Adjusting Speed p. 9
First start
- Run-in the flexible driver (if used) for 2 minutes in a vertical position before first use. p. 14
Problems and fixes
Tool stalls
Switch off immediately and reduce pressure.
p. 5Maintenance and reset
- Lubricate the flexible driver every 25-30 hours of use. p. 14
Technical specifications
| Parameter | Value | Meaning | Pages |
|---|---|---|---|
| Voltage | 120V 60Hz | Power requirements | p. 4 |
| Speed Range | 8,000 - 35,000 rpm | Variable speed control | p. 4 |
Where to find it in the PDF
- Technical Specifications p. 4
- Speed Settings Table p. 10
Table of contents
Manual images
Click an image to enlargeQuick Guide
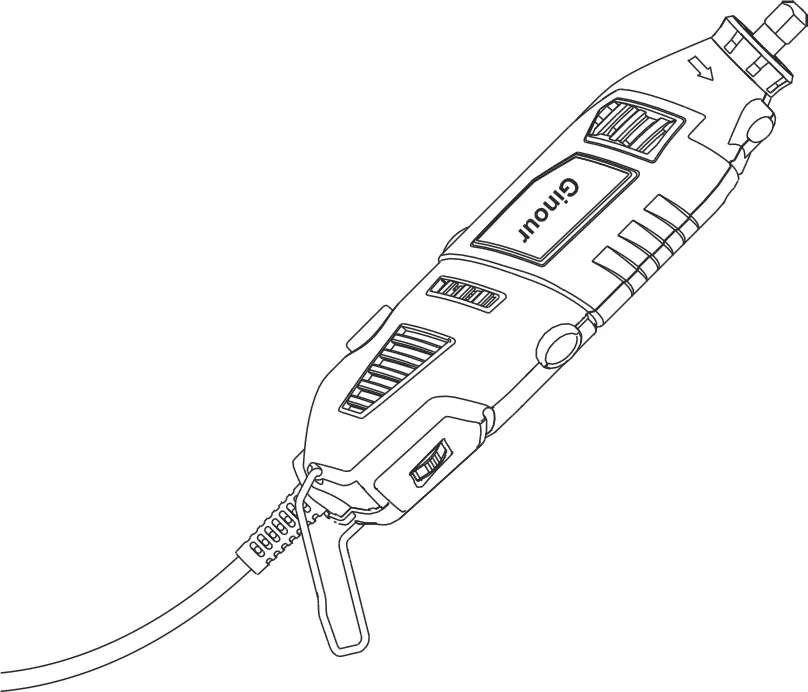
The VEVOR 170W-120V Mini Grinder is a versatile rotary tool designed for drilling, grinding, sanding, polishing, engraving, and cutting. It is suitable for use on most metals, glass, wood, and ceramics. Always read the safety instructions before operation and ensure the tool is unplugged when changing accessories or performing maintenance.
Technical Specifications
- Voltage: 120V 60Hz
- Maximum Output: 160W 1.4A
- No Load Speed: 8,000 - 35,000 rpm
- Collet Chuck Capacity: Max 3.2mm diameter
Operating Instructions
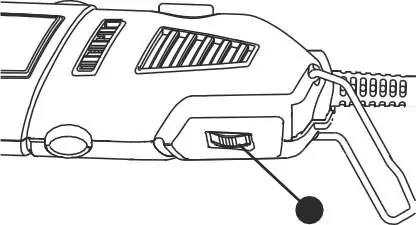
Start-up: Never start or stop the tool while the accessory is in contact with the workpiece. Hold the tool firmly and press the ON/OFF switch. The tool will run continuously until switched off.
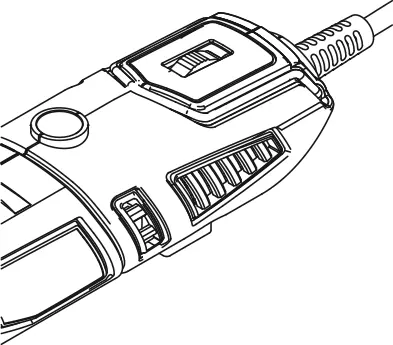
Speed Adjustment: The speed control dial is located on the rear of the tool. Adjust the speed while the tool is running. Use lower speeds for polishing and delicate work, and higher speeds for drilling, cutting, and engraving.
Accessory Installation
Replacing Collets:

- Unplug the tool.
- Press and hold the shaft lock button (A) and rotate the shaft with the collet wrench (E) until it engages.
- Use the wrench to loosen the collet nut (D).
- Remove the old collet (C) and insert the new one.
- Tighten the collet nut with the wrench.
Installing Accessories:
- Unplug the tool.
- Hold the shaft lock button (A) and loosen the collet nut (D).
- Insert the accessory shank into the collet as deep as possible.
- Tighten the collet nut securely using the wrench. Do not use pliers.
Attachments
Cutting Guide: Comes pre-assembled. Remove the collet nut and housing cap, insert the cutting bit, tighten the collet nut, and thread the guide onto the housing. Adjust to the desired depth.

Shield Attachment: Redirects debris and sparks. Remove the housing cap, screw the shield onto the tool using the lock nut, and position it using the tabs.
Flexible Driver: Ensure no sharp bends or kinks in the shaft (minimum bend radius is 6 inches). Run the tool in a vertical position for 2 minutes before first use. Lubricate the core every 25-30 hours of use with automotive wheel bearing grease.
Maintenance
- Keep air vents and motor housing free of dust.
- Clean the device immediately after use with a moist cloth and soft soap.
- Do not use solvents or cleaning agents that may damage plastic parts.
- Periodically check the tightness of the collet chuck.
- Do not attempt to repair the tool yourself.
Manufacturer information
VEVOR
Practical help
Common problems
Tool stalls during operation
Switch off immediately. Reduce pressure on the workpiece; do not force the tool.
Accessory slips or vibrates
Ensure maximum contact between the accessory shaft and the collet chuck. Tighten the collet nut securely.
Tool overheats
Allow the tool to cool down. Do not apply excessive radial pressure to the accessory.
Before use
- Verify power supply is 120V 60Hz.
- Ensure the collet chuck is tightened correctly.
- Check that the accessory is properly balanced.
- Wear safety glasses and a dust mask.
- Ensure the work area is clean and well-lit.
Specs in practice
- 8,000 - 35,000 rpm
- Variable speed range; use lower speeds for polishing/cleaning and higher speeds for cutting/drilling.
Images and diagrams
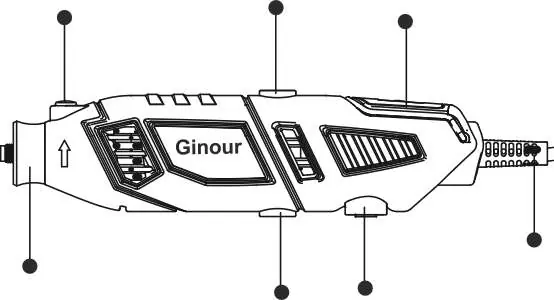
- Shaft lock button (A) is used to hold the shaft stationary while changing accessories.
- Speed control dial (H) adjusts the RPM from 1 to 6.
Model compatibility
- Not for use with router bits or large diameter bits (1 inch or larger) when using the Flexible Driver.

Manual page author
Emily Carter
User documentation editor
Prepares concise manual descriptions and highlights the most useful setup, operation, and maintenance information for readers.