General / Other Manuals
Installation Guide for Vevor 03SDHB Automotive Tail Light Assemblies
A comprehensive guide for installing Vevor 03SDHB, 99SDBK, and 02SSBK automotive tail light assemblies, including step-by-step replacement procedures, troubleshooting for condensation, and vehicle compatibility.
Table of contents
Manual images
Jump to the sectionQuick guide from the manual
This document provides instructions for the installation and maintenance of Vevor automotive tail light assemblies (models 03SDHB, 99SDBK, 02SSBK). It is highly recommended to have these parts installed by a professional car modification service. Always wear safety goggles and work gloves during the process.
Safety and Precautions
- Keep the assembly area clean, well-lit, and free of bystanders.
- Do not attempt installation if tired or under the influence of substances.
- Ensure all parts are accounted for before beginning.
- Retain original reversing lamps if required by your specific model, as they may not be included in the new assembly.
Replacement Procedure
The installation process is identical for both the right-hand (RH) and left-hand (LH) sides of the vehicle.
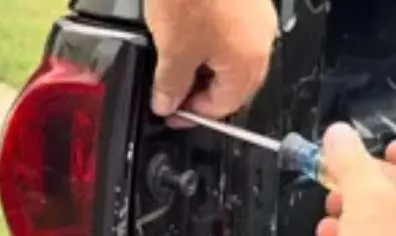
Step 1: Remove existing tail light
- Open the tailgate and remove the two Phillips screws securing the light.
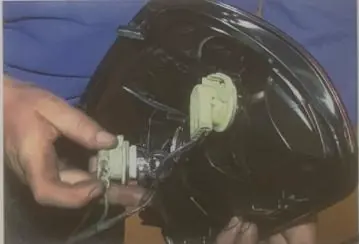
- Carefully remove the original factory tail light assembly and disconnect the sockets and bulbs. Note: You must retain the original reversing light bulbs to install them into the new assembly.
Step 2: Install the new tail light
- Locate the new tail light assembly and connect the wiring harness.
- Position the new assembly into place.
- Reinstall the two Phillips screws and test the lights to ensure all functions operate correctly.
Troubleshooting Condensation
If you notice condensation inside the tail light housing, follow these steps:
- Check Vents: Ensure all housing vents are free from blockages.
- Evaporation: Turn on the lights for 20 minutes to raise the internal temperature and evaporate moisture.
- Seal Inspection: If condensation persists, check the bulb and socket seals. Remove bulbs to allow moisture to escape, using a hairdryer to speed up the process if necessary.
- Desiccant: Consider placing a moisture-absorbing silica-gel packet inside the housing if seal issues continue.
Manufacturer information
VEVOR
Practical help
Common problems
Condensation inside the tail light housing
Check for blocked vents, turn on lights for 20 minutes to evaporate moisture, or inspect bulb/socket seals.
Missing reversing lamp function
Ensure you have transferred the original vehicle reversing lamp bulbs into the new assembly, as they are not included with some models.
Before use
- Verify vehicle compatibility (e.g., 2003-2006 Chevrolet Silverado 1500/2500/3500 for model 03SDHB).
- Wear ANSI-approved safety goggles.
- Wear heavy-duty work gloves.
- Ensure you have a Phillips screwdriver.
- Confirm if your specific model requires reusing original reversing lamp bulbs.
Specs in practice
- Rating for light
- DC12V, standard automotive voltage.
Images and diagrams
- The manual provides visual steps for removing the Phillips screws from the tailgate area.
- Images illustrate the disconnection of the wiring harness and the removal of the factory assembly.
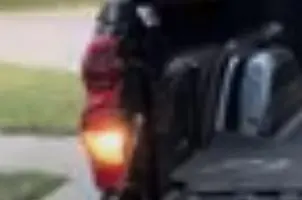
- Final images show the completed installation on various truck models.
Model compatibility
- Model 03SDHB: Fits 2003-2006 Chevrolet Silverado 1500/2500/3500 and 2007 Classic.
- Model 99SDBK: Fits 1999-2003 GMC Sierra and 1999-2006 Chevrolet Silverado variants.
- Model 02SSBK: Fits 1999-2002 Chevrolet Silverado and 1999-2006 GMC Sierra variants; not compatible with stepped type.

Manual page author
Emily Carter
User documentation editor
Prepares concise manual descriptions and highlights the most useful setup, operation, and maintenance information for readers.