Garden / Fencing & Gates
User Manual for VEVOR Metal Fence Posts
Quick guide for VEVOR metal fence posts. Includes installation steps, safety precautions, component descriptions, and specifications for models 10-3FT through 10-7FT.
Table of contents
Manual images
Click an image to enlargeQuick guide from the manual
This guide provides essential information for the installation and safe use of VEVOR metal fence posts. Always ensure the stable anchor is fully inserted into the soil to maintain stability. Before operating, inspect the posts for any damage and ensure they are in proper working order.
Safety precautions
- Hazardous areas: Do not use or store fence posts in hazardous locations.
- Inspection: Always check the posts for damage or instability before use.
- Intended use: Use only as intended. Do not use the posts for sweeping off corrosive substances, as this can damage the material.
- Supervision: Keep children away from the installation area and ensure they do not play with the fence posts.
- Proper handling: Consider local conditions and pay attention to third parties when working with the posts.
Product description and specifications
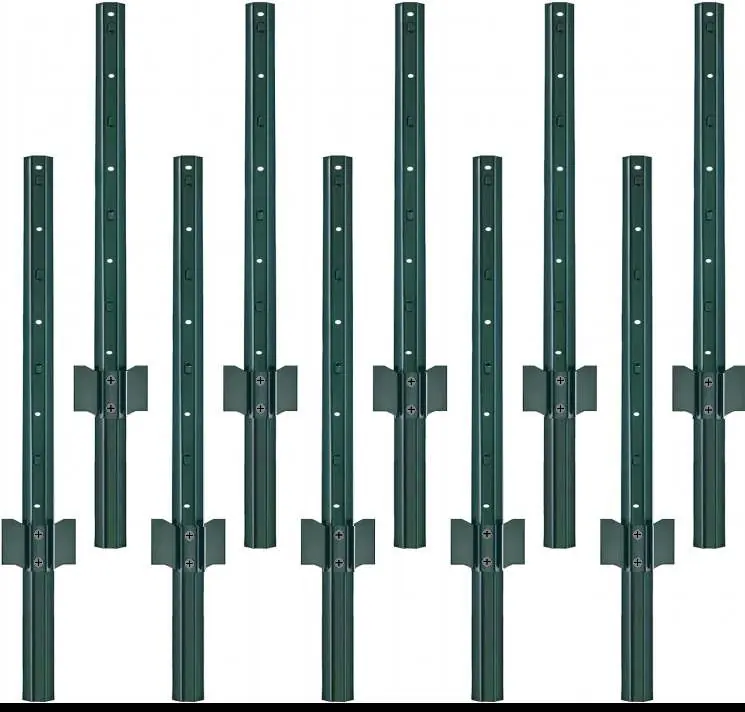
The VEVOR metal fence posts are available in various heights. Each set includes the necessary hardware for assembly.
- 10-3FT: 3ft height, 10 sets, 20 cable ties, 20 hooks, 20 screws.
- 10-4FT: 4ft height, 10 sets, 20 cable ties, 20 hooks, 20 screws.
- 10-5FT: 5ft height, 10 sets, 30 cable ties, 20 hooks, 20 screws.
- 6-6FT: 6ft height, 6 sets, 24 cable ties, 12 hooks, 12 screws.
- 10-6FT: 6ft height, 10 sets, 40 cable ties, 20 hooks, 20 screws.
- 10-7FT: 7ft height, 10 sets, 50 cable ties, 20 hooks, 20 screws.
Components overview
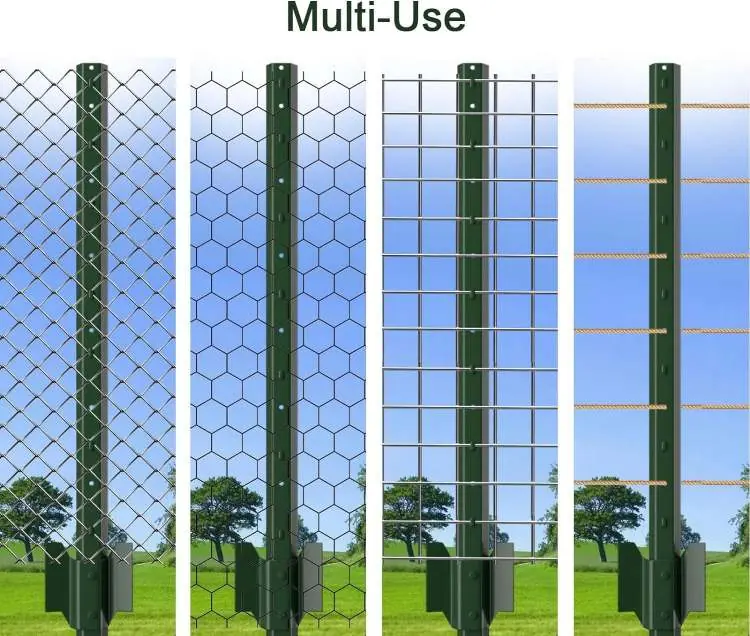
The fence posts feature several design elements for versatility:
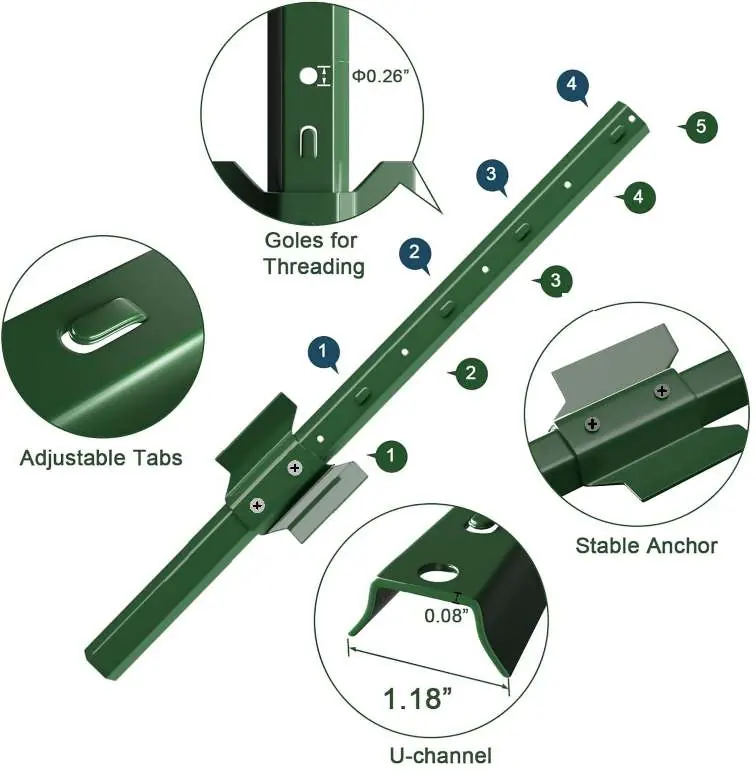
- U-channel: Provides structural integrity.
- Stable anchor: Must be fully buried in the soil for stability.
- Adjustable tabs: Allow for flexible attachment of fencing materials.
- Threading holes: Used for securing wires or other materials.
- Hardware: Includes plastic cable ties, metal hooks, and screws for assembly.
Installation instructions
Follow these steps to install your fence posts:
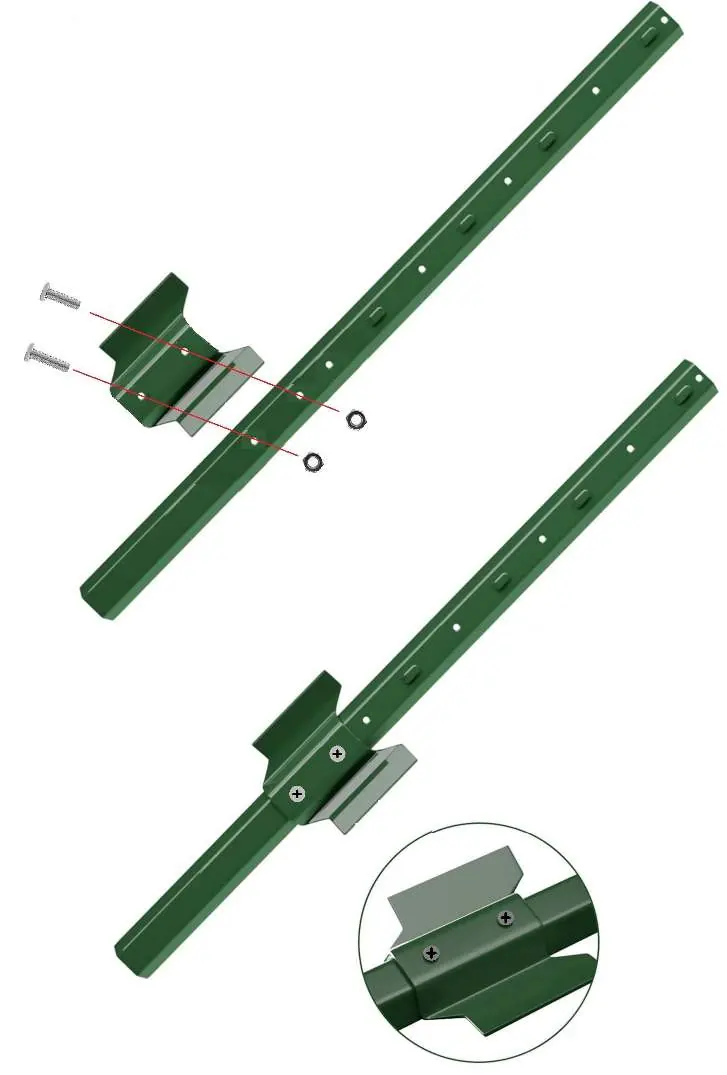
- Assemble the stable anchor to the post using the provided screws.
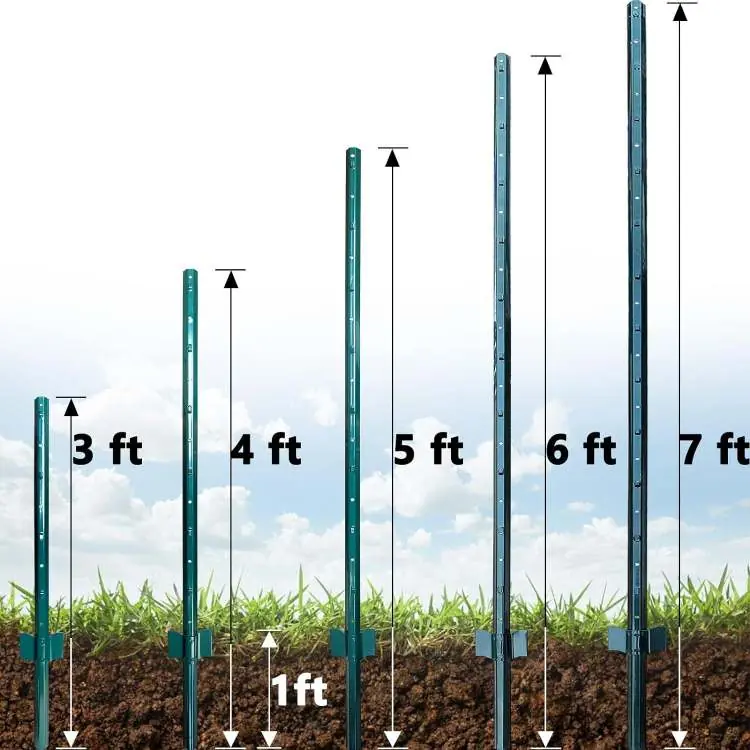
- Ensure the stable anchor is fully inserted into the soil. The anchor section (approximately 1ft) must be completely underground to ensure the post remains stable.
- Attach your fencing material using the provided cable ties, hooks, or by threading through the pre-drilled holes.
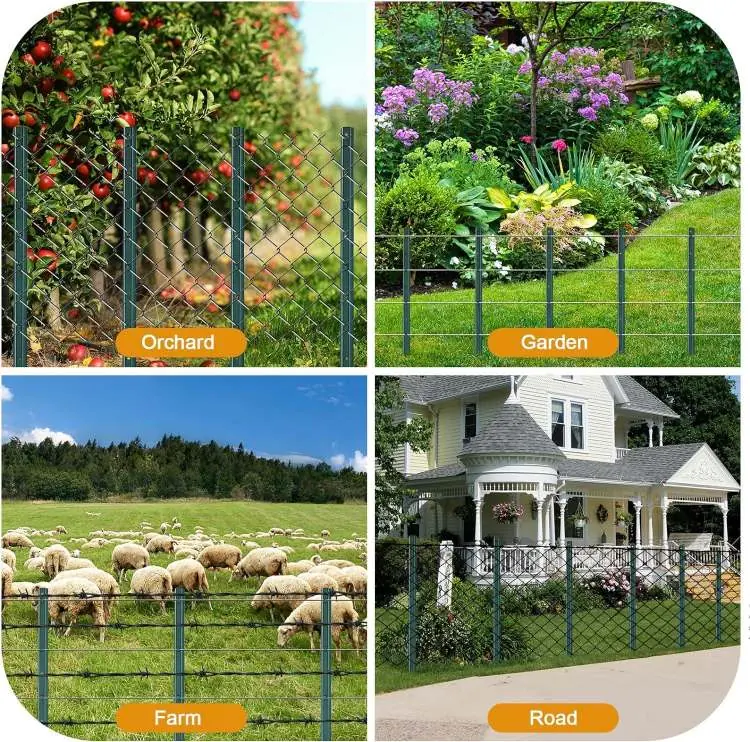
Usage and applications
These fence posts are designed for multi-use applications, including:
- Orchards and gardens
- Farm fencing
- Roadside boundaries
Manufacturer contact information
For support, you can contact the manufacturer via email at [email protected].
Manufacturer information
VEVOR
Practical help
Common problems
Fence post is unstable
Ensure the stable anchor is fully inserted into the soil. The anchor must be buried completely to provide necessary support.
Corrosion or material damage
Do not use the posts for sweeping off corrosive substances, as these can harm the protective coating and material of the fence posts.
Before use
- Inspect the fence posts for any damage or defects.
- Verify that the installation area is not a hazardous location.
- Ensure you have all required components (cable ties, hooks, screws) based on your specific model.
- Check that the ground is suitable for inserting the stable anchor.
Specs in practice
- No. of Plastic cable ties
- The quantity of ties provided for securing fencing material to the post.
- No. of Metal hooks
- The quantity of hooks provided for mounting fencing or wire.
- No. of Screws
- The quantity of screws provided for attaching the stable anchor to the post.
Images and diagrams
- The U-channel design provides structural support.
- The stable anchor must be buried completely for stability.
- Adjustable tabs and threading holes allow for versatile fencing attachment.
Model compatibility
- Suitable for various fencing types including wire mesh, chicken wire, and rope.

Manual page author
David Miller
Documentation analyst
Organizes user manual content into clear summaries, with attention to model details, product context, and everyday usability.