Computers / Printer Accessories
Installation Guide for Xerox 097S04981 Booklet Maker Finisher
Step-by-step installation guide for the Xerox 097S04981 and 097S04982 Booklet Maker Finisher. Includes instructions for unpacking, removing shipping materials, and installing internal components.
Table of contents
Manual images
Click an image to enlargeQuick Installation Overview
This document provides the installation procedure for the Xerox 097S04981 and 097S04982 Booklet Maker Finisher. The process involves unpacking the unit, removing all internal shipping materials, and installing specific components required for operation.
Unpacking and Positioning
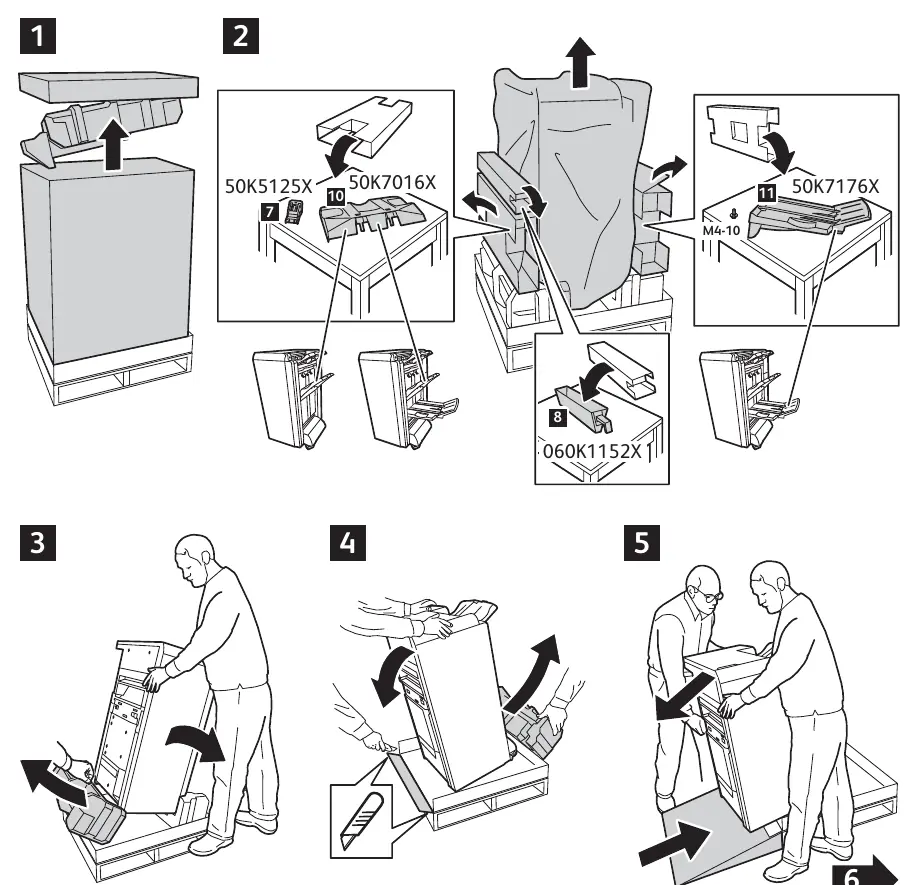
- Carefully remove the outer packaging from the finisher unit.
- Remove the top packaging foam and accessories.
- Use the provided ramp or lift to safely move the finisher from the pallet to the floor.
- Ensure the unit is placed on a stable, level surface.
Removing Packaging Materials
Before operation, all internal shipping materials must be removed to prevent mechanical failure:
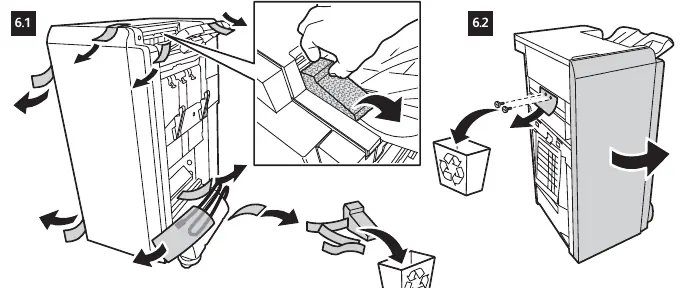
- Open the finisher access doors.
- Remove all adhesive tapes securing internal components.
- Remove all foam blocks and protective cardboard inserts from the interior.
- Check for any loose packing materials inside the paper path and discard them.
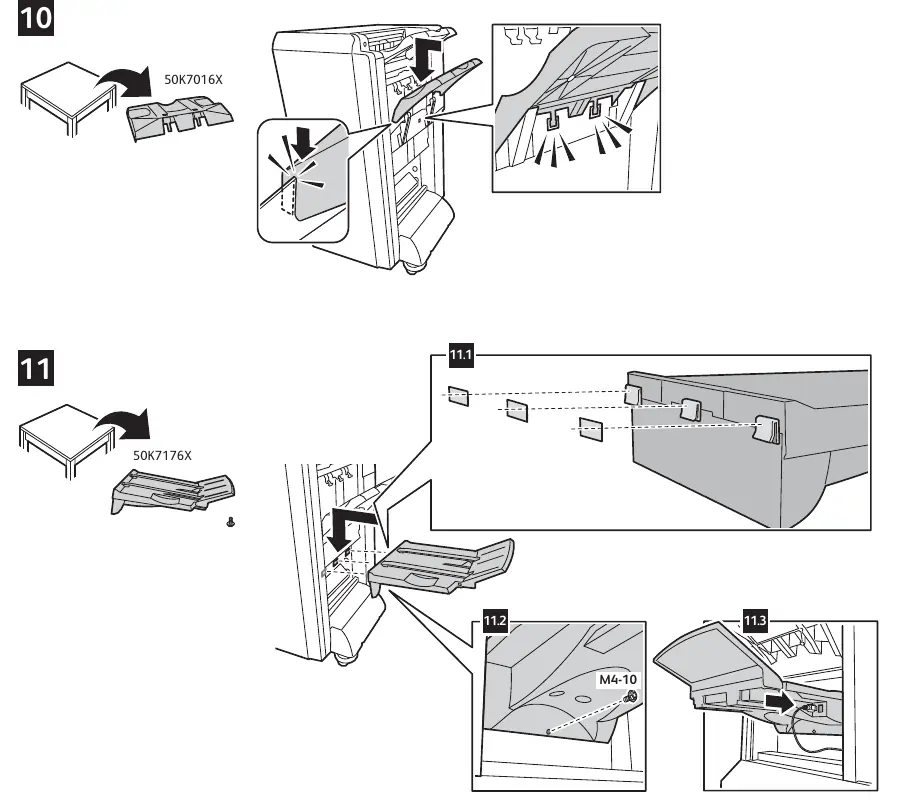
Component Installation
The installation requires the attachment of several specific parts included in the kit:
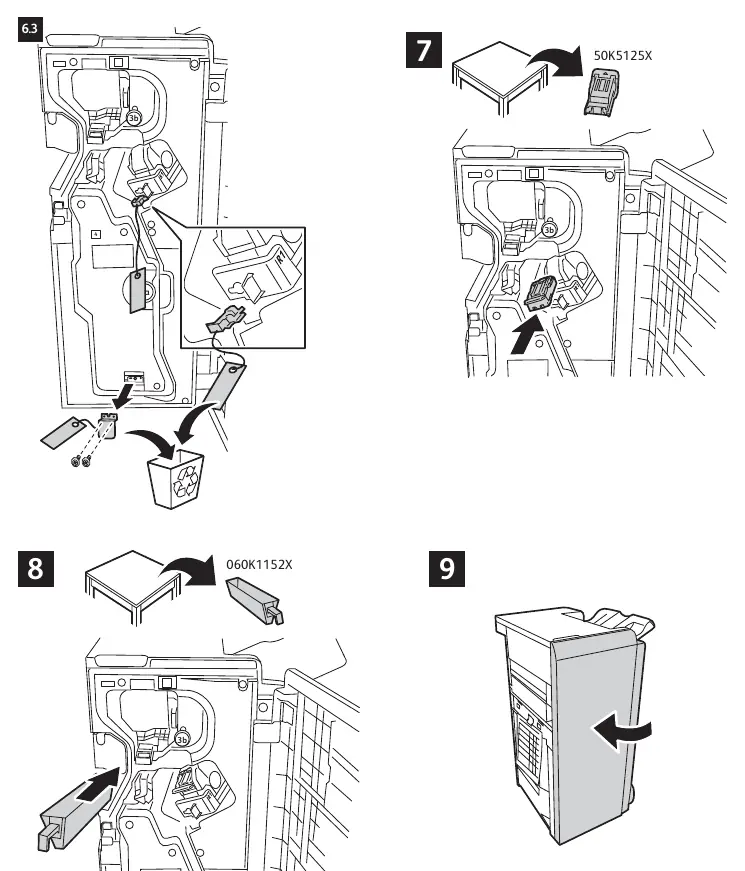
- Part 50K5125X: Install as indicated in step 7.
- Part 060K1152X: Install as indicated in step 8.
- Part 50K7016X: Install as indicated in step 10.
- Part 50K7176X: Install as indicated in step 11.
- Securing: Use the provided M4-10 screws to secure components where indicated in steps 11.2 and 11.3.
Final Setup
After installing all components, ensure all access doors are closed securely. Verify that the finisher is correctly aligned with the main printer unit. Refer to the printer's main installation guide for final connection steps.
Practical help
Common problems
Unit does not align with the printer
Ensure all internal shipping foam and tape have been completely removed from the finisher interior.
Finisher door does not close
Check for any remaining packing material or improperly seated components (50K7016X, 50K7176X) that may be obstructing the door.
Before use
- Remove all external packaging.
- Remove all internal shipping tapes and foam blocks.
- Verify all parts (50K5125X, 060K1152X, 50K7016X, 50K7176X) are present.
- Secure components using the provided M4-10 screws.
- Ensure the unit is on a level surface.
Images and diagrams
- Steps 1-5: Unpacking sequence from the pallet.
- Step 6: Removal of internal shipping materials.
- Steps 7-11: Installation of specific finisher components.
Model compatibility
- Compatible with Xerox 097S04981 (76B) and 097S04982 (77B) models.

Manual page author
Emily Carter
User documentation editor
Prepares concise manual descriptions and highlights the most useful setup, operation, and maintenance information for readers.