Garden / Playground Equipment
User Manual for Airzone 12-15FT Trampoline & Enclosure
Comprehensive assembly and safety guide for the Airzone 12-15FT Trampoline & Enclosure. Includes step-by-step installation instructions, maintenance tips, and safety guidelines for proper use.
Table of contents
Manual images
Click an image to enlargeImportant Information from the Manual
This document provides assembly, safety, and maintenance instructions for the Airzone 12-15FT Trampoline & Enclosure. Assembly requires 2-3 adults in good physical condition. The trampoline is intended for recreational use only and is not for professional use. The user weight limit for 12ft and larger trampolines is 200 lbs. The product is not recommended for children under 6 years of age.
Safety Warnings
- Clearance: A minimum of 24ft of overhead clearance from ground level is recommended. Maintain a clear space on all sides of the trampoline away from walls, structures, fences, and other play areas.
- Usage: Do not allow more than one person on the trampoline at the same time. Do not attempt somersaults. Use only with mature, knowledgeable supervision.
- Environment: Use in a well-lighted area. Do not use in gusty or severe winds. The bed should be dry before use.
- Clothing: Wear clothing free of drawstrings, hooks, or loops that could cause entanglement.
Assembly and Installation
The assembly process involves constructing the frame, attaching the jumping mat with springs, and installing the enclosure system.
Frame Assembly
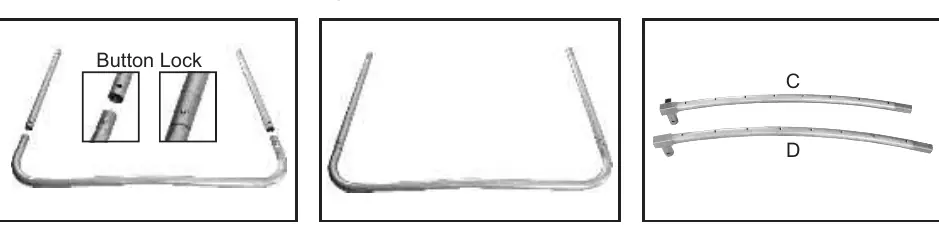
- Connect leg extensions to the W-shaped legs using the button locks.
- Assemble the top rail by connecting rail tubes C and D to form a large circle.
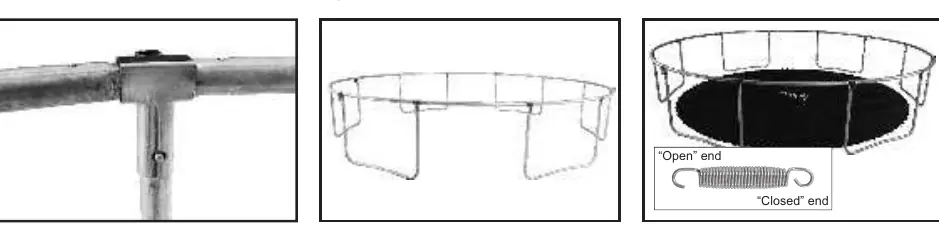
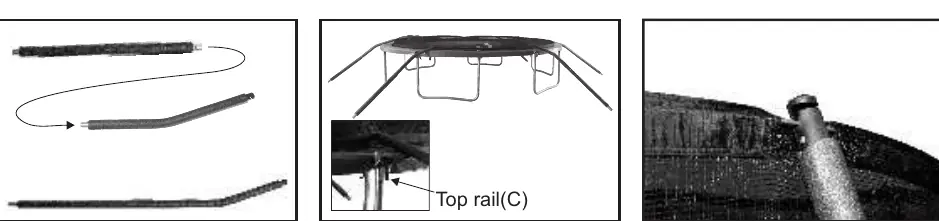
- Insert the leg assemblies into the T-connectors of the top rail.
Mat and Spring Installation
- Lay the jump mat inside the frame with the stitching facing downward.
- Attach springs to the D-rings on the mat and the top rail. Start by attaching springs directly across from each other to ensure even tension.
- Use the provided spring tool to safely hook the springs into the rail.
Enclosure Installation
- Spread the enclosure mesh net over the trampoline.
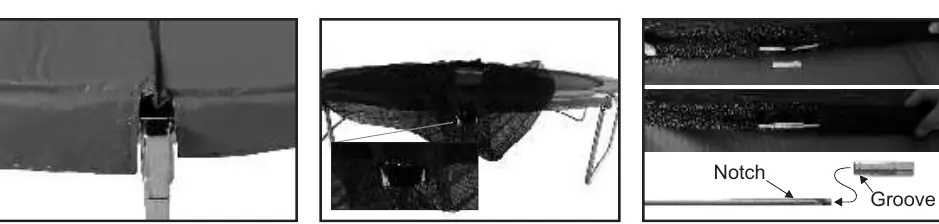
- Guide the steel rods through the tunnel stitched into the top of the net and connect them using the connection nuts.
- Connect the enclosure poles (upper and lower) and insert them into the T-connectors on the top rail.
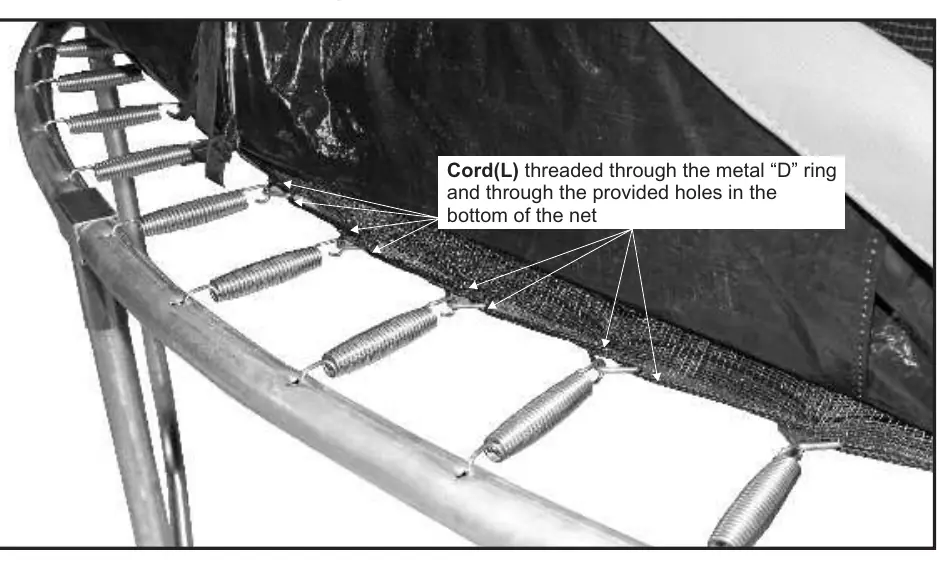
- Fasten the enclosure to the jump mat by threading the cord through the D-rings and the holes at the bottom of the net.
Care and Maintenance
Inspect the trampoline before each use. Replace any worn, defective, or missing parts. Potential hazards include:
- Missing or improperly attached frame padding.
- Punctures, tears, or holes in the bed or padding.
- Deterioration in stitching or fabric.
- Ruptured springs or bent/broken frame components.
- Sharp protrusions on the frame.
During extreme weather conditions (rain, snow, wind), it is recommended to disassemble and store the trampoline.
Warranty
The tubular steel frame is warranted for 3 years, and all other parts for 1 year from the date of purchase. Warranty claims require the original sales receipt and the serial number found on page 2 of the manual or on the frame. Contact Airzone customer service at 1-800-775-6524 or via email at [email protected] for service or parts replacement.
Practical help
Common problems
Missing parts or warranty claims
Contact customer service at 1-800-775-6524 with your original sales receipt and the serial number found on page 2 of the manual.
Extreme weather damage
Disassemble and store the trampoline during prolonged periods of rain, snow, or wind to prevent increased wear.
Safety hazard during use
Do not use the trampoline if frame padding is missing, improperly positioned, or if there are tears in the bed or frame padding.
Before use
- Inspect frame padding for proper positioning.
- Check for punctures, tears, or holes in the bed.
- Ensure all springs are intact and not ruptured.
- Verify the enclosure is securely attached to the frame.
- Clear the area of overhead hazards like wires or tree limbs.
- Ensure the trampoline is placed on a level surface.
Specs in practice
- Weight Limit
- 200 lbs for 12ft and larger trampolines.
- Age Recommendation
- Not recommended for children under 6 years of age.
- Overhead Clearance
- Minimum 24ft from ground level is recommended.
Images and diagrams
- Steps 1-6: Frame and leg assembly.
- Steps 9-15: Spring attachment and mat installation.
- Steps 16-26: Enclosure net, rod, and pole installation.
Model compatibility
- The enclosure must be used only with the trampoline size it was designed for.
- Use only manufacturer-approved accessories.

Manual page author
Emily Carter
User documentation editor
Prepares concise manual descriptions and highlights the most useful setup, operation, and maintenance information for readers.