Garden / Playground Equipment
Installation Manual for Vinci Play 0206S1 Playground Equipment
Complete installation and assembly guide for the Vinci Play 0206S1 playground equipment. Includes foundation requirements, safety zones, parts list, and step-by-step assembly instructions.
Table of contents
Manual images
Click an image to enlargeImportant Information
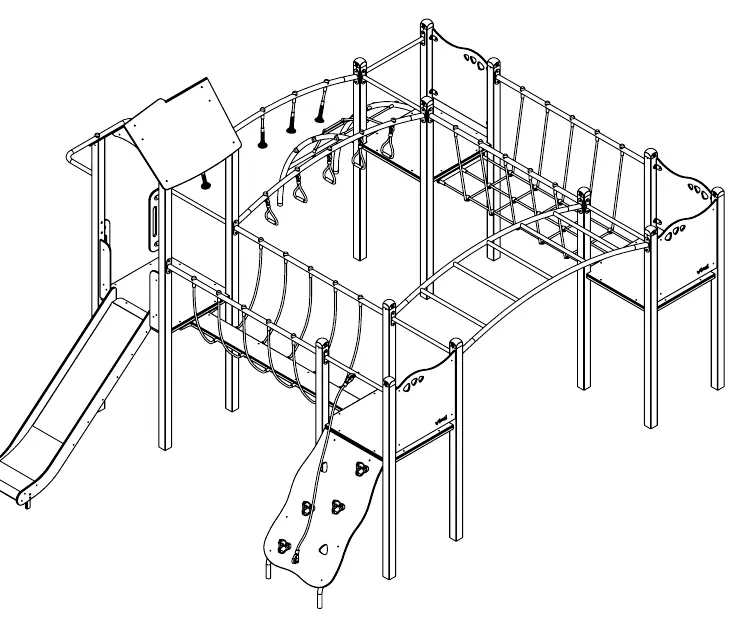
This document provides the installation and assembly instructions for the Vinci Play 0206S1 playground equipment. The assembly requires 2 people and approximately 10 hours of work. Ensure the installation site is prepared according to the safety zone requirements provided in the manual.
Safety and Preparation
Before beginning assembly, ensure you have all necessary tools, including a hammer, shovel, drill, and measuring tape. Follow these safety guidelines:
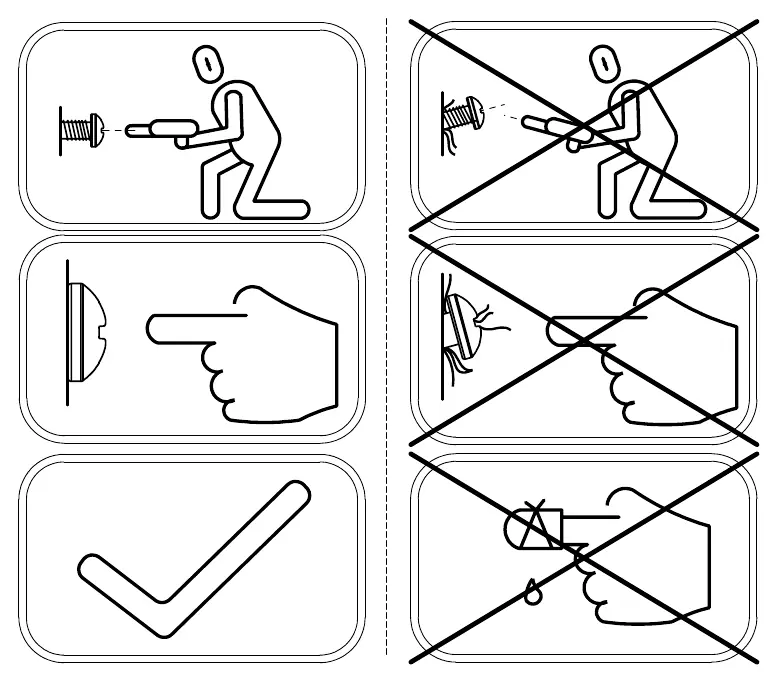
- Do not overtighten bolts during assembly to avoid damaging components.
- Ensure the playground is installed on a level surface.
- Verify the safety zone dimensions (as shown on page 4) are clear of any obstacles.
- Use only the specified hardware provided in the kit.
Foundation Requirements
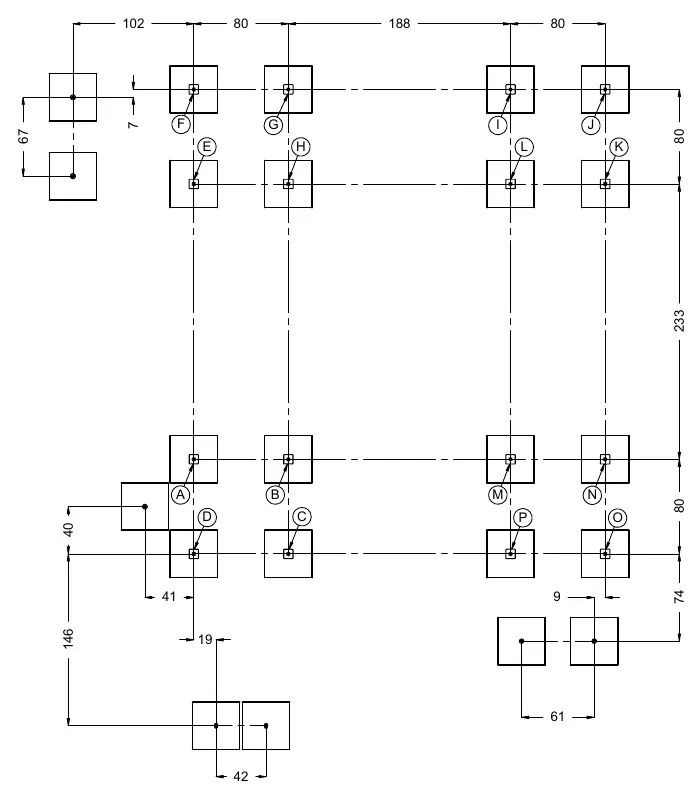
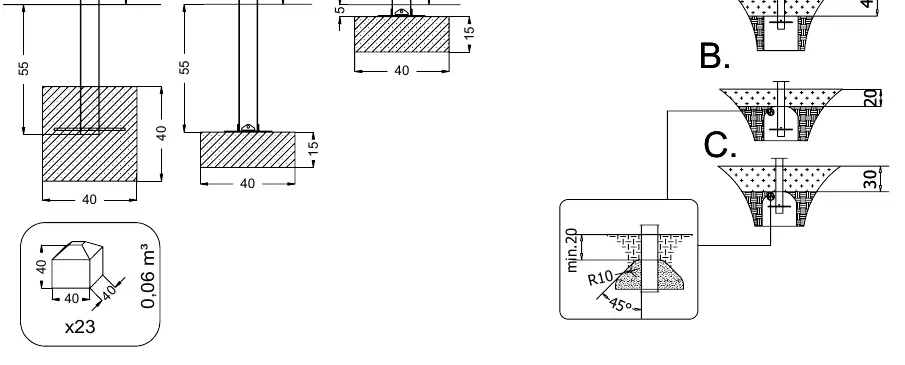
The equipment requires specific foundation types (K1, K2, or K3) depending on the site conditions. Refer to the foundation layout on page 5 for the exact placement of footings. Detailed concrete requirements for each foundation type are provided on page 6, including depth and volume specifications.
Assembly Instructions
The assembly process is divided into logical steps:
- Foundation Layout: Mark the ground according to the layout diagram on page 5.
- Structural Assembly: Begin by assembling the main frame components as shown in pages 9-10.
- Component Installation: Attach the climbing elements, slides, and platforms following the specific diagrams for each section (pages 11-16).
- Finalization: Secure all connections and apply the identification label (V001) as shown on page 17.
Parts List and Components
A comprehensive list of all parts, including metal components (ST/INOX), plywood/HDPE, and HPL panels, is provided on page 7. Verify all parts against this list before starting the assembly to ensure the kit is complete.
Practical help
Common problems
Foundation mismatch
Ensure the correct foundation type (K1, K2, or K3) is selected based on your specific site conditions and soil type.
Bolt overtightening
Do not overtighten bolts; use appropriate tools to avoid damaging the structural components or threads.
Before use
- Verify all parts against the parts list on page 7.
- Ensure you have the required tools: hammer, shovel, drill, and measuring tape.
- Measure the site to ensure the safety zone (page 4) is clear of obstacles.
- Prepare concrete footings according to the K1/K2/K3 specifications on page 6.
- Check that the assembly team consists of at least 2 people.
Images and diagrams
- Page 5: Foundation layout showing the exact placement of footings.
- Pages 9-16: Step-by-step sequence for connecting structural elements.
- Page 8: Visual guide on correct and incorrect bolt tightening techniques.
Model compatibility
- The equipment is compatible with Plywood, HDPE, or HPL materials depending on the specific kit version.
- Ensure the foundation type matches the soil and site requirements.

Manual page author
Michael Turner
Technical manual editor
Reviews PDF manuals for structure, safety notes, and practical product details so readers can find the right information quickly.