Home / Security
User Manual for Ajax Systems KeyPad
Quick guide for the Ajax Systems KeyPad. Learn how to install, configure codes, manage security modes, and troubleshoot your wireless touch-sensitive keypad.
Quick answers from the manual
Quick answer
- The Ajax KeyPad is a wireless touch-sensitive keyboard for managing Ajax security systems. It allows arming/disarming, Night Mode activation, and silent alarm triggering via codes. p. 1, 3
Key actions
- Arming/Disarming p. 21, 22
- Connecting to Hub p. 10, 11
First start
- Install Ajax app, add hub, ensure hub is not armed, select 'Add Device' in app, scan QR code, and power on KeyPad. p. 10, 11
Show 4 more answers Show less
Problems and fixes
Malfunction indicator blinks
Check the Ajax app for the specific reason (e.g., connection loss, lid open).
p. 8, 9Maintenance and reset
- Battery replacement is required when the system sends a low battery notification. p. 27
Technical specifications
| Parameter | Value | Meaning | Pages |
|---|---|---|---|
| Battery life | Up to 2 years | Autonomous operation with 3-minute inquiry frequency. | p. 27 |
| Communication range | Up to 1,700 m | Maximum distance in line of sight. | p. 1 |
Where to find it in the PDF
- Functional elements p. 2
- Installation p. 12, 26
Table of contents
Manual images
Click an image to enlargeQuick guide from the manual
The Ajax KeyPad is a wireless indoor touch-sensitive keyboard designed to manage the Ajax security system. It allows users to arm and disarm the system, activate Night Mode, and trigger a silent alarm under duress. The device communicates with the hub via the secure Jeweller radio protocol at a distance of up to 1,700 m in line of sight.
Functional elements
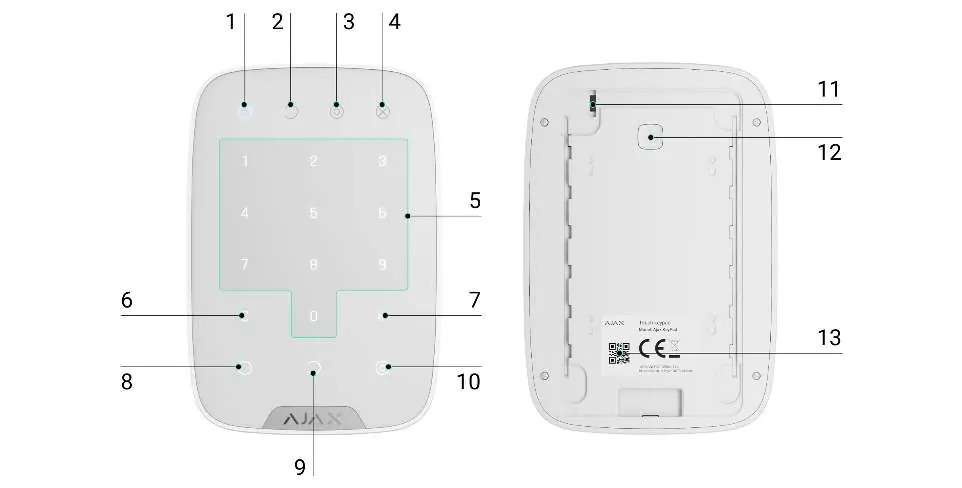
- 1-4: Armed, Disarmed, Night Mode, and Malfunction indicators.
- 5: Numerical buttons block.
- 6-10: Clear, Function, Arm, Disarm, and Night Mode buttons.
- 11-12: Tamper and On/Off buttons.
- 13: QR code for device identification.
Connecting to the hub
- Switch on the hub and ensure it has an Internet connection.
- Install the Ajax app, create an account, and add the hub.
- Ensure the hub is not armed and not updating.
- Select Add Device in the app, name the device, scan the QR code, and select a room.
- Select Add and hold the KeyPad power button for 3 seconds to switch it on.
Installation
The KeyPad is designed for indoor use and must be attached to a vertical surface.

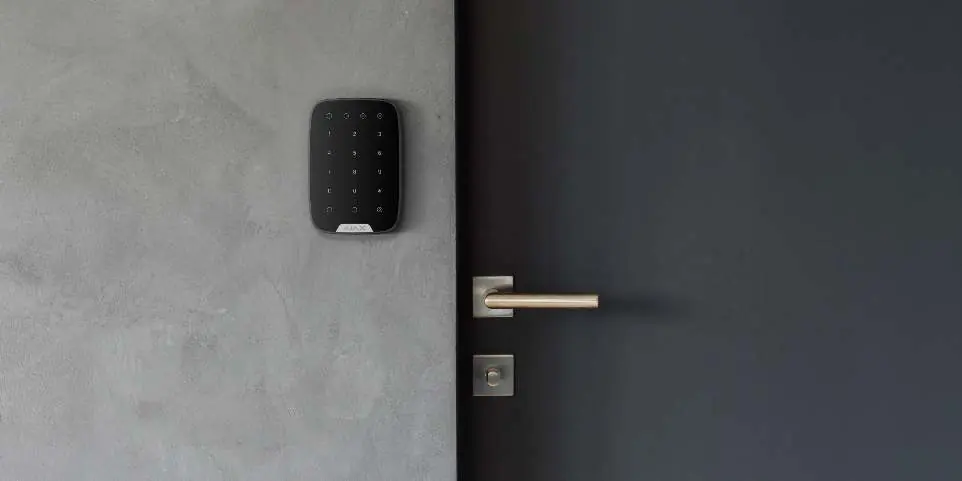
- Attach the SmartBracket panel using bundled screws.
- Ensure at least two fixing points are used, including one above the tamper.
- Put the KeyPad on the panel and tighten the mounting screw on the underside.
Do not install the KeyPad:
- Near radio transmission equipment (routers, mobile networks, other hubs).
- Close to electrical wiring, metal objects, or mirrors.
- Outside the premises.
- Closer than 1 m to the hub.
Operating principle and codes
The KeyPad supports 4 to 6 digit codes. Before entering a code, touch the keypad to wake it up.
- Keypad Code: General code for the keypad.
- User Code: Personal code for registered users.
- Keypad Access Code: For unregistered persons.
- RRU Code: Access code for rapid response units, valid for a specified period.
- Duress Code: Simulates disarming while sending a silent alarm to the security company.
Maintenance and troubleshooting
The device is battery-powered with an estimated life of up to 2 years. If the battery is low, the system will send notifications. If the malfunction indicator blinks, check the Ajax app for the specific error (e.g., connection loss, lid open). If the keypad is locked due to incorrect code attempts, it will unlock automatically after the time specified in settings or can be unlocked via the app.
Practical help
Common problems
Keypad locked
Wait for the lock time defined in settings to expire or unlock via the Ajax app.
Low battery
The system will send a notification; replace the batteries.
Connection loss
Check signal strength in the app, move the device closer to the hub, or use a radio signal range extender.
Incorrect passcode
The keypad will emit a long sound signal and the backlight will blink 3 times.
Before use
- Ensure the hub is online and not armed.
- Install the Ajax app and create an account.
- Check the Jeweller signal strength at the intended installation location.
- Ensure the device is installed on a vertical surface.
- Set up necessary codes (general, user, or access) in the app.
Show more Show less
Specs in practice
- Jeweller protocol
- Secure two-way radio protocol for fast communication between hub and devices.
- Tamper button
- Triggers an alarm if the device is removed from the surface or damaged.
Images and diagrams
- The functional elements diagram identifies all buttons and LED indicators on the front and back of the device.
- The installation section highlights the importance of the tamper button and proper mounting on a vertical surface.
Model compatibility
- Works only with Ajax hubs.
- Not compatible with ocBridge Plus or uartBridge integration modules.
- Indoor use only.

Manual page author
Emily Carter
User documentation editor