Garden / Gazebos & Canopies
User Manual for American Tent 40x120 Ft Frame Tent
Comprehensive setup and safety guide for the American Tent 40x120 Ft Frame Tent. Includes detailed assembly instructions, anchoring procedures, and maintenance tips.
Table of contents
Manual images
Click an image to enlargeQuick Guide from the Manual
This guide provides instructions for the assembly and safety of the American Tent 40x120 Ft Frame Tent. The tent is a temporary structure and is not designed to withstand snow loads or extreme weather conditions. Always evacuate the tent during high winds or lightning. Before beginning, contact your local utility 811 service to mark underground lines.
Required Equipment
- Sledge Hammer
- Drop Cloth
- 10-12 People for assembly
Site Selection and Safety
Choose a site that is level, elevated, and clear of debris. Check for overhead electrical lines and tree branches. Ensure the site allows for easy access for services and delivery. Monitor weather conditions closely; if winds exceed 25 mph for more than 6 seconds, consider disassembling the tent.
Frame Assembly
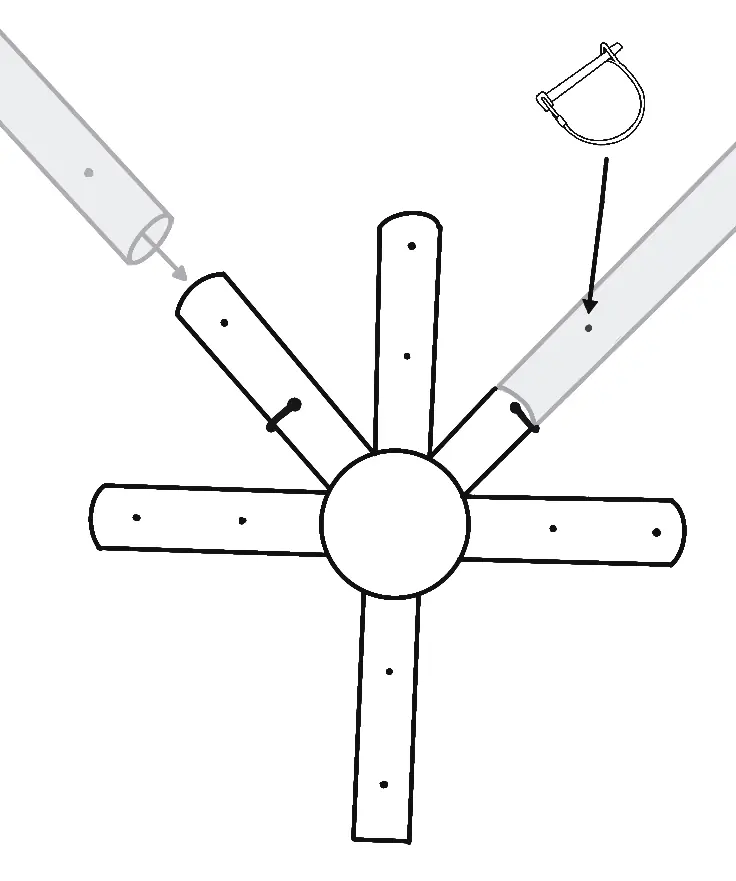
Begin by placing all frame parts on the ground in their approximate locations. Use the provided diagrams to identify fittings and poles. When connecting the 6-way crown to poles, use the alignment hole first to prevent the rafter from moving too far, then insert the pin into the placement hole. Ensure all R-Pins are installed with the tail pointing away from the tent top to prevent vinyl damage.
Tent Top Installation
Unroll the tent top on a drop cloth to protect it from dirt. Lace the tent sections together, ensuring the lace side overlaps the grommet side. Pull the tent top over the frame, creating an air cushion. Center the top by hiding seams behind hip rafters and loosely fasten alligator straps at the corners and along the perimeter.
Anchoring Procedures
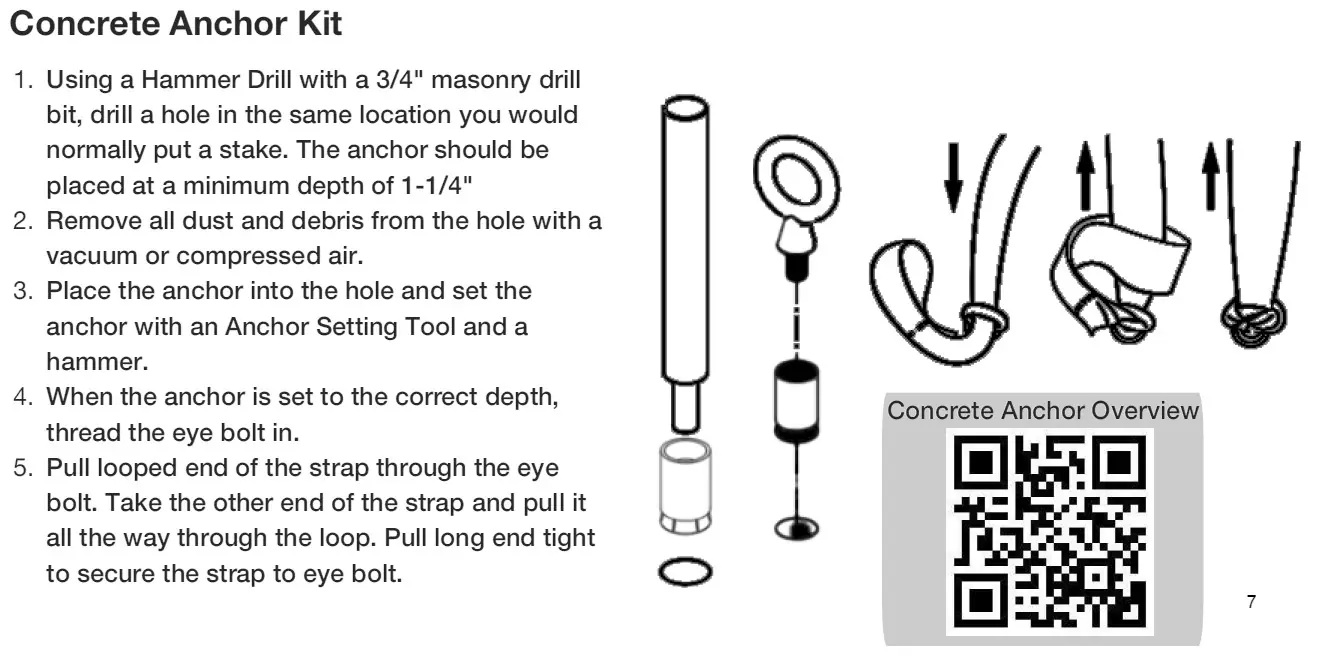
Stakes should be driven into the ground 5 feet out from each leg. For concrete surfaces, use the Concrete Anchor Kit: drill a hole with a 3/4" masonry bit, clean the hole, set the anchor with the setting tool, and secure the strap. Always lift the downwind side of the frame first when raising the tent to prevent wind from catching the structure.
Additional Assembly
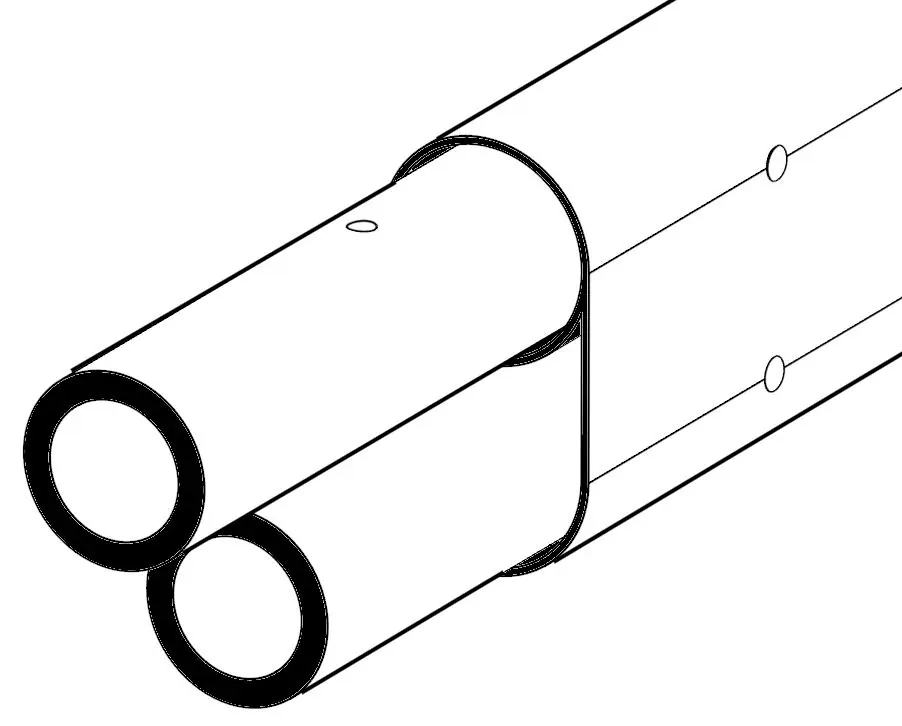
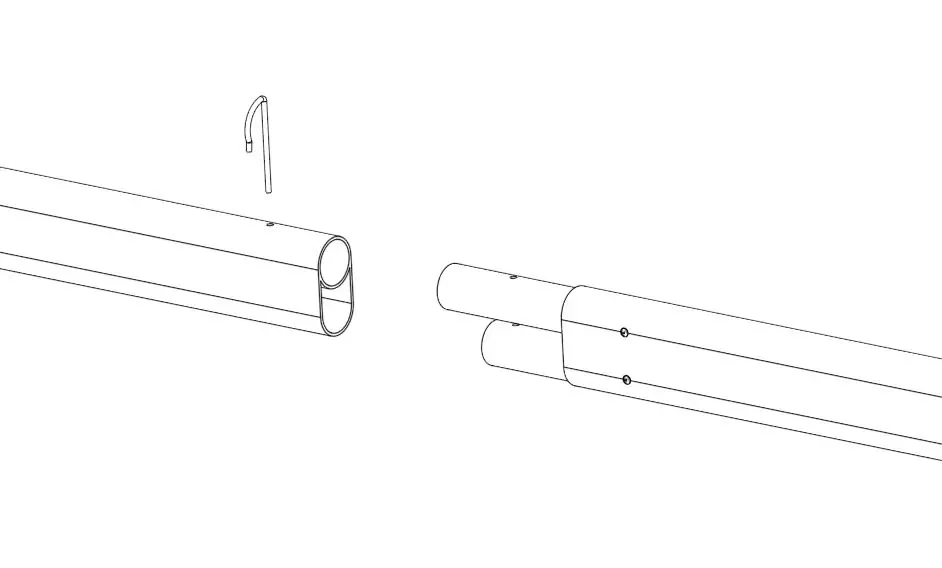
The manual includes instructions for installing sidewalls, rain gutters, leg bracing packages, and PinGuards. For double tube assembly, ensure the rivet side is slid into the R-Pin side and secured with an R-Pin.


Takedown and Storage
To disassemble, loosen ratchet straps, remove leg poles, and unlace the tent top. Remove the tent top from the frame while it is on a drop cloth. Disassemble fittings from the perimeter inward. Ensure all components are clean and dry before storage to prevent mold and mildew. Fan folding is recommended for sidewall storage.
Manufacturer information
American Tent
Practical help
Common problems
Tent fabric ponding
Ensure the tent is installed and tensioned correctly.
Wind damage
Disassemble or remove the tent top if wind speeds reach 25 mph for more than 6 seconds.
Difficulty inserting pins
Use the alignment hole on the crown first to position the rafter, then insert the pin into the placement hole.
Before use
- Check for overhead electrical lines and tree branches.
- Contact local utility 811 service to mark underground lines.
- Ensure site is level and clear of debris.
- Verify all parts are accounted for using diagrams.
- Ensure 10-12 people are available for assembly.
Images and diagrams
- Frame assembly diagrams show the layout of fittings and poles.
- Staking diagrams illustrate the correct angle and distance from the leg.
Model compatibility
- Not designed for snow loading.
- Temporary structure; not intended to meet building codes.

Manual page author
Michael Turner
Technical manual editor
Reviews PDF manuals for structure, safety notes, and practical product details so readers can find the right information quickly.