Garden / Gazebos & Canopies
Assembly Instructions for Canopia Olympia 10x10 Patio Cover
Quick guide for assembling the Canopia Olympia 10x10 Patio Cover. Includes site preparation, tools required, safety advice, and step-by-step assembly instructions.
Table of contents
Manual images
Click an image to enlargeQuick guide from the manual
This document provides assembly instructions for the Canopia Olympia 10x10 Patio Cover. It is a multi-part assembly that is best achieved by two people. Please ensure you have all components and parts before starting. The product must be anchored directly to a solid foundation for stability and warranty validity.
Tools and equipment
- 2 people needed
- Work gloves
- Electric drill with 10 mm (3/8") drill bit
- Spirit level
- Tape measure
- Ladder
- Silicone sealant
- Pencil
- Philips head screwdriver
- Wrench (10 mm / 3/8" and 13 mm / 1/2")
Site preparation and foundation
Choose a sunny position away from overhanging trees. The product must be positioned and fixed on a flat, level surface. Ensure the surface is solid (concrete, tiled floor, or wooden surface) before beginning assembly.
Safety advice
- Always wear work gloves, shoes, and safety goggles when working with extruded aluminium.
- Do not attempt to assemble the product in windy or wet conditions.
- Do not climb or stand on the roof.
- Keep children away from the assembly area.
- The snow must be removed from the structure's roof if the accumulated snow height exceeds 40 cm (1'4").
- Do not touch overhead power cables with the aluminium profiles.
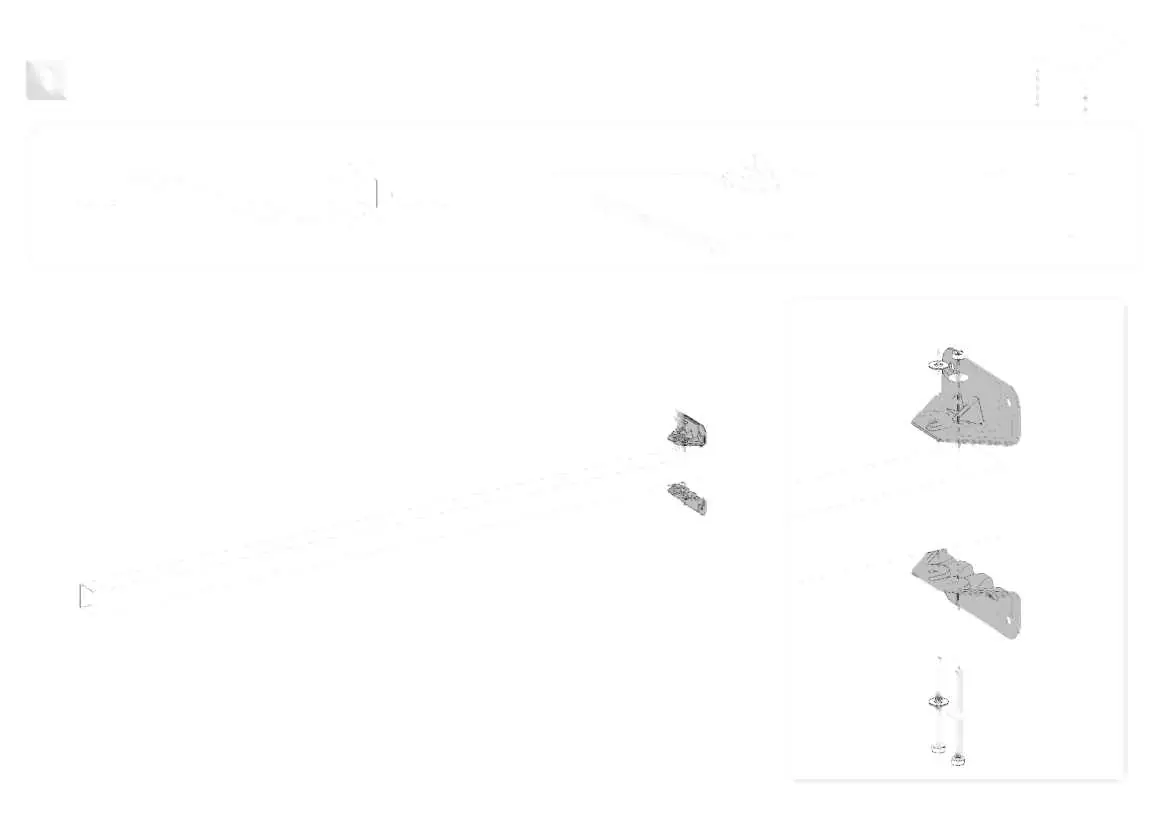
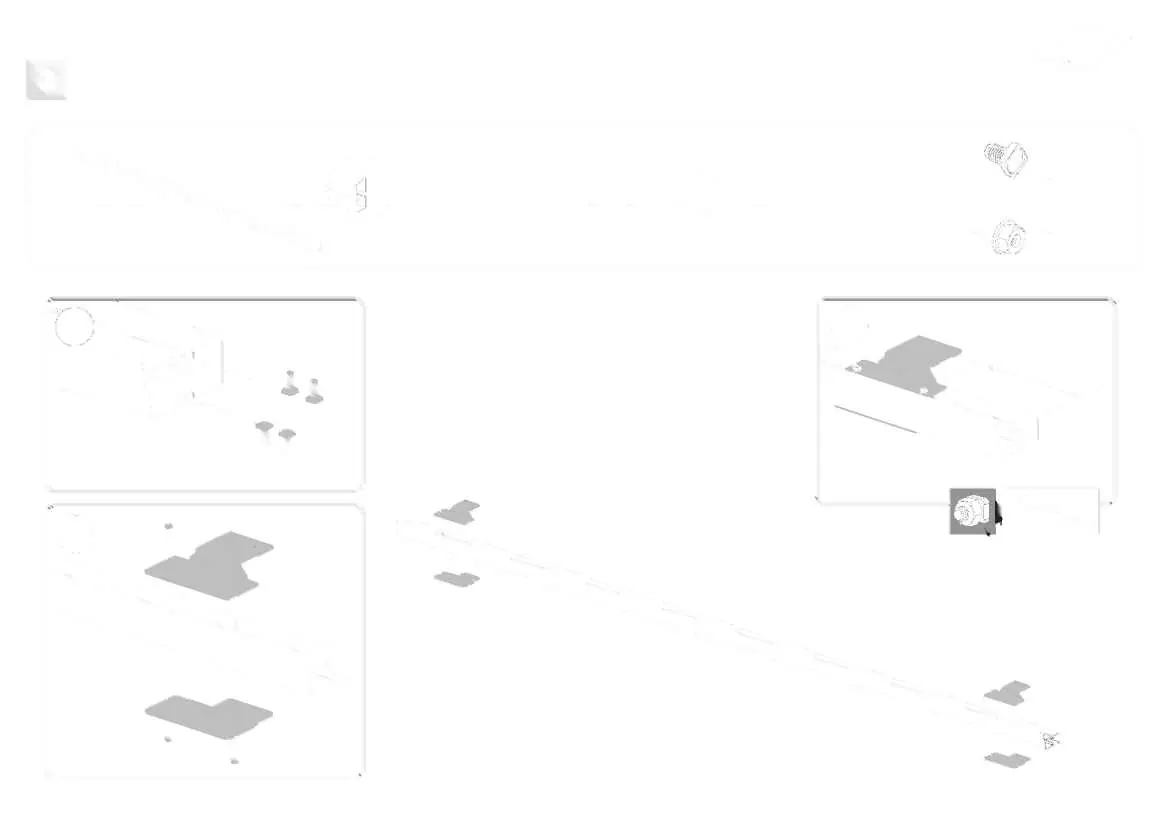
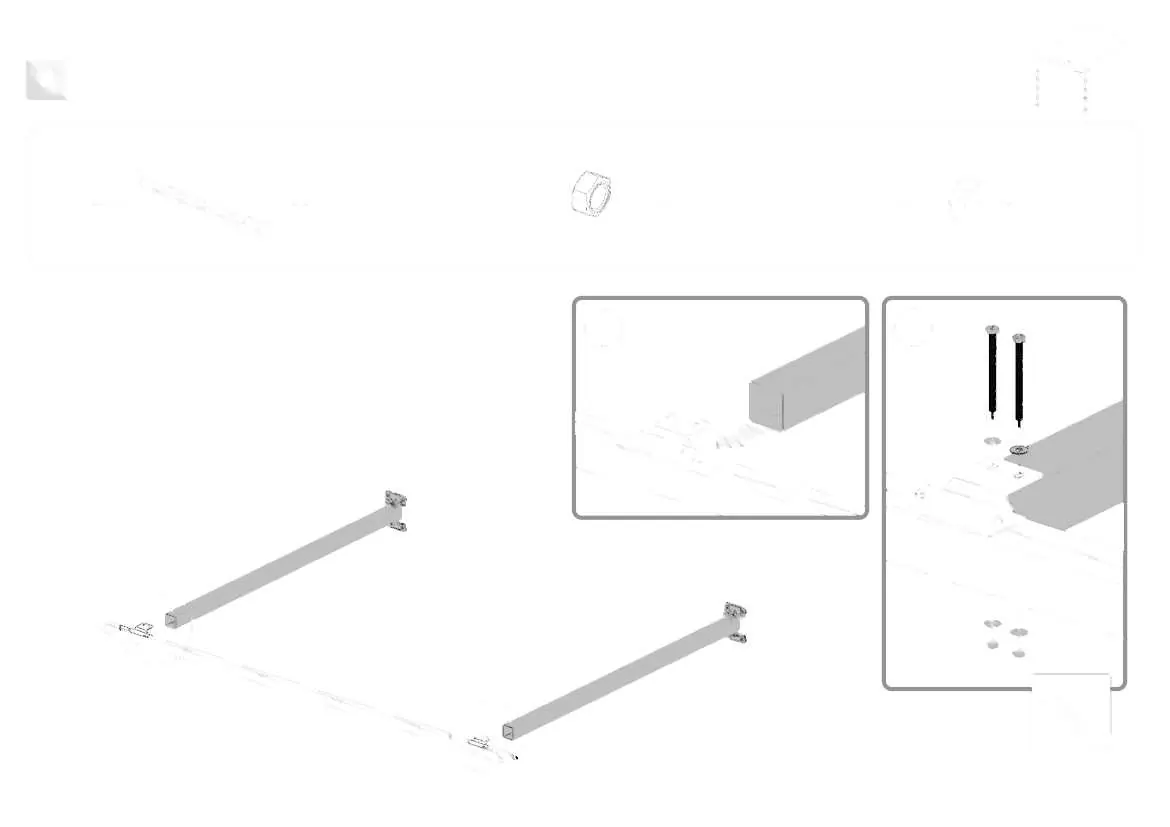
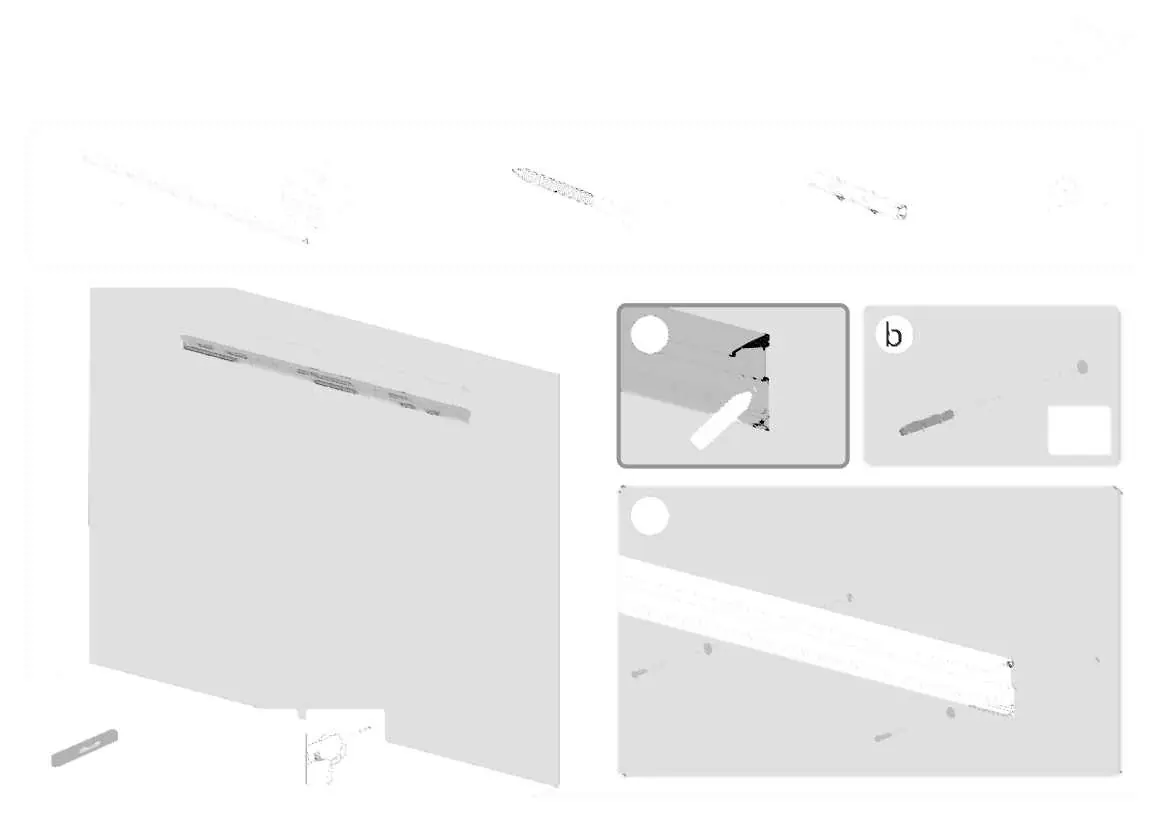
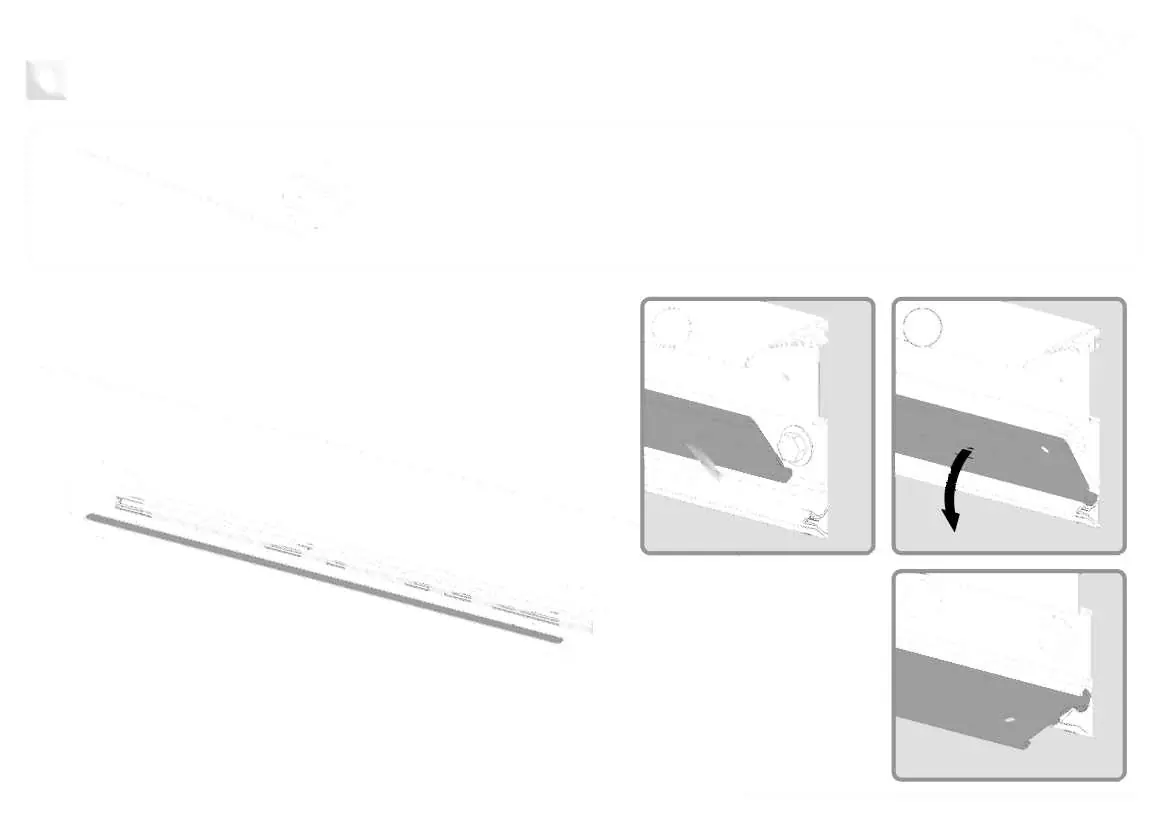
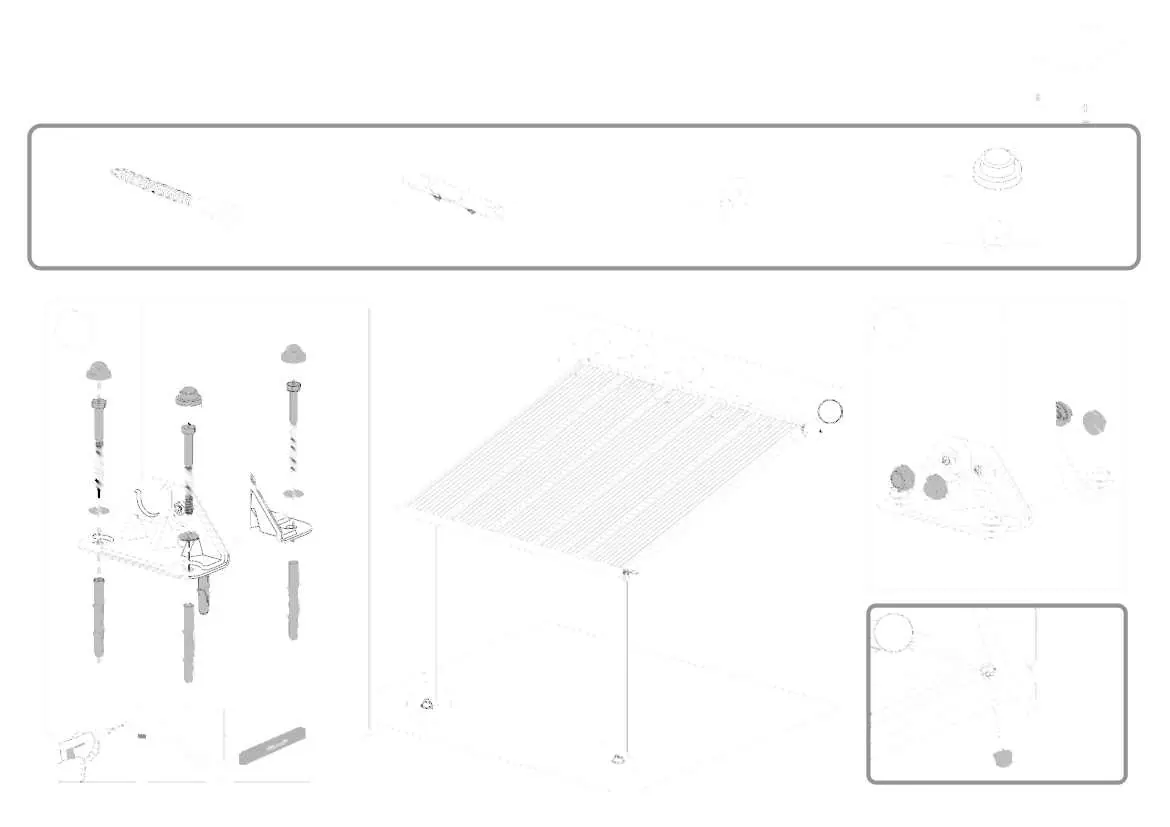
Assembly instructions
Follow the assembly steps in the exact order provided. Note that multi-sided profiles are used, so some holes may not be used. Use silicone sealant as indicated in specific steps (e.g., above beam #7288) to prevent water seepage. Ensure the UV-protected side of the panels (marked "THIS SIDE OUT") is facing outwards. Adjust poles and wall mounting profiles according to your specific site dimensions before final anchoring.
Care and maintenance
When your product needs to be cleaned, use a soft cloth and rinse with cold clean water. Do not use acetone, abrasive cleaners, or other special detergents to clean the panels. Clean the product once assembly is complete.
Manufacturer information
Palram Canopia
Practical help
Common problems
Water leakage
Apply silicone sealant above beam #7288 during assembly.
Difficulty sliding panels
Use silicone lubricant spray on the frame to help panels slide into profiles.
Snow accumulation
Remove snow from the roof if the accumulated height exceeds 40 cm (1'4").
Before use
- Ensure you have 2 people for assembly.
- Prepare a solid, level surface (concrete, tile, or wood).
- Check for hidden pipes or cables in the ground.
- Wear work gloves, safety goggles, and sturdy shoes.
- Sort all components and check against the parts list.
- Review the entire instruction manual before starting.
Specs in practice
- Wall mounting height
- Adjustable from 260 to 305 cm above ground.
- Pole distance from wall
- Adjustable from 226 to 286 cm.
- Pole side positioning
- Adjustable from 5 to 54 cm from side edges.
Images and diagrams
- Diagrams illustrate the assembly sequence, including wall bracket installation, frame assembly, panel insertion, and final anchoring.
Model compatibility
- Designed mainly as a patio cover.
- Requires a solid foundation for stability and warranty validity.

Manual page author
Michael Turner
Technical manual editor
Reviews PDF manuals for structure, safety notes, and practical product details so readers can find the right information quickly.