Garden / Gazebos & Canopies
Assembly Guide for Canopia Palermo 10x10 / 3x3 Gazebo
A comprehensive assembly guide for the Canopia Palermo 10x10 / 3x3 Gazebo. This manual provides essential information on site preparation, foundation types, safety precautions, maintenance, and detailed step-by-step assembly instructions.
Table of contents
Manual images
Click an image to enlargeQuick guide from the manual
This gazebo requires assembly by at least two people. Before starting, ensure you have a solid, leveled surface and all necessary tools. Always wear safety gear, including gloves and goggles. Do not attempt assembly in windy or wet conditions. If you encounter the information icon during assembly, refer to the specific step for additional comments.
Site preparation and foundation
The product must be built on a solid and leveled surface. Choose a sunny position away from overhanging trees.
- Concrete slab / Wooden deck: Screws and masonry anchors supplied are suitable for concrete fixing only. Consult an expert for wooden deck fasteners.
- Paving stones: Dig holes in the ground and fill with concrete.
- Solid ground / Asphalt: Dig holes in the ground and fill with concrete.
Safety advice
- Assemble all parts according to the instructions; do not skip any steps.
- Wear work gloves, shoes, and safety goggles when working with aluminum.
- Do not climb or stand on the roof.
- Keep children away from the assembly area.
- Do not lean against or push the product during construction.
- Do not position the product in an area exposed to excessive wind.
- Do not attempt to assemble the product if you are tired, have taken drugs, or are prone to dizzy spells.
- Ensure there are no hidden pipes or cables in the ground before inserting the pegs.
Tools and equipment
The following tools are required for assembly:
- Electric drill with drill bit (5mm / 3/16" and 10mm / 13/32")
- Spirit level
- Cordless drill with Phillips head
- Wrench (10mm / 13/32" and 13mm / 1/2")
- Ladder
- Gloves
Before assembly


- Select a site: The product must be positioned and fixed on a flat level surface.
- We strongly recommend this product be secured directly to a solid foundation.
- This is a multi-part assembly; it is best achieved by two people. Allow at least half a day for the assembly process.
- Take all components and parts out of the packages. Sort the parts and check against the parts list.
- Parts should be laid out close at hand. Keep all small parts (screws, etc.) in a bowl so they do not get lost.
- Review all instructions before starting. Carry out the assembly steps in the exact order.
- Consult local authorities if any permits are required prior to building the product.
During assembly
- You may use silicone lubricant spray on the frame to help you slide the panels into the profiles.
- Do not spray the Polycarbonate panels.
- Use a rubber mallet if necessary.
- Ensure you install the panels with the UV protected side out (marked with "THIS SIDE OUT") and remove the plastic stickers once the panels are in place.
- Do not tighten screws (8192 & 466) more than 2-3 turns until panel assembly is complete.
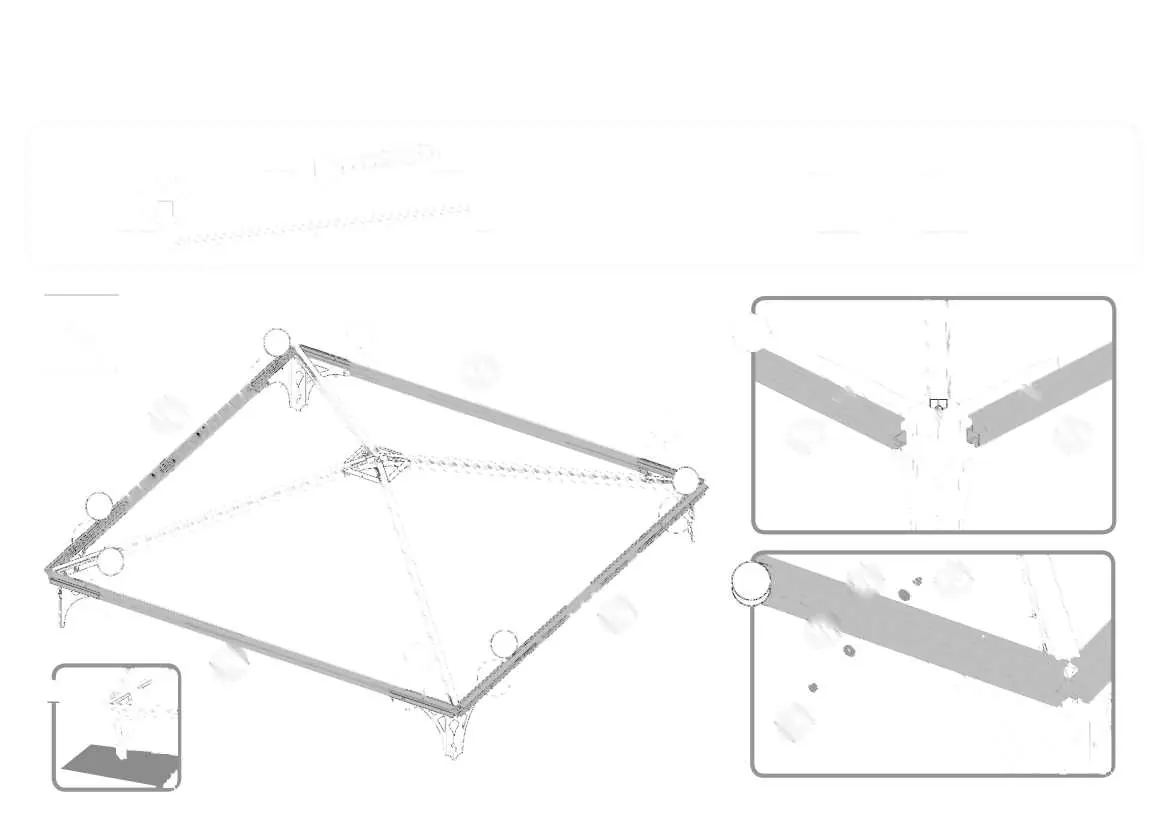
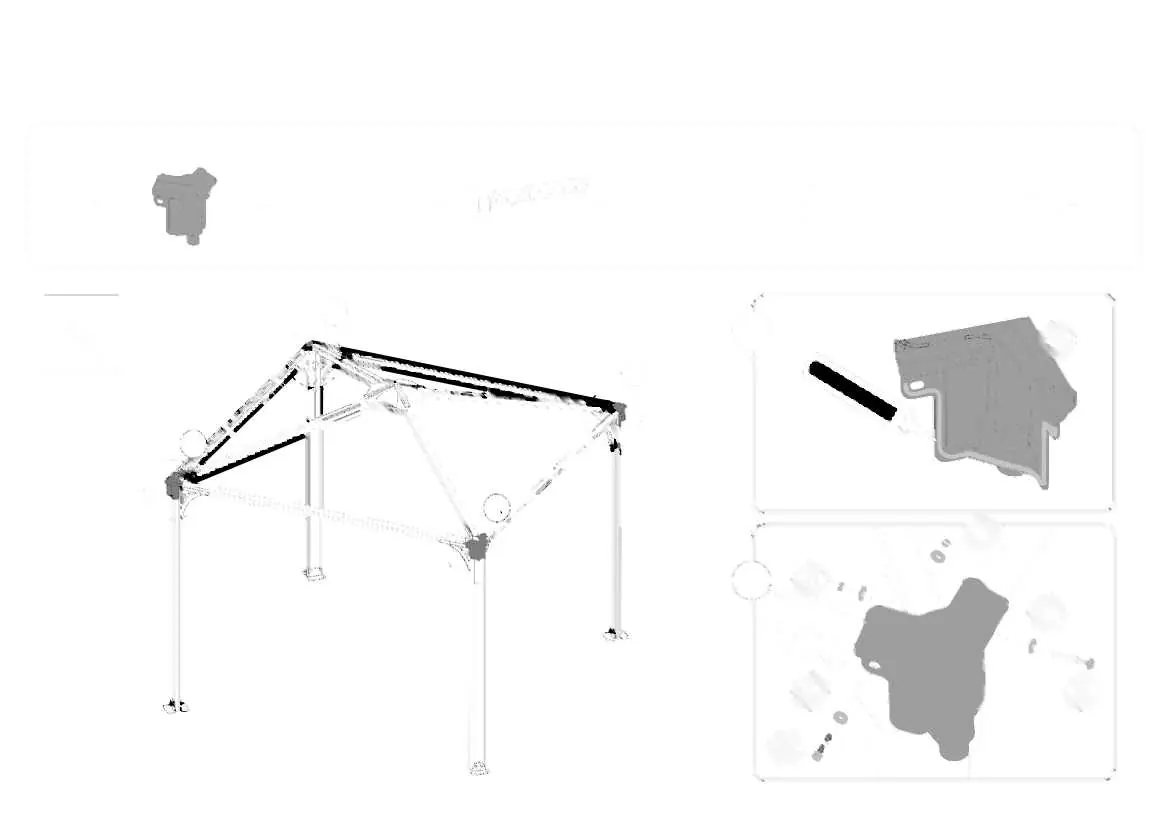
Important assembly steps
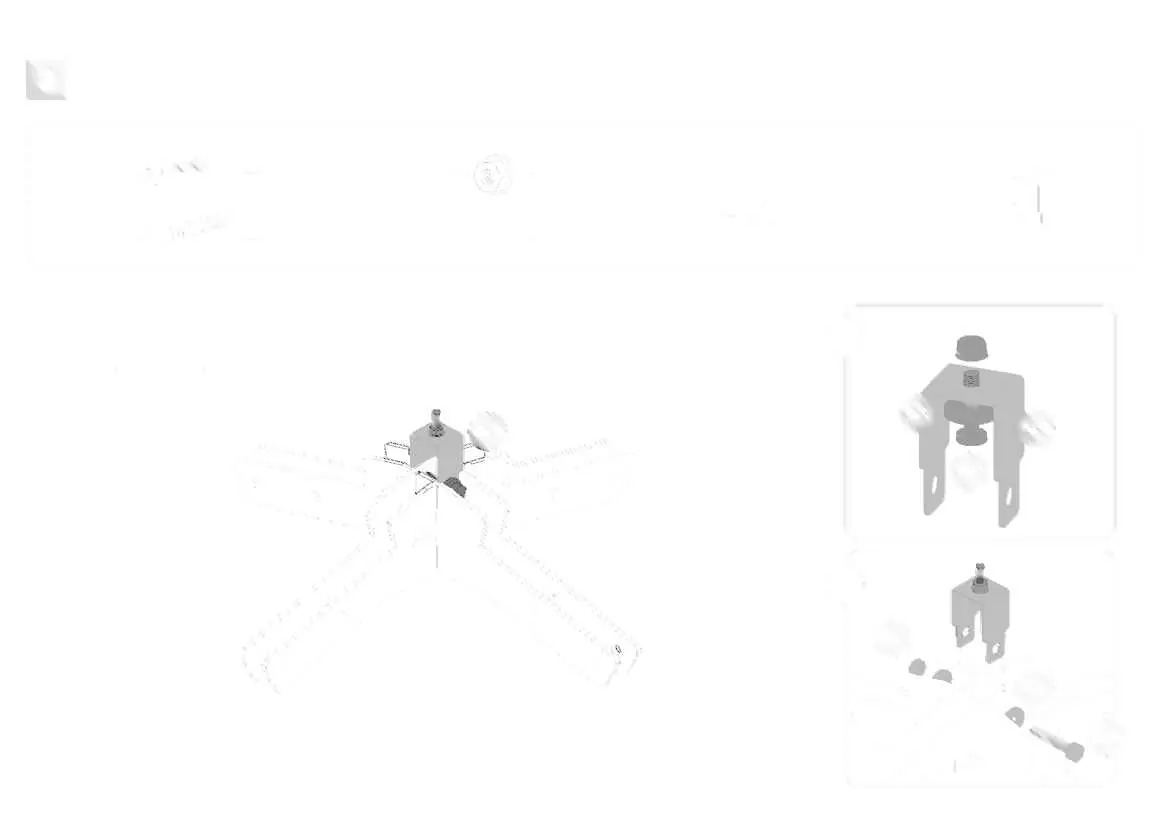
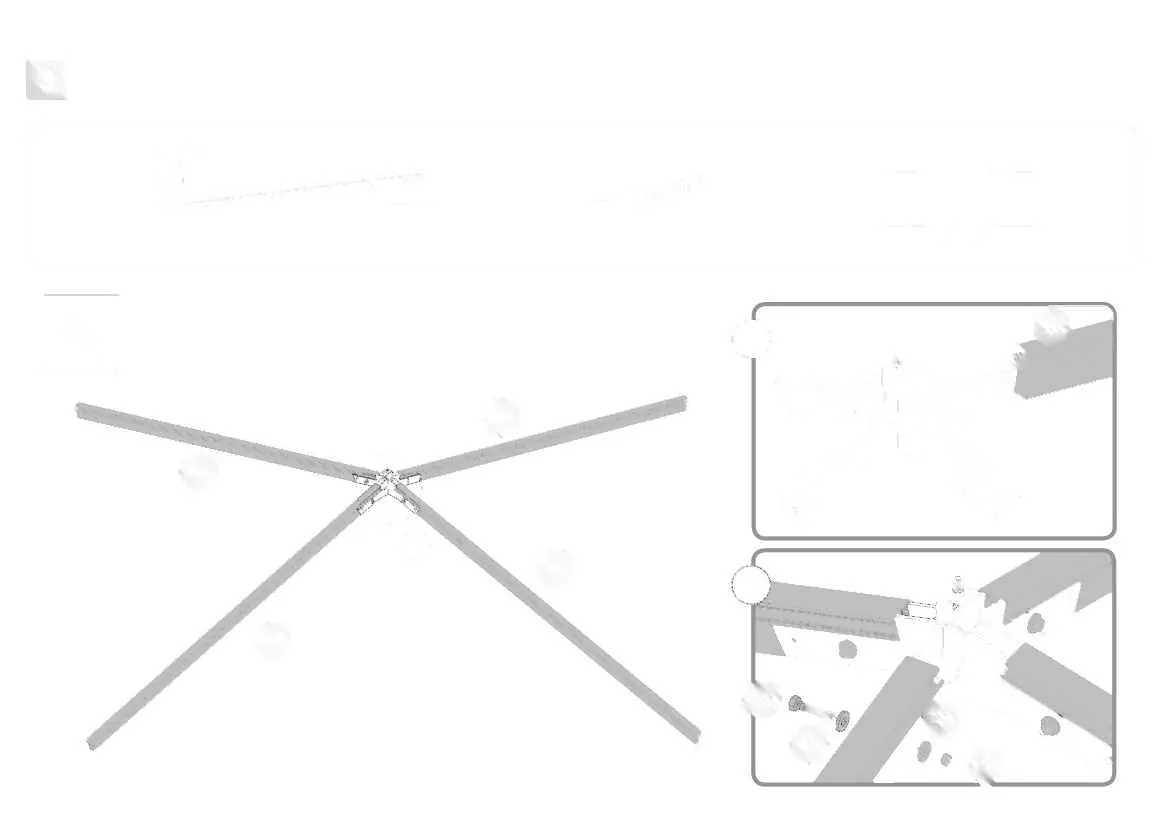
- Steps 3-12: It is recommended to use a carton or other soft material under the lowered corner in order to avoid scratches and peeling of paint.
- Step 10: Optional: If you wish to add Palram Canopia's Curtains or Netting Set, please thread the plastic clips through the rail in each profile.
- Steps 11a+13a: Please note that threading of the screws should be done from the outside.
- Steps 12+14: Please note that threading of the screws should be made from the bottom up.
- Step 15a: Please add silicone on the inner area of part #8327 as illustrated.
- Step 21a: Please drill holes in the panels to be located precisely parallel to the holes in profiles #9249.
- Step 22: Please level the profile's legs and adapt screws and plugs to your specific ground type.
Care and maintenance
When your product needs to be cleaned, use a mild detergent solution and rinse with cold clean water. DO NOT use acetone, abrasive cleaners, or other special detergents to clean the panels. Clean the product once assembly is complete.
Manufacturer information
Palram Canopia
Practical help
Common problems
Missing or damaged parts
Do not return the product to the store. Use the parts request form on the manufacturer's website.
Assembly difficulty
If you need technical assistance, use the assembly assistance form on the manufacturer's website.
Scratches or paint peeling
Use a carton or other soft material under the lowered corner during assembly.
Before use
- Ensure the site is solid and leveled.
- Check for underground pipes or cables.
- Ensure you have a helper (2 people required).
- Sort all parts and check against the parts list.
- Have all required tools ready (drill, wrench, ladder, etc.).
Specs in practice
- UV protected side
- Panels must be installed with this side facing out (marked 'THIS SIDE OUT').
Images and diagrams
- Foundation types: Concrete slab, paving stones, or solid ground/asphalt.
- Screw tightening: Do not tighten screws (8192 & 466) more than 2-3 turns until panel assembly is complete.
Model compatibility
- Optional: Palram Canopia Curtains or Netting Set can be added (not supplied).

Manual page author
David Miller
Documentation analyst
Organizes user manual content into clear summaries, with attention to model details, product context, and everyday usability.