Electronics / Media Players
Battery Replacement Guide for Apple iPod Nano 1st Generation
Step-by-step instructions for replacing the battery in your Apple iPod Nano 1st Generation. Includes tools required, disassembly, soldering procedures, and reassembly tips.
Quick answers from the manual
Quick answer
- This guide provides instructions for replacing the battery in an Apple iPod Nano 1st Generation. The process involves opening the device, disconnecting ribbon cables, desoldering the old battery, and soldering a new one. p. 1, 20
Key actions
- Open the rear panel by releasing 11 clips p. 4, 7
- Solder the new battery leads to the logic board p. 17, 19
Problems and fixes
Difficulty opening the case
Insert the opening tool into the seam and work the tool back and forth to release the clips.
p. 5, 6Show 1 more answers Show less
Where to find it in the PDF
- Introduction and Tools p. 2
- Opening the Case p. 3, 7
- Battery Replacement p. 8, 20
Table of contents
Manual images
Click an image to enlargeQuick guide from the manual
This document provides a detailed procedure for replacing the battery in an Apple iPod Nano 1st Generation. Please note that this repair requires soldering skills and the use of specific tools. The process involves opening the device case, removing the logic board, desoldering the old battery, and soldering a new replacement battery.
Tools required
- iFixit Opening Tools
- Phillips #00 Screwdriver
- Safety Pin
- Solder
- Spudger
- Tweezers
- Soldering Iron
Opening the iPod
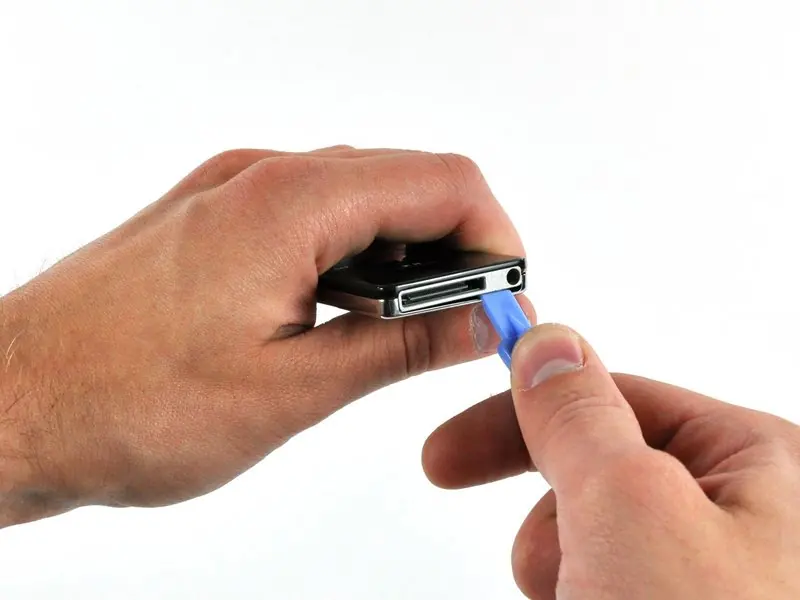
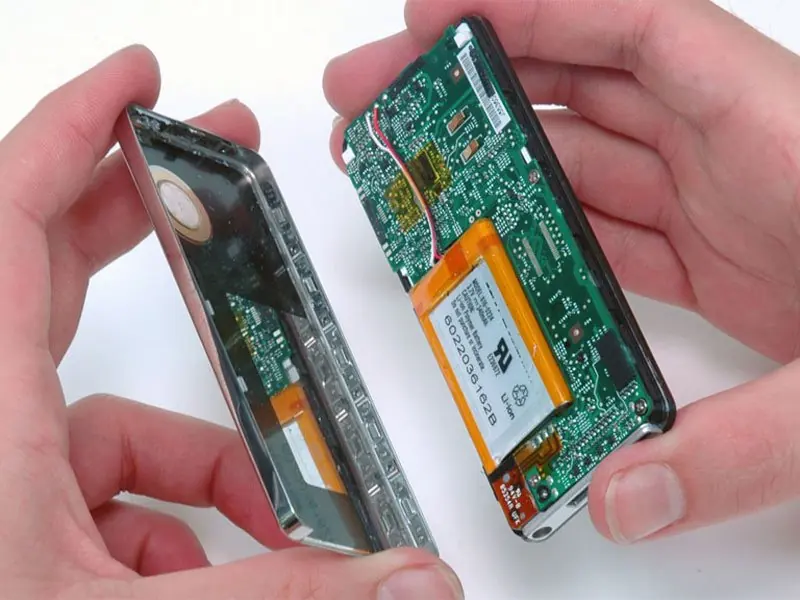
Before beginning, ensure the hold switch is in the locked position. The rear panel is secured to the front case by eleven clips. To open the device, insert the large iPod opening tool into the seam between the front case and the rear panel, below the dock connector. Run the tool back and forth to create an opening. Use a small opening tool to gently enlarge the gap by pressing or wiggling the tool near each of the two tabs attached to the rear case, pushing the clips toward the center of the iPod until they are freed. Repeat this procedure along the headphone jack side to free the remaining clips.
Removing the logic board and battery
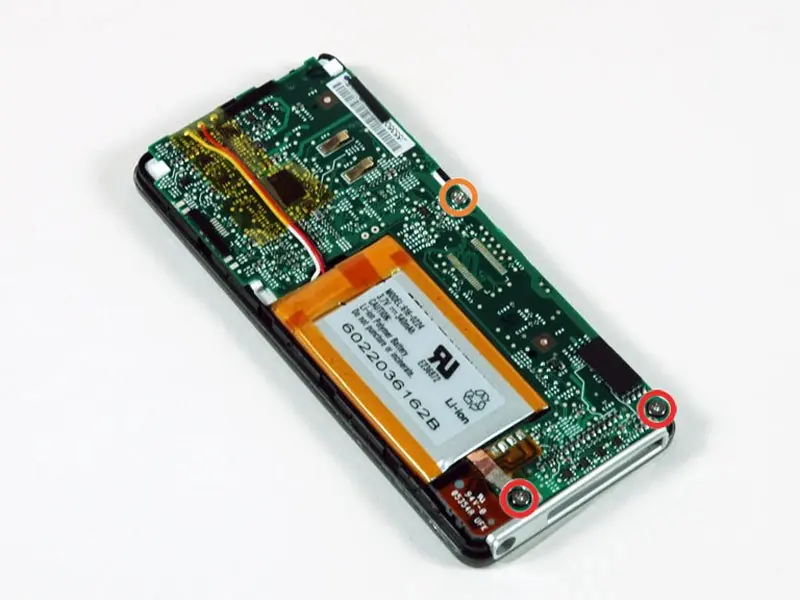
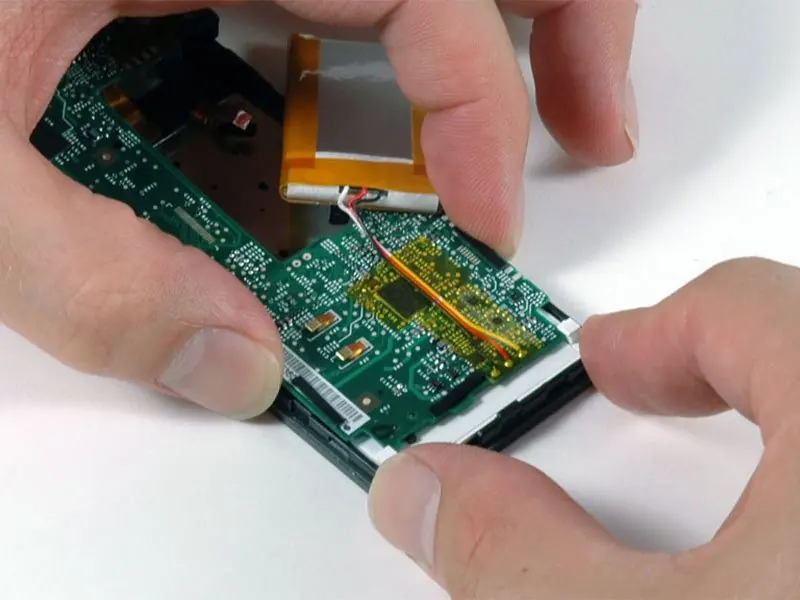
Once the rear panel is free, remove any kapton tape covering the screws. Remove two 3 mm Phillips screws near the dock connector and one 4 mm Phillips screw along the edge of the logic board. Peel up the ground strap connecting the battery to the logic board. Use the flat end of a spudger to pry the battery off the adhesive securing it to the front case. Rotate the battery out of the iPod, but do not remove it entirely as it is still soldered to the logic board. Lift the dock connector end of the logic board to free it, then slide the board out of its holding brackets. Disconnect the display ribbon cable and the click wheel ribbon cable by using a spudger to flip up the black plastic tabs holding them in place.
Soldering the new battery
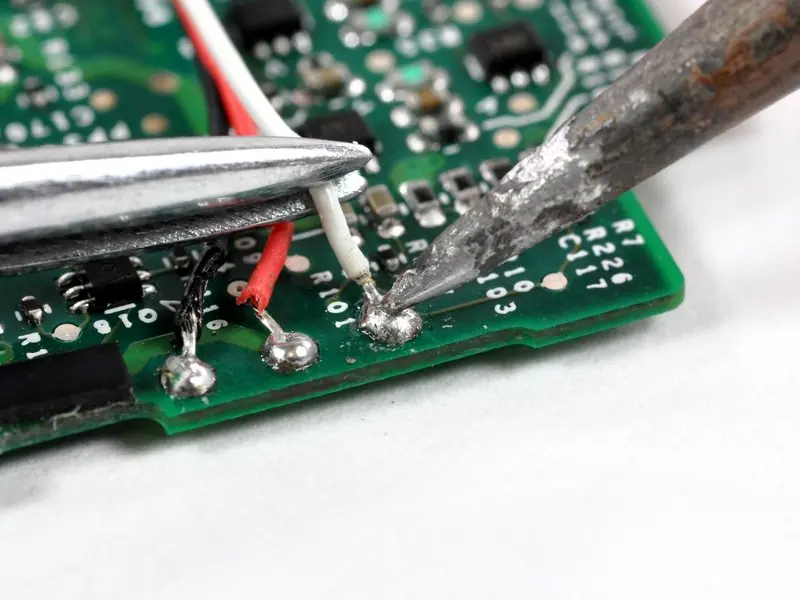
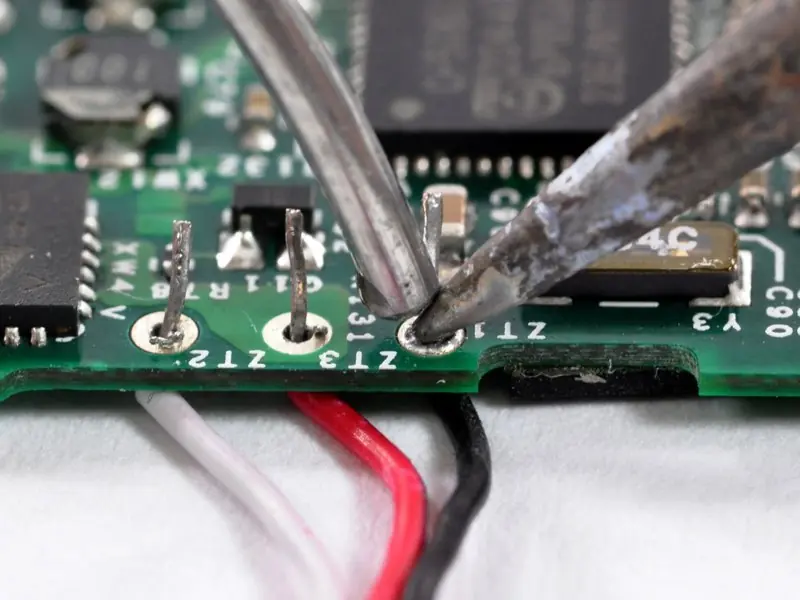
With the logic board and battery free, peel the orange kapton tape covering the battery leads. Heat the exposed end of the battery leads with a soldering iron while pulling the lead away from the connection to desolder them. To prepare for the new battery, ensure the solder pad holes are clear of solder by using a safety pin to push against the solder while heating the pad from the other side. Place the logic board flat and insert the new battery leads into their respective holes: black lead nearest the hold switch, red lead in the center, and white lead furthest from the hold switch. Solder the connections by momentarily placing the tip of the soldering iron against the joint, melting the solder into the connection, and quickly removing the iron.
Reassembly
Rotate the battery toward the logic board and place it flat in its void, bending the cables as necessary. Follow the disassembly instructions in reverse order to reassemble the device.
Manufacturer information
Apple Inc.
Practical help
Common problems
Battery not holding charge
Replace the battery (requires soldering).
Difficulty opening the case
Use the opening tool to release the 11 internal clips carefully by working the tool back and forth.
Before use
- Ensure the hold switch is in the locked position
- Gather all required tools (soldering iron, spudger, etc.)
- Work in a well-lit area
- Ensure you have a replacement battery for the 1st Generation iPod Nano
Show more Show less
Specs in practice
- Battery leads
- White, red, and black wires that must be soldered to specific pads on the logic board.
Images and diagrams
- The guide uses photos to show the location of the 11 clips that secure the rear panel.
- Soldering diagrams show the specific order of battery leads (black, red, white).
Model compatibility
- This guide is specifically for the 1st Generation iPod Nano.

Manual page author
Emily Carter
User documentation editor