Electronics / Media Players
Service Manual for Apple iPod Shuffle 1st Generation
Comprehensive teardown and service guide for the Apple iPod Shuffle 1st Generation. Includes step-by-step disassembly instructions, tool requirements, and safety precautions for internal components.
Quick answers from the manual
Quick answer
- This document is a teardown guide for the Apple iPod Shuffle 1st Generation, detailing the step-by-step process to disassemble the device for repair or service. p. 1
Key actions
- Disassemble the device p. 3, 4, 5, 6
Problems and fixes
USB port removal
Run a knife along the seam 20-30 times to release the glue.
p. 4, 5Show 2 more answers Show less
Maintenance and reset
- Reassembly p. 12
Where to find it in the PDF
- Disassembly Steps p. 3, 4, 5, 6
Table of contents
Manual images
Click an image to enlargeQuick Guide and Safety Information
This document provides a detailed teardown procedure for the Apple iPod Shuffle 1st Generation. Before beginning, ensure you have the necessary tools: a precision utility knife and a spudger. Work slowly and patiently, especially when cutting the adhesive, to avoid damaging the device casing or internal ribbon cables.
Disassembly Instructions
Follow these steps in order to disassemble the device:
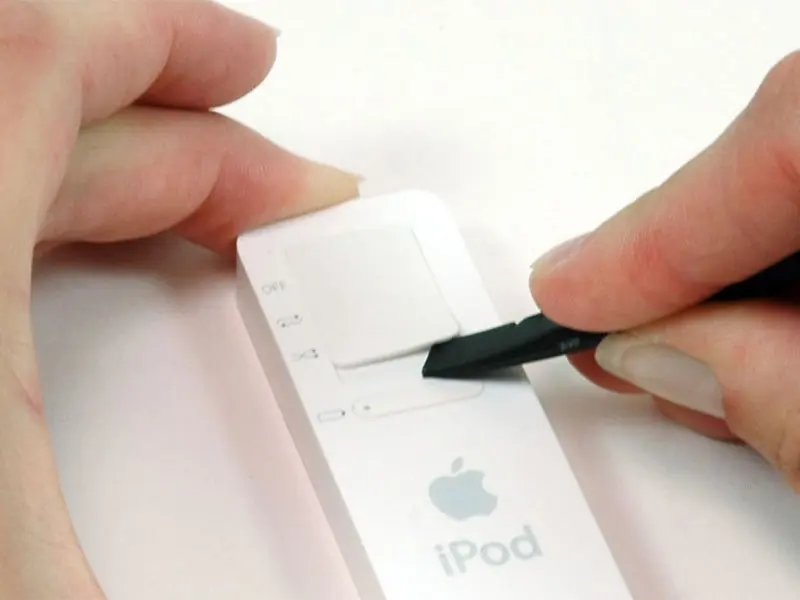
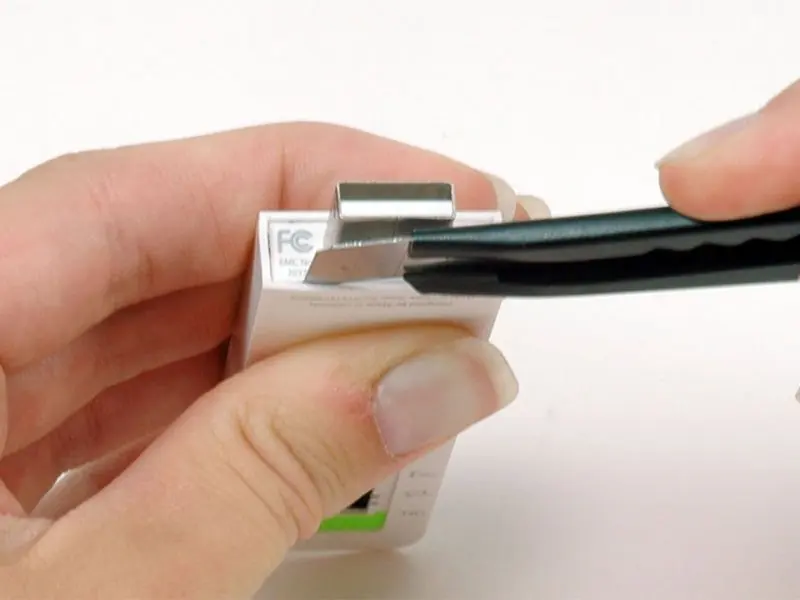
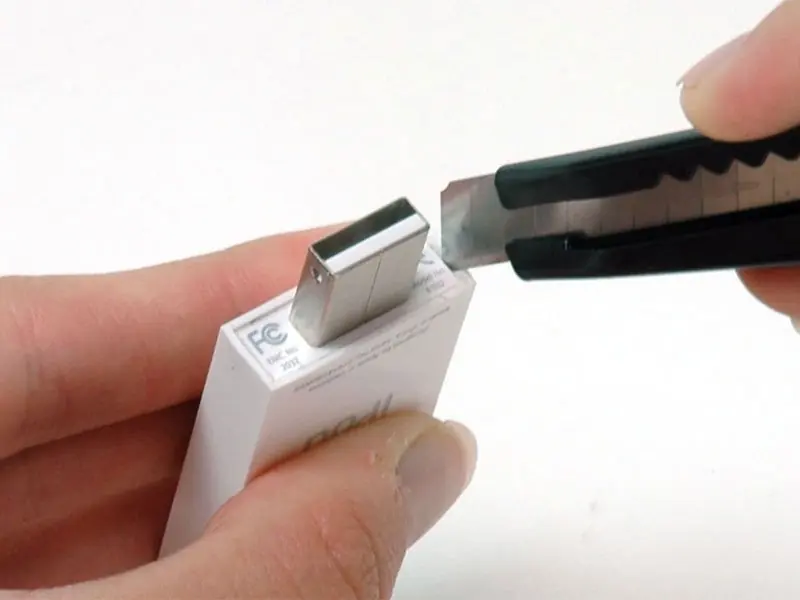
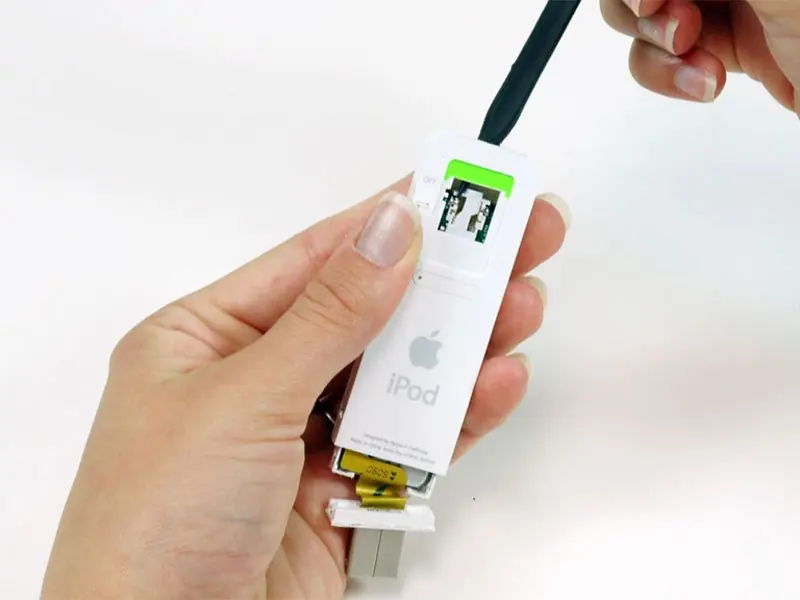
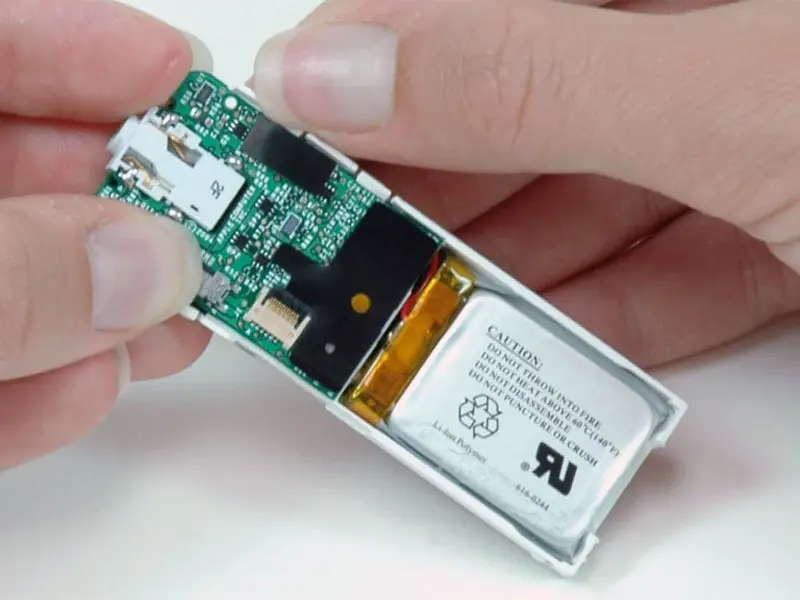
- Hold Switch: Ensure the hold switch is in the locked position before opening. Use a spudger to pry up the white plastic hold switch.
- Casing: Remove the USB port cap. Use an Exacto knife to carefully separate the glue holding the USB port. Run the knife along the seam between the two sections of the iPod 20-30 times until the glue is fully released.
- USB Port: Use a spudger to push on the headphone jack and slide the USB port out of its housing. Be careful not to pull on the USB port itself, as there is a fragile ribbon cable connecting it to the logic board.
- Logic Board: Slide the iPod out of its casing. Use a spudger to push on the logic board near the headphone jack. Turn the iPod so the click wheel faces up to prevent the battery indicator from falling out.
- Battery and Logic Board: Gently pull back the white plastic framework to free the edges of the logic board. Lift the logic board to disconnect it from the memory board beneath. Turn the iPod over and push the battery through the hole in the casing to lift the battery and logic board out.
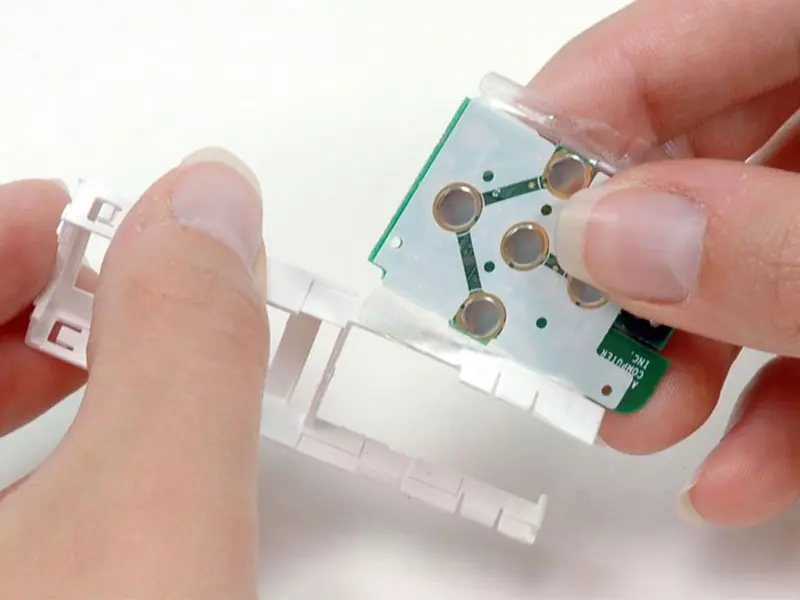
- Memory Board: Peel up the translucent tape securing the memory board to the white plastic framework. Lift the memory board out of the framework.
Reassembly
To reassemble your device, follow the disassembly instructions in reverse order. Ensure all components are properly aligned and ribbon cables are securely connected before closing the casing.
Manufacturer information
Apple Inc.
Practical help
Common problems
USB port is stuck or difficult to remove
Ensure all glue along the seam is fully released by running the knife along the edge 20-30 times. Do not pull forcefully.
Battery indicator falls out during disassembly
Keep the click wheel facing up while sliding the device out of the casing. If it falls out, slide it back in from the end of the casing before reassembly.
Before use
- Ensure the hold switch is in the locked position.
- Prepare a precision utility knife.
- Prepare a spudger tool.
- Work in a clean, well-lit area.
- Proceed slowly to avoid damaging fragile ribbon cables.
Show more Show less
Images and diagrams
- The guide includes visual steps for prying the hold switch, cutting the adhesive seam, and disconnecting internal ribbon cables.

Manual page author
David Miller
Documentation analyst