Electronics / Media Players
Hard Drive Replacement Guide for Apple TV 1st Generation
A step-by-step repair guide for replacing the hard drive in an Apple TV 1st Generation. Includes required tools, safety warnings, and detailed disassembly and reassembly procedures.
Quick answers from the manual
Quick answer
- To replace the hard drive, you must remove the rubber base using heat, unscrew the lower case, disconnect the ribbon cable, and swap the drive. Ensure the new drive uses a 44-pin PATA connector. p. 2, 3, 5, 6
Key actions
- Remove rubber base using heat p. 3
- Remove T10 screws p. 4
- Disconnect data cable p. 5
- Remove T8 screws p. 5
Problems and fixes
Flashing question mark on boot
Ensure the hard drive data cable is firmly seated in its socket on the logic board.
p. 5Show 2 more answers Show less
Technical specifications
| Parameter | Value | Meaning | Pages |
|---|---|---|---|
| Connector Type | 44 pin Parallel ATA (PATA) | Required interface for the replacement hard drive | p. 2 |
Where to find it in the PDF
- Tools and Parts p. 2
- Disassembly Steps p. 3, 4, 5
- Reassembly Steps p. 6
Table of contents
Manual images
Click an image to enlargeQuick guide from the manual
This guide provides instructions for replacing the hard drive in the Apple TV 1st Generation. The process involves removing the rubber base, accessing the internal components, disconnecting the data cable, and swapping the drive. Please ensure you have the correct tools before beginning.
Required Tools and Parts
To perform this replacement, you will need the following:
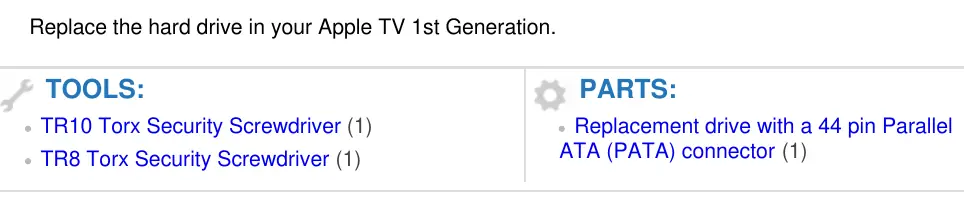
- TR10 Torx Security Screwdriver
- TR8 Torx Security Screwdriver
- Replacement hard drive with a 44-pin Parallel ATA (PATA) connector
- Hairdryer or heat gun (for softening the adhesive on the rubber base)
Disassembly
Follow these steps to access the hard drive:
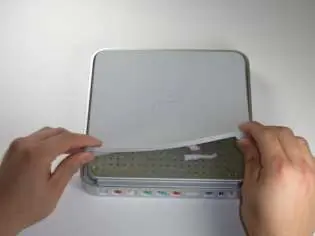
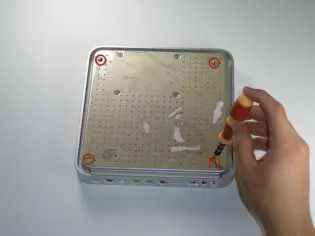
- Remove the rubber base: Flip the Apple TV over. Use a hairdryer or heat gun to soften the adhesive holding the rubber base in place. Peel the base upwards carefully to detach it from the metal plate. Warning: The rubber base will be hot after heating; handle with caution to avoid injury. The base may tear if the adhesive is not sufficiently softened.
- Remove the lower case: Remove the four T10 Torx screws securing the lower case to the upper case.
- Open the device: Carefully lift the lower case from the upper case. Be aware that the hard drive is attached to the lower case and connected to the logic board via a ribbon cable.
Hard Drive Replacement
Once the device is open, proceed with the drive replacement:
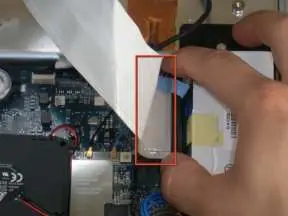
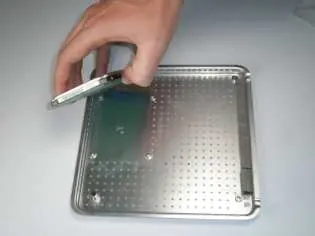
- Disconnect the data cable: Carefully pull the hard drive data cable straight up from its socket on the logic board.
- Remove the drive: Remove the four T8 Torx screws securing the hard drive to the lower case. Peel and remove the hard drive from the lower case, noting that it is held in place with mild adhesive.
- Disconnect the cable from the drive: Disconnect the hard drive data cable from the socket on the hard drive itself. If you are installing a new drive, transfer the data cable to the new unit.
- Install the new drive: Align the new hard drive with the screw holes on the lower case. Insert and tighten the four T8 Torx screws.
Reassembly
To reassemble the device, follow the disassembly instructions in reverse order. Ensure the hard drive data cable is firmly seated in its socket on the logic board. If the cable is not properly connected, the device may display a flashing question mark during boot-up.
Manufacturer information
Apple Inc.
Practical help
Common problems
Flashing question mark on boot
The hard drive data cable is not firmly seated in its socket on the logic board. Re-open the device and ensure the connection is secure.
Rubber base tearing during removal
The adhesive has not been softened enough. Apply more heat using a hairdryer or heat gun before continuing to peel.
Before use
- TR10 Torx Security Screwdriver
- TR8 Torx Security Screwdriver
- Replacement hard drive with 44-pin PATA connector
- Hairdryer or heat gun
Show more Show less
Specs in practice
- 44-pin PATA connector
- The specific interface required for the replacement hard drive to be compatible with the Apple TV 1st Generation.
Images and diagrams
- The guide includes visual steps showing the location of the rubber base, screw positions, and the ribbon cable connection.
Model compatibility
- Requires a hard drive with a 44-pin Parallel ATA (PATA) connector.

Manual page author
Michael Turner
Technical manual editor