Automotive / Engine Components
Installation Guide for 14.9-Inch Multimedia Screen for Audi Q5L
A comprehensive step-by-step installation guide for upgrading the Audi Q5L with a 14.9-inch multimedia screen. This manual covers the complete disassembly of the dashboard, center console, and original display unit, along with instructions...
Table of contents
Manual images
Click an image to enlargeQuick Installation Guide
This document provides instructions for installing a 14.9-inch multimedia screen in an Audi Q5L. The process involves disassembling the dashboard and center console to remove the original factory screen and install the new unit. Ensure you have the necessary tools, including a plastic pry bar and a socket set, before beginning.
Dashboard Disassembly
The installation begins by removing the decorative panels and storage components. Use a plastic pry bar to avoid damaging the vehicle interior.
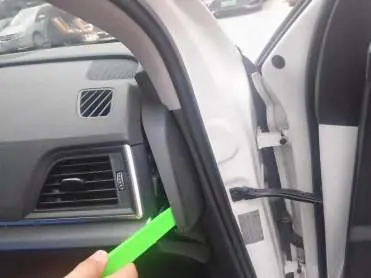
- Use a pry bar to remove the right side panel.
- Remove the silver decorative strips from the dashboard.
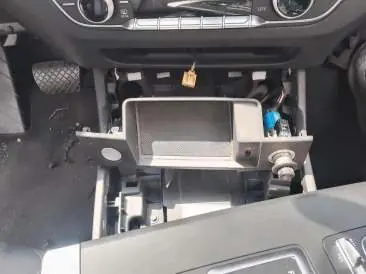
- Unscrew and remove the storage box, ensuring the power plug is disconnected.
- Remove the driver's side panel and decorative strips using the pry bar and screwdriver.
Center Console and Gear Lever Removal
Accessing the internal wiring and mounting points requires removing the center console components.
- Pry open the gear lever cover and remove the gear lever.
- Remove the decorative panel around the gear lever.
- Remove the small storage box and disconnect any associated plugs.
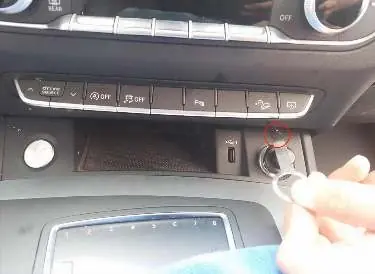
- Pry off the air conditioning control panel and remove the screws located behind it.
Screen Installation
Once the dashboard and console are disassembled, you can proceed to replace the display unit.
- Pry off the air vent decorative panels to access the screen mounting screws.
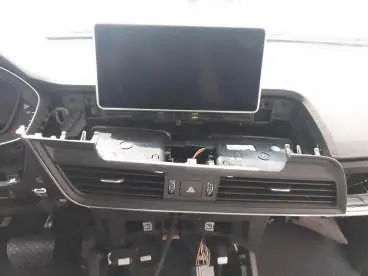
- Remove the fixing screws of the original display screen.
- Remove the original screen and its bracket.
- Fix the new 14.9-inch screen onto the original vehicle rack.
- Install the provided special cables and test all functions before fully reassembling the dashboard.
- After successful testing, fasten the specialized decorative strip provided by the manufacturer onto the new machine.
Manufacturer information
Audi AG
Practical help
Common problems
Decorative strip damage
Always use a plastic pry bar to gently loosen clips rather than metal tools to avoid scratching or breaking the trim.
Loose connections
Ensure all electrical plugs are fully seated and clicked into place before reassembling the dashboard.
Difficulty removing panels
Check for hidden screws behind decorative strips or buttons if a panel does not come off easily.
Before use
- Plastic pry bar tool
- Ensure vehicle ignition is off
- Test all functions before final reassembly
Images and diagrams
- The manual provides a visual sequence of panel removal, highlighting screw locations in red circles.
- Images demonstrate the correct use of pry bars to release clips without damaging the dashboard.
Model compatibility
- Designed specifically for Audi Q5L models.
- Includes specialized cables for integration with the original vehicle system.

Manual page author
Emily Carter
User documentation editor
Prepares concise manual descriptions and highlights the most useful setup, operation, and maintenance information for readers.