Home Appliances / Ovens
User Manual for Belleze 050-HA-50099 23" Insert Fireplace Heater
Quick guide for the Belleze 050-HA-50099 23" Insert Fireplace Heater, covering assembly, operation, safety precautions, and troubleshooting.
Table of contents
Manual images
Jump to the sectionQuick guide from the manual
This document provides essential instructions for the assembly and safe operation of the Belleze 050-HA-50099 23" Insert Fireplace Heater. Always read the full safety warnings before use. The unit requires two people for assembly and should be installed into a fireplace mantel from the back.
Assembly
The assembly process takes approximately 20 minutes and requires two people. Ensure all parts are present before starting. Assemble on a soft surface like a carpet or rug to prevent scratches.
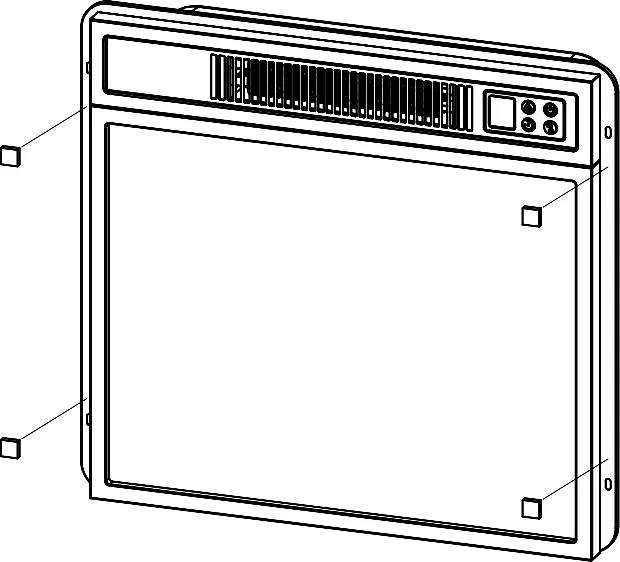
- Attach the four EVA cushion gaskets to the frame of the heater.
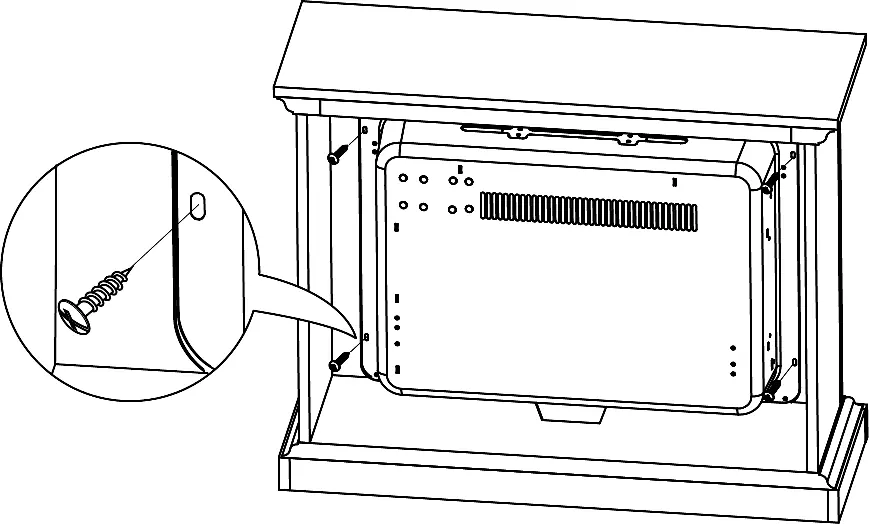
- Position the unit from the back of the fireplace mantel and center it in the opening.
- Secure the unit to the mantel by inserting the provided screws through the pre-drilled holes on the mantel. Do not attempt to install from the front.
Operation
The heater can be operated via the control panel on the top right of the unit or the included remote control. The remote control functions identically to the panel buttons but cannot switch between Fahrenheit and Celsius.
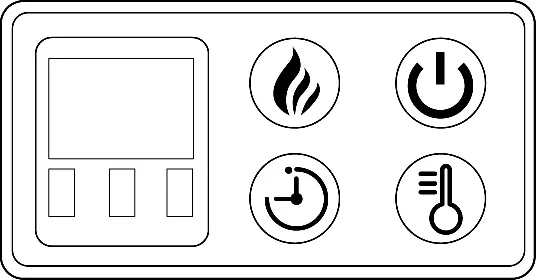
- Power: Press the power button to turn the unit on or off.
- Flame Control: Cycles through High (L3), Medium (L2), Low (L1), and OFF.
- Heater Control: Press to turn the heater on/off. Hold for 5 seconds to enter temperature adjustment mode (62°F-82°F or 17°C-27°C).
- Timer Control: Sets an automatic shut-off timer from 30 minutes up to 6 hours.
Safety and Maintenance
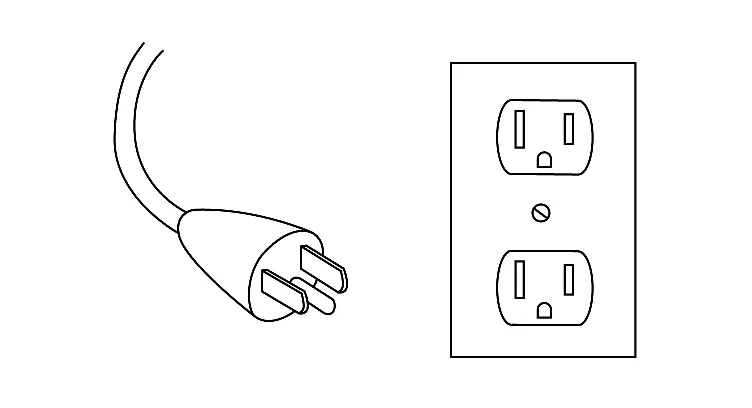
Always keep combustible materials (furniture, curtains, etc.) at least 3 feet (0.9 m) away from the heater. Do not use in bathrooms or near water. The unit must be plugged directly into a grounded wall outlet; do not use extension cords. Before cleaning, ensure the unit is turned off, unplugged, and fully cooled. Use a vacuum or duster to remove dust and a soft, damp cloth for surfaces. Do not use abrasive cleaners.
Troubleshooting
If the unit fails to turn on, ensure it is plugged into a grounded 120V outlet. If the heater does not blow warm air, check that the set temperature is higher than the room temperature. For error code E3, unplug the unit for 5 minutes to reset it. If the flame effect is missing, check if the flame spindle has detached from the motor.
Manufacturer information
Belleze Furniture
Practical help
Common problems
Unit does not turn on
Ensure it is plugged into a grounded 120V outlet and press the power button.
No flame effect
Check if the flame spindle has fallen off the spindle motor (requires opening the top/back panel).
Heater does not blow warm air
Verify that the set temperature is higher than the current room temperature.
Error Code E3
Unplug the unit from the power source for 5 minutes to reset, then plug it back in.
Before use
- Ensure air intake and exhaust are not obstructed.
- Keep combustible objects at least 3 ft (0.9 m) away.
- Plug directly into a grounded wall outlet.
- Ensure the unit is fully assembled before use.
- Check that all parts are present and undamaged.
Specs in practice
- Power Rating: 1400 W
- The maximum power consumption of the heater.
- Voltage: 120 V
- Requires a standard North American grounded electrical outlet.
- Dimensions: 24.17" x 5.10" x 17.52"
- The physical size of the insert unit.
Images and diagrams
- The control panel features icons for Power, Flame, Heater, and Timer.
- The remote control mirrors the control panel layout.
- Assembly requires attaching gaskets to the frame and screwing the unit into the mantel from the rear.
Model compatibility
- Requires a grounded 120V outlet.
- Not intended for use in bathrooms or laundry areas.
- Do not use with extension cords or power strips.

Manual page author
Michael Turner
Technical manual editor
Reviews PDF manuals for structure, safety notes, and practical product details so readers can find the right information quickly.