Home Appliances / Vacuum Cleaners
User Guide for Bissell 23T7 Series Vacuum Cleaner
Quick guide for the Bissell 23T7 Series vacuum cleaner. Includes assembly instructions, maintenance steps for filters and brush roll, troubleshooting, and parts list.
Quick answers from the manual
Quick answer
- The Bissell 23T7 Series is an upright vacuum cleaner. To maintain it, empty the dirt cup when full, clean the filters monthly, and regularly check the brush roll and drive belt for debris or wear. p. 1, 8, 9, 11
Key actions
- Assemble the vacuum by inserting the handle into the base until it locks. p. 5
- Clean filters by separating the foam and pleated filters; wash only the foam filter. p. 9
First start
- Remove the plastic plug guard, assemble the handle, and ensure all filters are installed before plugging in. p. 5, 7
Show 3 more answers Show less
Problems and fixes
Vacuum won't pick up dirt
Empty dirt cup, clean filters, check hose connections, clear air path, or replace belt/brush.
p. 13Maintenance and reset
- No electronic reset required; maintenance involves physical cleaning of filters, brush roll, and dirt cup. p. 8, 9, 11
Where to find it in the PDF
- Assembly p. 5
- Maintenance p. 8, 9, 10, 11
Table of contents
Manual images
Click an image to enlargeQuick Guide
The Bissell 23T7 Series is an upright vacuum cleaner designed for household use. This guide provides essential information for assembly, operation, and maintenance to ensure optimal performance.
Safety Instructions
- Always connect to a polarized outlet (left slot is wider than right).
- Do not use outdoors or on wet surfaces.
- Do not pick up flammable materials, toxic substances, or sharp objects.
- Keep hair, loose clothing, and body parts away from openings and moving parts.
- Unplug the vacuum when not in use and before performing maintenance.
Assembly
The vacuum comes in two main components: the handle and the base.
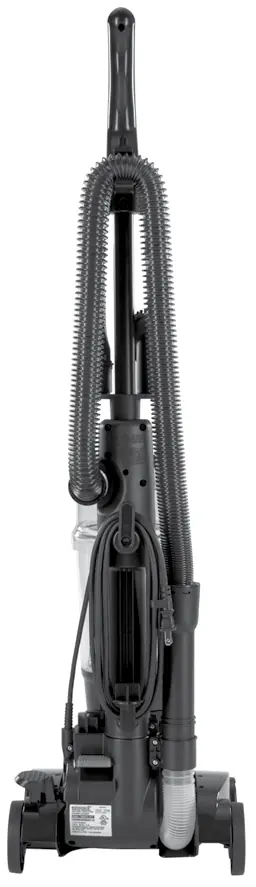
- Position the handle so the lower snap faces the back of the vacuum.
- Line up the holes on the base with the snap and knob on the handle.
- Insert the handle into the base until it locks into place.
- Install the lower cord wrap hook by inserting the bottom clip with the U-shape facing downward and pushing upward to secure.
- Wrap the power cord around the cord wraps.
Operation
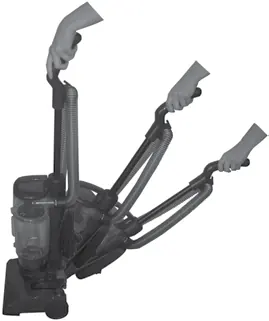
Handle Positions: Press the handle recline pedal to adjust:
- Upright: For storage and transport.
- Normal Cleaning: Press pedal once for standard floor cleaning.
- Low Cleaning: Press pedal again to reach under furniture.
Using the Vacuum: Remove the plastic plug guard before first use. Step on the red power switch pedal located on the back of the cleaner to turn the unit on or off.
Maintenance and Care
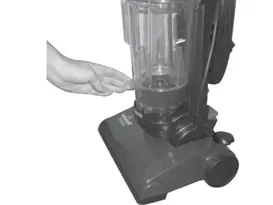
Cleaning the Dirt Tank
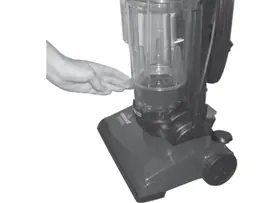
Empty the dirt cup when debris reaches the "Full" line.
- Turn off and unplug the vacuum.
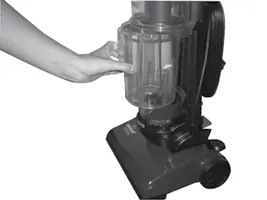
- Slide the dirt cup release lever and pull the cup out.
- Empty contents into a trash container.
- Reinsert the cup and push the release handle to lock it into place.
Filter Maintenance
Check filters at least once per month.
- Remove the dirt cup and pull up on the filter cup.
- Twist the circular filters counterclockwise to unlock and remove.
- Separate the black outer foam filter from the white inner pleated filter.
- The white filter is not washable; tap it against a trash can to remove dust.
- The black foam filter can be washed in warm water with mild detergent. Air dry completely before reassembling.
Brush Roll and Belt
Regularly check the brush roll for hair, string, or debris. If the belt appears worn or cut, it must be replaced. To access, remove the five screws on the brush cover, lift the cover, and clean or replace the brush/belt as needed.
Troubleshooting
- Vacuum won't run: Check the electrical plug, fuse, or circuit breaker.
- Vacuum won't pick up dirt: Empty the dirt cup, clean filters, ensure the hose is secure, check for clogs in the air path, or replace the belt/brush if damaged.
Manufacturer information
Bissell Inc.
Practical help
Common problems
Vacuum cleaner won't run
Check if the unit is plugged in, or check for a blown fuse or tripped circuit breaker.
Vacuum cleaner won't pick up dirt
Empty the dirt cup, clean or replace filters, check that the hose is snapped into place, clear any clogs in the air path, or check the drive belt and brush roll for damage.
Before use
- Remove the plastic plug guard.
- Ensure the handle is fully assembled and locked into the base.
- Verify that all filters (pre-motor and post-motor) are in place.
- Check that the hose is securely attached.
- Ensure the power cord is unwrapped from the cord wraps.
Show more Show less
Specs in practice
- Polarized Plug
- A safety feature where one blade is wider than the other; it fits into an outlet only one way.
- Handle Recline Pedal
- Allows the vacuum to be set to Upright (storage), Normal (cleaning), or Low (under furniture) positions.
Images and diagrams
- The dirt cup release lever is located on the side of the dirt cup assembly.
- The power switch pedal is located on the back of the cleaner, under the cord wraps.
- The filter cup is located directly below the dirt cup.
Model compatibility
- For household use only.
- Not suitable for wet surfaces.
- Do not use to pick up burning or smoking objects.

Manual page author
Emily Carter
User documentation editor