Tools / Air Tools Painting
User Manual for Bosch PFS 105 E Fine-spray System
Quick guide for the Bosch PFS 105 E fine-spray system. Learn how to assemble, operate, adjust spray patterns, clean the unit, and troubleshoot common issues.
Table of contents
Manual images
Click an image to enlargeQuick guide from the manual
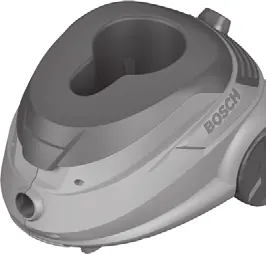
The Bosch PFS 105 E is a fine-spray system designed for atomizing solvent-based and water-dilutable paints, finishes, primers, and wood preservatives. It is not suitable for dispersion paints (wall paint/latex) or caustic/acidic materials. Always ensure the work area is well-ventilated and free from ignition sources.
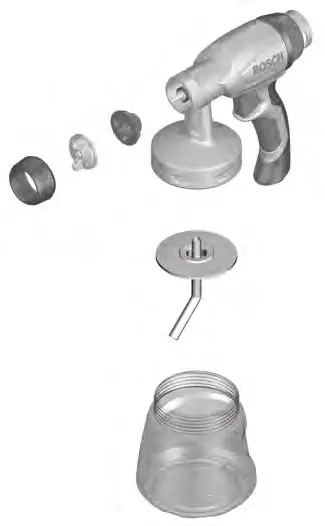
Assembly
Before performing any work on the machine, disconnect the mains plug. Connect the air hose by inserting the SDS connectors into the hose ports on both the spray gun and the base unit. Turn the connectors until they latch securely. Ensure the protective caps are removed from the hose ends before connection.
Preparing for operation
Ensure the spray surface is clean, dry, and grease-free. If necessary, roughen smooth surfaces and remove sanding dust. When diluting spray material, ensure the diluting agent is compatible with the paint to prevent clogging. Most paints require at least 10% dilution. Always perform a test-spray on a scrap surface before starting your project.
Operation
To operate the system:
- Place the base unit horizontally on a level surface.
- Plug the unit into a power outlet.
- Grasp the spray gun and point it at the surface.
- Turn the control knob on the base unit to the right to switch on.
- Pull the trigger switch on the spray gun to begin spraying.
Maintain a uniform distance of 5-15 cm from the surface. Move the spray gun evenly, overlapping paths by 4-5 cm for an even finish. Never spray the container completely empty, as this causes the spray jet to break off.
Adjustments
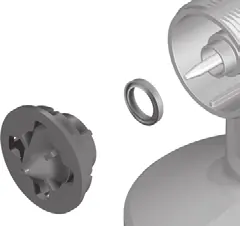
- Spray Pattern: Loosen the union nut and turn the air cap to select the desired pattern (A: vertical flat jet, B: horizontal flat jet, C: round jet). Retighten the nut.
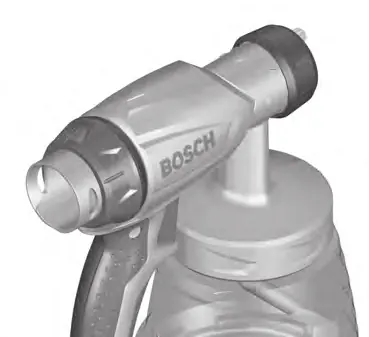
- Spraying Capacity: Use the thumbwheel on the spray gun to adjust the material flow (I for minimum, IIII for maximum).
- Air Flow: Use the control knob on the base unit to adjust air pressure. Start with maximum air flow and reduce if there is too much fog.
Maintenance and Cleaning
Proper cleaning is essential to prevent clogging and voiding the warranty. After use, empty the remaining material from the container. Fill the container with the appropriate diluting agent, shake the gun, and spray the solvent through the system until it runs clear. Clean the nozzle, air cap, and suction tube thoroughly. Replace the air filter if it becomes soiled.
Manufacturer information
Bosch
Practical help
Common problems
Spray material does not cover properly
Increase spraying capacity, reduce spray distance, or thin the material by 10%.
Spray jet pulsates
Refill the container, clean the suction tube and venting hole, or replace the air filter.
Spray material drips from the nozzle
Clean the nozzle and air cap, or tighten the union nut.
Atomization is too coarse
Reduce spraying capacity, increase air flow, or clean the nozzle.
Before use
- Check that the mains voltage matches the tool's rating.
- Ensure the spray surface is clean, dry, and grease-free.
- Verify the correct suction tube is installed (green for 800ml, white for 600ml).
- Dilute the spray material by 10% if required.
- Perform a test-spray on a scrap surface to adjust settings.
Specs in practice
- Rated power input
- 350W - the power consumption of the unit.
- Spraying capacity
- 150g/min - the maximum material output rate.
- Container capacity
- 800ml - the volume of the paint container.
Images and diagrams
- A1-A2: Connecting the air hose using SDS connectors.
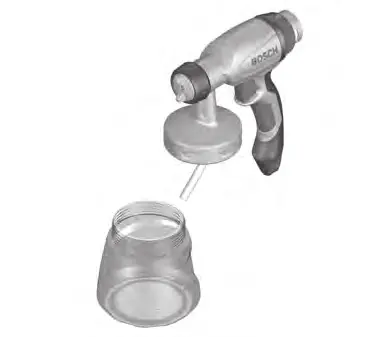
- C1-C2: Filling the container and positioning the suction tube.
- D1-D2: Proper spraying technique (distance and movement).
- F: Adjusting the spray pattern (A, B, C).
Model compatibility
- Not suitable for dispersion paint (wall paint/latex).
- Do not use materials with a flashpoint below 21°C.

Manual page author
David Miller
Documentation analyst
Organizes user manual content into clear summaries, with attention to model details, product context, and everyday usability.