Garden / Portable Garages
Assembly Guide for Canopia Palma 10x17 / 3x5
A comprehensive assembly guide for the Canopia Palma 10x17 / 3x5 carport. This manual provides essential safety advice, site preparation requirements, foundation options, a list of necessary tools, and detailed step-by-step installation...
Table of contents
Manual images
Click an image to enlargeQuick guide from the manual
The Canopia Palma 10x17 / 3x5 requires at least 3 people for assembly. Before starting, ensure the site is perfectly level and prepared. You must choose a suitable foundation type (concrete, wooden surface, or paving stones) and have all necessary tools ready. Pay close attention to the important assembly steps regarding drainage direction and leveling.
Safety advice
- Do not attempt to assemble the product in windy or rainy conditions.
- Always wear gloves, safety goggles, and long sleeves when handling aluminum profiles.
- Keep children away from the assembly area.
- Do not climb or stand on the roof.
- Ensure the product is anchored directly to a solid foundation to increase stability and wind resistance.
Care and maintenance
- When your product needs cleaning, use a mild detergent solution and rinse with cold clean water.
- Do NOT use acetone, abrasive cleaners, or other special detergents to clean the panels.
Before assembly


- Choose your site carefully: The product must be positioned and fixed on a flat level surface.
- Foundation preparation: Clear the site and level the ground.
- Choose your foundation type: Options include concrete/wooden surface, paving stones, or solid ground/asphalt.
Tools and equipment

- 3 people needed
- Work gloves
- Spirit level
- Tape measure
- Philips head screwdriver
- Electric drill with drill bit (10 mm / 13/32" and 3 mm / 1/8")
- Wrench (10 mm / 13/32", 13 mm / 1/2", 17 mm / 21/32")
- Silicone
- Cordless drill (Philips head)
- Ladder
Assembly steps
The assembly process consists of 26 steps. Follow the instructions sequentially. Use the provided parts list to identify components before starting.
Important assembly steps
When you encounter the information icon during assembly, refer to these specific notes:
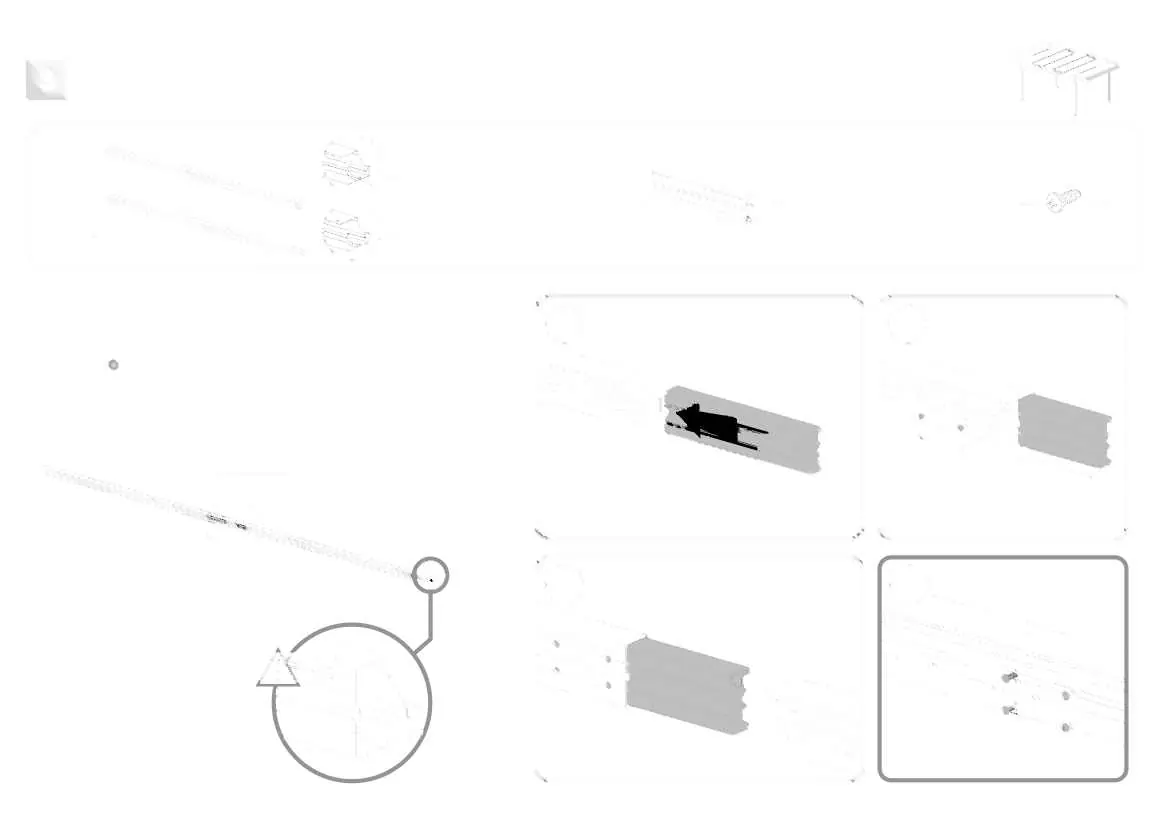
- Step 5: Select the preferred side for the shorter legs based on the desired drainage direction. Ensure both legs are mounted on the same side.
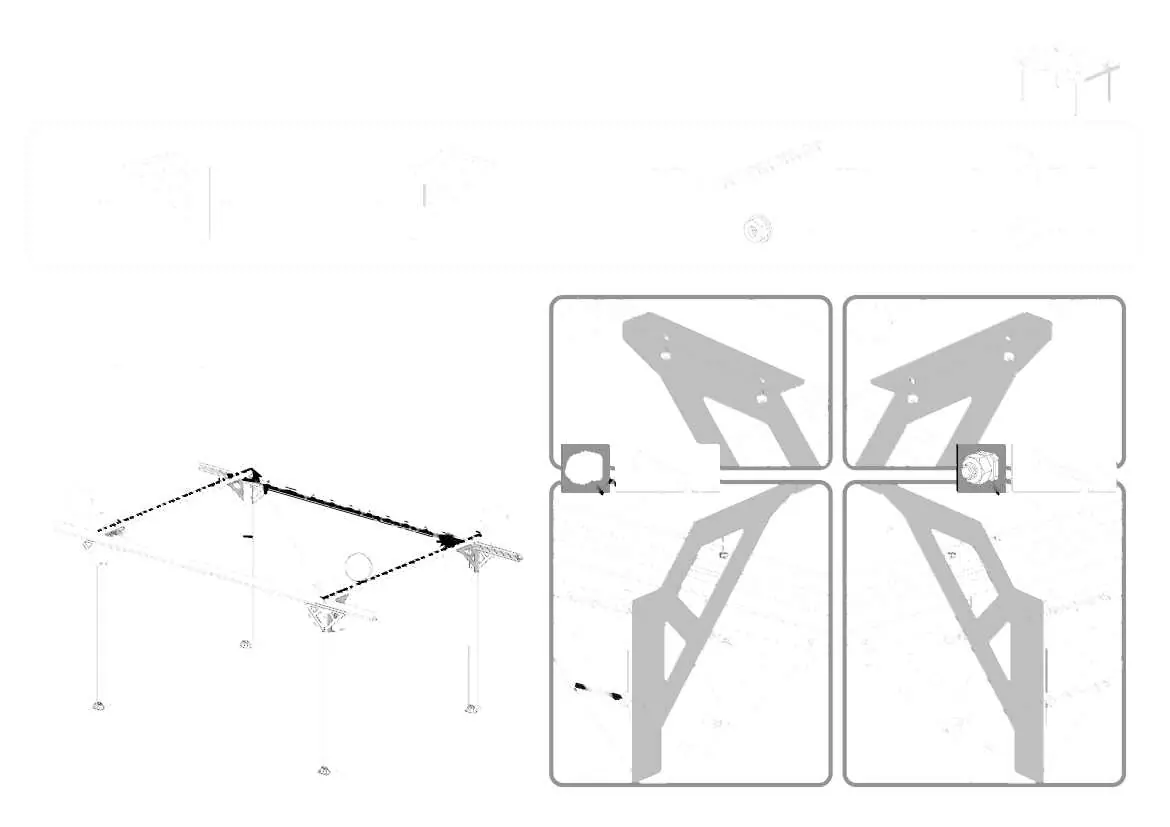
- Step 6: Note the parts direction and placement in the corners. Ensure diagonals are equal in size.
- Step 19: Perform gradually in accordance with the previous steps.
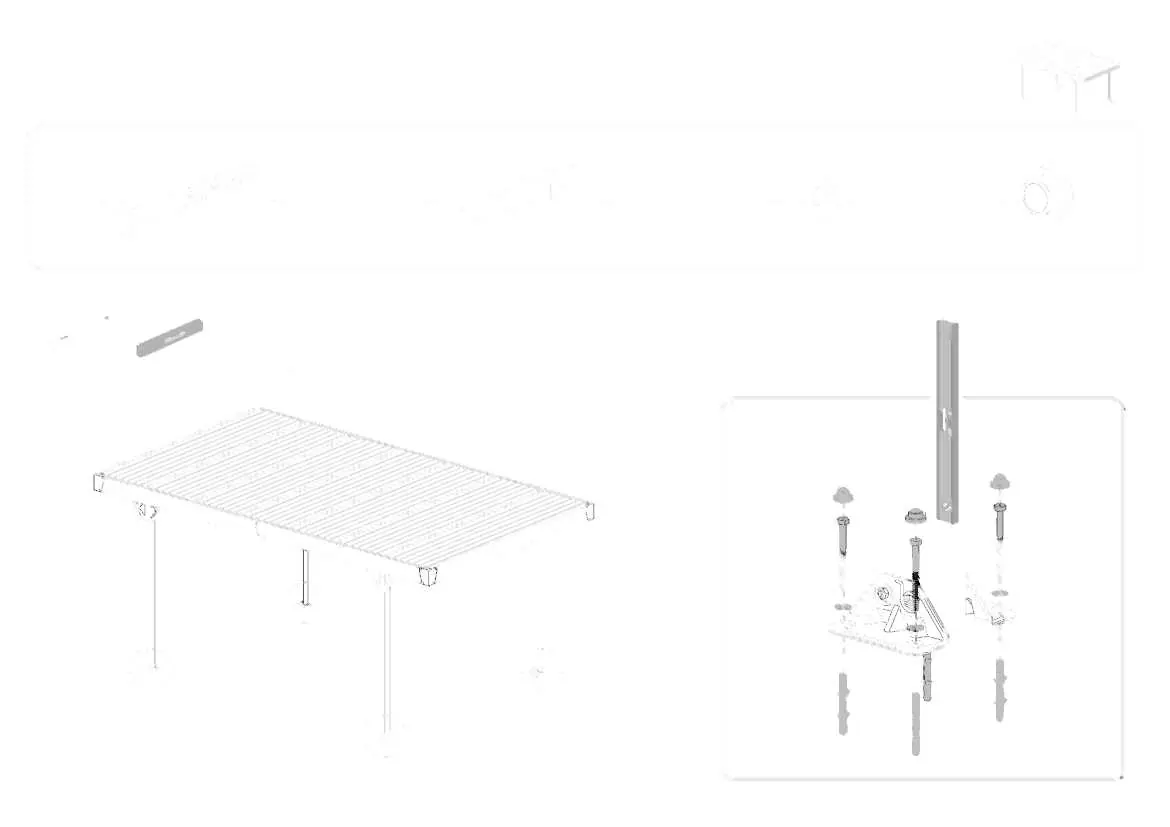
- Step 25: Level the poles with the foot pads on the flat surface, and then attach to the surface of your choosing using accordant screws and anchors.
Manufacturer information
Palram Canopia
Practical help
Common problems
Water drainage issues
Ensure the shorter legs are placed on the correct side during Step 5 to direct water flow as desired.
Unstable structure
Ensure the product is anchored directly to a solid foundation (concrete, asphalt, or wood) as specified in the foundation section.
Parts not fitting
Verify that the diagonals are equal in size during Step 6 and that all parts are placed in the correct orientation.
Before use
- Ensure at least 3 people are available for assembly.
- Clear and level the ground site.
- Select and prepare the foundation (concrete, wood, or paving).
- Gather all required tools: drill, wrenches, ladder, tape measure, spirit level, and silicone.
- Wear protective gear: gloves, safety goggles, and long sleeves.
- Verify all parts are present using the contents list.
Specs in practice
- Foundation requirement
- Must be a flat, level surface.
Images and diagrams
- Foundation options are detailed on pages 6 and 7, showing concrete, paving, and solid ground preparation.
- Assembly steps 1-26 provide visual guidance on connecting profiles, brackets, and panels.
- Important assembly steps (5, 6, 19, 25) are highlighted with an information icon.
Model compatibility
- The structure is designed for open multi-purpose covering.
- Ensure the ground slope is less than 5%.

Manual page author
Michael Turner
Technical manual editor
Reviews PDF manuals for structure, safety notes, and practical product details so readers can find the right information quickly.