Mobile / Smartphones
Instruction Manual for Celestron ExploraScope 60AZ Refractor Telescope
Quick guide for the Celestron ExploraScope 60AZ refractor telescope. Learn how to assemble the mount, install the finderscope, align optics, and start your first astronomical observation session safely.
Quick answers from the manual
Quick answer
- The ExploraScope 60AZ is a refractor telescope. Assembly involves setting up the tripod, attaching the telescope tube, installing the star diagonal, eyepieces, and aligning the StarPointer finderscope. p. 2, 3, 4
Key actions
- Aligning Finderscope p. 5
- Changing Eyepieces p. 4, 6
First start
- Start by assembling the tripod and attaching the telescope tube. Install the 20mm eyepiece first for easier targeting. p. 3, 4
Show 4 more answers Show less
Problems and fixes
Image blurry
Turn the focus knobs on either side of the telescope.
p. 4Maintenance and reset
- Replace the 3V lithium battery (#CR2032) in the StarPointer if it fails to turn on. p. 7
Technical specifications
| Parameter | Value | Meaning | Pages |
|---|---|---|---|
| Battery | CR2032 | 3V lithium battery for StarPointer | p. 7 |
| Eyepieces | 20mm, 4mm | Included magnification eyepieces | p. 2, 4 |
Where to find it in the PDF
- Assembly p. 3
- Finderscope Alignment p. 5
Table of contents
Manual images
Click an image to enlargeQuick guide from the manual
The Celestron ExploraScope 60AZ is a refractor telescope designed for astronomical observation. This guide covers the essential steps for assembly, alignment, and initial use. Crucial Safety Warning: Never look directly at the Sun with the telescope without a proper solar filter, as this can cause permanent eye damage.
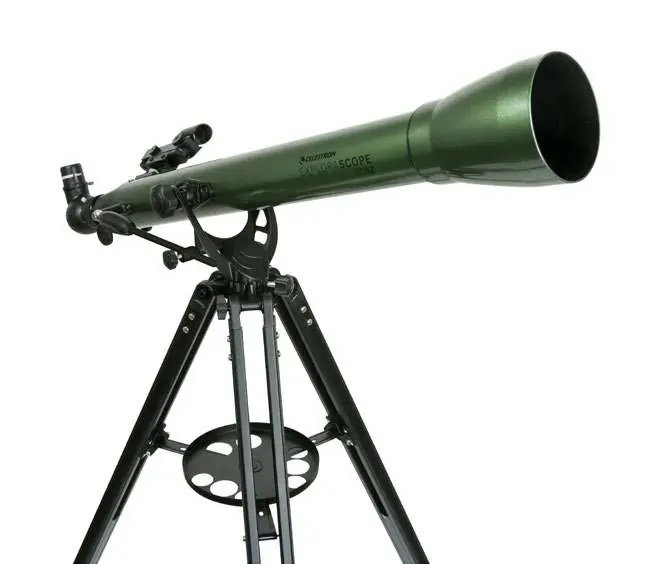
What's in the box
- Telescope tube
- Tripod with mount
- Accessory tray
- StarPointer Red Dot Finderscope
- 20 mm Eyepiece
- 4 mm Eyepiece
- 3x Barlow Lens
- Erect Image Diagonal
- Software download codes
Assembling your telescope
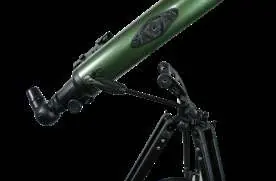
The Mount
- Remove the tripod and mount from the box.
- Loosen the hand knobs on the legs to extend them to the desired length, then tighten.
- Stand the tripod upright and pull legs apart until the center brace snaps into place.
- Attach the accessory tray to the leg support bracket by turning it clockwise.
- Ensure leg hinge bolts are secure.
The Telescope Tube
- Loosen the set screw on the slow motion rod guide on the U-shaped mount.
- Slide the slow motion rod through the guide and lower the telescope tube hinges into the cradles.
- Tighten the set screw to secure the rod.
- Insert the two mounting bolts through the U-shaped mount into the tube hinges. Do not over-tighten.
The Star Diagonal
- Remove caps from both sides of the diagonal.
- Loosen setscrews on the focuser and remove the dust cap.
- Insert the diagonal into the focuser and tighten the setscrews.
The Eyepieces
Always start with the 20 mm eyepiece for a wider field of view before switching to the 4 mm eyepiece for higher magnification.
- Loosen the setscrews on the star diagonal.
- Insert the silver barrel of the 20 mm eyepiece.
- Tighten the setscrews.
- Look through the eyepiece and turn the focus knobs until the image is sharp.
The StarPointer Red Dot Finderscope
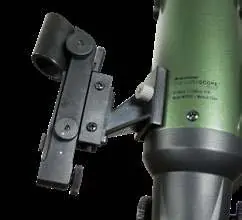
- Remove the two silver nuts from the threaded posts on the telescope tube.
- Place the finderscope base over the posts and thread the nuts back on.
- Remove the clear plastic tab from the battery compartment to activate the battery.
Aligning the finderscope
Alignment is best done during the day.
- Choose a distant object (at least 1/4 mile away).
- Center the object in the 20 mm eyepiece.
- Look through the finderscope and locate the red dot.
- Use the adjustment knobs on the finderscope to move the red dot until it is centered on the same object seen in the eyepiece.
Your first astronomical observing session
The Moon is the best first target. Observe it a few days after a New Moon for the best detail. Use the 20 mm eyepiece to locate the Moon, then switch to the 4 mm eyepiece for a closer view. Adjust focus knobs as needed when changing eyepieces.
Battery access instructions
The StarPointer uses a 3V lithium battery (#CR2032). To replace it, loosen the screw on the battery cover with a Phillips head screwdriver. Ensure the positive (+) terminal faces outward when installing the new battery.

Bonus software included
The telescope includes access to Celestron Starry Night software (PC/Mac) and the SkyPortal app (iOS/Android) to help identify celestial objects.
Manufacturer information
Celestron
Practical help
Common problems
Image is blurry
Slowly turn the focus knobs on either side of the telescope until the image becomes sharp.
Finderscope not pointing at the target
Align the finderscope during the day using a distant object (at least 1/4 mile away) and the adjustment knobs.
StarPointer does not turn on
Ensure the clear plastic battery tab has been removed from the battery compartment.
Before use
- Unpack the box carefully as some parts are small.
- Verify all parts are present using the parts list.
- Remove the plastic battery tab from the StarPointer finderscope.
- Align the finderscope with the main telescope optics during the day.
- Always start observing with the 20 mm eyepiece.
Show more Show less
Specs in practice
- 20 mm Eyepiece
- Low power eyepiece, recommended for initial target acquisition.
- 4 mm Eyepiece
- High power eyepiece, used for detailed views after centering the target.
Images and diagrams
- Mount assembly: Shows how to attach the accessory tray to the tripod legs.
- Tube attachment: Illustrates sliding the slow motion rod and securing the tube hinges.
- Finderscope alignment: Shows the adjustment knobs used to center the red dot on the target.
Model compatibility
- Compatible with Celestron SkyPortal app (iOS and Android).
- Includes Starry Night software for PC and Mac.

Manual page author
David Miller
Documentation analyst