Mobile / Smartphones
User Manual for Celestron LandScout 20-60x80 Spotting Scope
Quick guide for the Celestron LandScout 20-60x80 Spotting Scope. Learn how to set up the tripod, focus, use the smartphone adapter, pair the Bluetooth remote, and maintain your optics.
Quick answers from the manual
Quick answer
- The Celestron LandScout 20-60x80 is a spotting scope designed for observation and digiscoping. It includes a tabletop tripod, smartphone adapter, and Bluetooth remote. p. 1, 3
Key actions
- Setup tripod p. 5
- Focusing p. 5
- Pair Bluetooth remote p. 10
First start
- Attach to tripod and focus p. 4, 5
Show 4 more answers Show less
Problems and fixes
Vignetting
Use lower magnification or adjust camera alignment.
p. 7, 11Maintenance and reset
- Clean lenses with soft brush or pressurized air. p. 12
Technical specifications
| Parameter | Value | Meaning | Pages |
|---|---|---|---|
| Magnification | 20-60x | Variable zoom | p. 1 |
Where to find it in the PDF
- Parts Diagram p. 3
- Smartphone Adapter Setup p. 9
Table of contents
Manual images
Click an image to enlargeQuick guide from the manual
The Celestron LandScout 20-60x80 is a spotting scope designed for terrestrial observation and digiscoping. It features a variable magnification of 20-60x and an 80mm objective lens. The kit includes a tabletop tripod, a smartphone adapter, and a Bluetooth remote for remote shutter control.
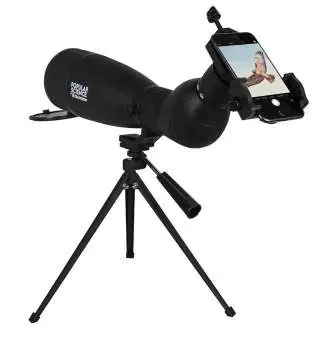
Nomenclature
Key components of the spotting scope include:
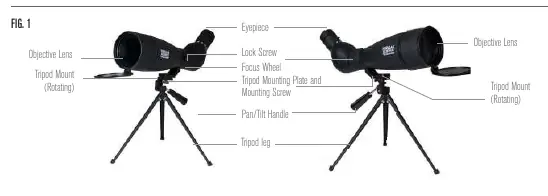
- Objective Lens: The large front lens.
- Eyepiece: Where you look through.
- Focus Wheel: Located behind the tripod mount, used to sharpen the image.
- Tripod Mount: Rotating mount with a lock screw to adjust the viewing angle.
- Pan/Tilt Handle: Controls horizontal and vertical movement on the tripod.
Using the Tabletop Tripod
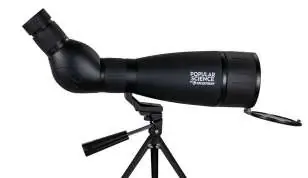
- Spread the three tripod legs until they stop.
- Ensure the Pan/Tilt Handle is locked (turn clockwise) and the mounting plate is level.
- Align the tripod mounting screw with the mounting hole on the spotting scope.
- Secure the scope by turning the screw counterclockwise.
- To adjust position, turn the handle counterclockwise to unlock, move the scope, and turn clockwise to lock.
Focusing and Magnification
To focus, slowly rotate the focus wheel located behind the tripod mount until the image is clear. To change magnification, rotate the zoom eyepiece according to the markings on the eyepiece. Note that the scope will need to be refocused after changing magnification. The largest field of view is achieved at the lowest magnification.
Using the Smartphone Adapter
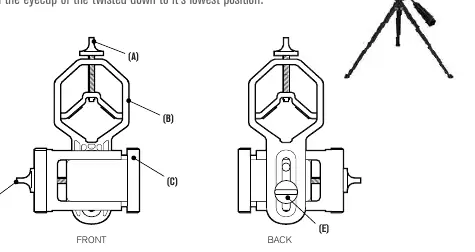
- Focus the scope on your subject first.
- Open the eyepiece clamp (B) by loosening the knob (A) and secure it to the eyepiece barrel (ensure it is on a non-rotating section).
- Loosen the holder clamp knob (D) to fit your phone. Ensure the phone case is flat; remove folio-style cases.
- Launch your camera app. Loosen the holder alignment knob (E) to center the phone camera over the eyepiece.
- Tighten the alignment knob once the image is centered.
Using the Bluetooth Remote
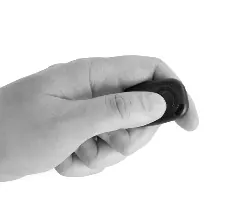
- Insert a CR2032 battery with the positive (+) side facing up.
- Press and hold the button for 5 seconds until the blue light blinks (pairing mode).
- Pair the device named "GBshutter" in your phone's Bluetooth settings.
- Open your camera app and press the button to trigger the shutter.
Care and Cleaning
Protect the scope from impact and store it in a cool, dry place. When storing for long periods, use an airtight container with a desiccant. Clean lenses using a soft lens brush or pressurized air to remove dust. Remove fingerprints or smudges with a soft lens cloth or tissue, rubbing in a circular motion from the center outward.
Manufacturer information
Celestron
Practical help
Common problems
Vignetting (circular image surrounded by black)
Use lower magnification or adjust the camera alignment on the smartphone adapter.
Image is blurry
Rotate the focus wheel slowly until the image is sharp. If it reaches the end of travel, rotate in the opposite direction.
Remote not pairing
Ensure the battery is inserted correctly and the remote is in pairing mode (blue light blinking).
Before use
- Attach the scope to a sturdy tripod.
- Ensure the Pan/Tilt handle is locked.
- Check that the lens caps are removed.
- Ensure the smartphone case is flat (for digiscoping).
- Never look at the Sun through the scope.
Show more Show less
Images and diagrams
- Figure 1: Parts identification.
- Figure 3: Focusing mechanism.
- Figure 5: Rotating tripod mount.
Model compatibility
- Smartphone adapter requires a flat-backed phone case.
- Point-and-shoot cameras with 3x-4x optical zoom are most compatible.

Manual page author
Emily Carter
User documentation editor