Mobile / Smartphones
Installation Guide for Celestron StarSense Explorer LT 80AZ Telescope
A comprehensive installation and setup guide for the Celestron StarSense Explorer LT 80AZ telescope. Includes step-by-step instructions for tripod assembly, telescope mounting, finderscope alignment, smartphone dock installation, and app...
Quick answers from the manual
Quick answer
- The StarSense Explorer LT 80AZ is an astronomical telescope that uses a smartphone app to help locate celestial objects. Setup involves assembling the tripod, mounting the telescope tube, installing the finderscope and smartphone dock, and aligning the finderscope with the main optics. p. 1, 2, 3, 4
Key actions
- Assemble the tripod and attach the accessory tray. p. 1
- Mount the telescope tube to the yoke mount. p. 1
- Align the finderscope with the main telescope optics. p. 3
First start
- Download the StarSense Explorer app and activate it using the code on the orange postcard. p. 2
Show 4 more answers Show less
Problems and fixes
Image is blurry
Turn the focus knobs on either side of the telescope until the image comes into sharp focus.
p. 3Maintenance and reset
- Reset the altitude slow motion rod if it reaches the end of its travel. p. 3
Technical specifications
| Parameter | Value | Meaning | Pages |
|---|---|---|---|
| Eyepieces | 25 mm, 10 mm | 25mm for low power/finding, 10mm for high power. | p. 2 |
Where to find it in the PDF
- Quick Setup Guide (English) p. 1, 2, 3, 4
- Guide d’installation rapide (Français) p. 5, 6, 7, 8
- Kurzanleitung zur Einrichtung (Deutsch) p. 9, 10, 11, 12
- Guida rapida (Italiano) p. 13, 14, 15, 16
- Guía de instalación rápida (Español) p. 17, 18, 19, 20
Table of contents
Manual images
Click an image to enlargeQuick guide from the manual
This guide provides instructions for assembling and setting up your Celestron StarSense Explorer LT 80AZ telescope. Before beginning, ensure you have all parts listed in the manual. The process involves assembling the tripod, mounting the telescope tube, installing the finderscope and accessories, and activating the StarSense Explorer app on your smartphone.
Parts and assembly
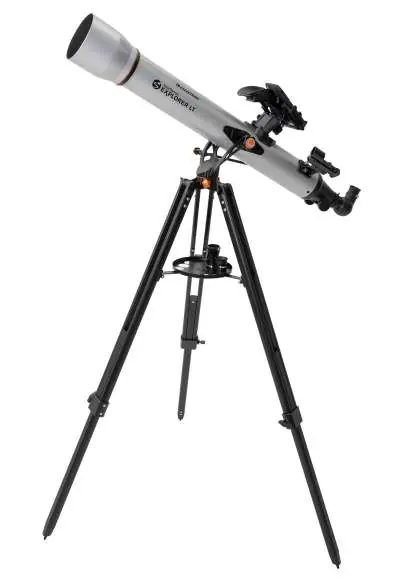
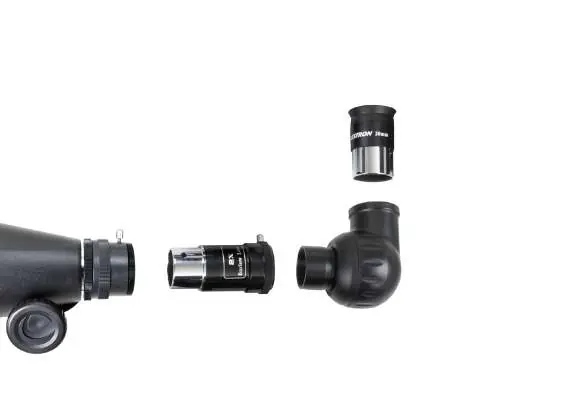
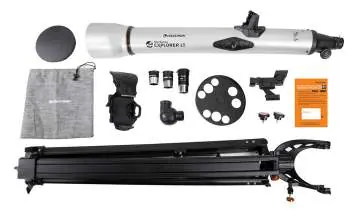
Your telescope includes a telescope tube with an altitude slow motion rod, a tripod with an alt-azimuth yoke mount, a StarSense smartphone dock, two eyepieces (25mm and 10mm), a 2x Barlow lens, an erect image diagonal, an accessory tray, and a StarPointer finderscope.
Tripod setup
To set up the tripod, spread the legs outward until fully extended and push down the center leg brace. Extend the center portion of each leg by 6 to 12 inches and secure them using the tightening screws. Ensure all three legs are at the same height to provide a level platform. Place the eyepiece accessory tray on top of the center leg brace and thread it into the hole until seated.
Telescope assembly
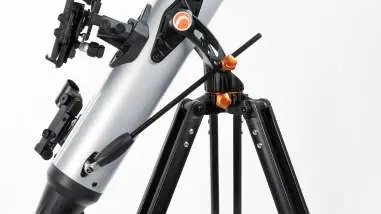
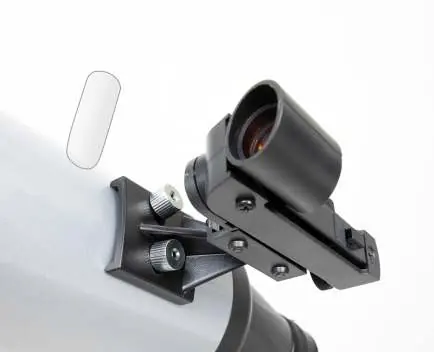
Loosen the knob on the altitude rod guide on the yoke mount. Slide the altitude rod into the guide and lower the altitude hubs on the telescope tube into the cradles on the yoke arms. Tighten the altitude rod guide screw. Insert the two tube mounting screws through the yoke mount into the hubs on the telescope tube to secure it. To install the finderscope, remove the two silver nuts from the threaded posts on the top of the tube, place the finderscope base over the posts, and replace the nuts.
Smartphone dock installation
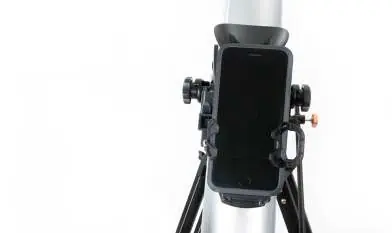
Remove the large cap covering the mirror on the front of the StarSense dock. Loosen the two setscrews on the dock mount on the top of the telescope tube. Slide the dovetail on the bottom of the dock into the mount and tighten both screws to secure it. To attach your phone, pull open the spring-loaded slider on the top of the dock, set the phone into the holder so it is flush with the bottom lip, and slowly release the slider.
App setup
Download the "Celestron StarSense Explorer" app from the Apple App Store or Google Play. We recommend downloading while connected to Wi-Fi. Once downloaded, locate the orange postcard in your telescope box. Launch the app and enter the activation code on the postcard when prompted to unlock the app.
Moving the telescope
To move the mount left and right, loosen the azimuth tension knob on the yoke mount. For up-and-down movement, loosen the knob on the slow motion rod guide. Fine adjustments can be made using the altitude slow motion rod handle. If you reach the end of the rod's travel, loosen the rod guide knob, reset the rod to the middle of its travel, and retighten the knob.
Aligning the finderscope
Aligning the finderscope is essential for locating objects. Perform this during the day. Choose an easily recognizable object at least a quarter mile away. Center the object in the 25mm eyepiece. Without moving the telescope, use the two adjustment knobs on the finderscope to move the red dot until it appears over the same object you are observing in the eyepiece.
Safety warnings
SOLAR WARNING: Never attempt to view the Sun through any telescope without a proper solar filter. Doing so can cause permanent eye damage.
Manufacturer information
Celestron
Practical help
Common problems
Image appears inverted
This is perfectly normal for an astronomical telescope.
Finderscope not pointing at the same object as the telescope
The finderscope needs to be aligned with the main optics. Follow the 'Aligning the Finderscope' procedure during the day.
Altitude slow motion rod knob will no longer turn
The rod has a limited range of motion (approx. 15 degrees). Loosen the rod guide knob, turn the handle to the middle of its travel, and retighten the guide knob.
Before use
- Verify all parts are present (telescope tube, tripod, eyepieces, finderscope, smartphone dock, etc.).
- Ensure the tripod is level and legs are extended to the same height.
- Download the StarSense Explorer app via Wi-Fi.
- Locate the orange postcard with the activation code.
- Choose a distant target (at least 1/4 mile away) for alignment.
Show more Show less
Specs in practice
- 25 mm Eyepiece
- Low-power eyepiece, recommended for initial target finding.
- 10 mm Eyepiece
- High-power eyepiece, used for closer inspection after finding the target.
- 2x Barlow Lens
- Doubles the magnification of the eyepiece used.
Images and diagrams
- Tripod setup: Spread legs, push down brace, extend legs, attach tray.
- Telescope mounting: Slide altitude rod into guide, lower hubs into cradles, secure with screws.
- Finderscope alignment: Center target in 25mm eyepiece, then adjust finderscope knobs until red dot matches target.
Model compatibility
- The StarSense Explorer app is compatible with most modern smartphones.
- The activation code unlocks up to 5 devices.

Manual page author
Michael Turner
Technical manual editor