Electronics / Routers
Quick Start Guide for Cisco RV 120W Wireless-N VPN Firewall
A comprehensive quick start guide for the Cisco RV 120W Wireless-N VPN Firewall. Includes instructions for physical installation, wall mounting, initial setup via the wizard, security configuration, and device features.
Table of contents
Manual images
Click an image to enlargeQuick Start Guide
This guide provides the essential steps to install and configure your Cisco RV 120W Wireless-N VPN Firewall. The device is designed to provide secure, high-speed wireless network access for small businesses.
Installation and Mounting
You can place the device on a desktop or mount it on a wall. Ensure the area has adequate air flow and does not exceed an ambient temperature of 104°F (40°C).
Wall Mounting
- Determine the mounting location and install two screws (not supplied) 2-7/16 inches (61 mm) apart.
- The screw heads should be approximately 5.5 mm in diameter and 2 mm deep. Do not mount the screw heads flush with the wall; they must fit inside the back of the unit.
- Align the wall-mount slots on the bottom of the unit with the screws.
- Place the slots over the screws and slide the unit down until it fits snugly.
Connecting the Equipment
Cisco recommends using the Setup Wizard for initial configuration.
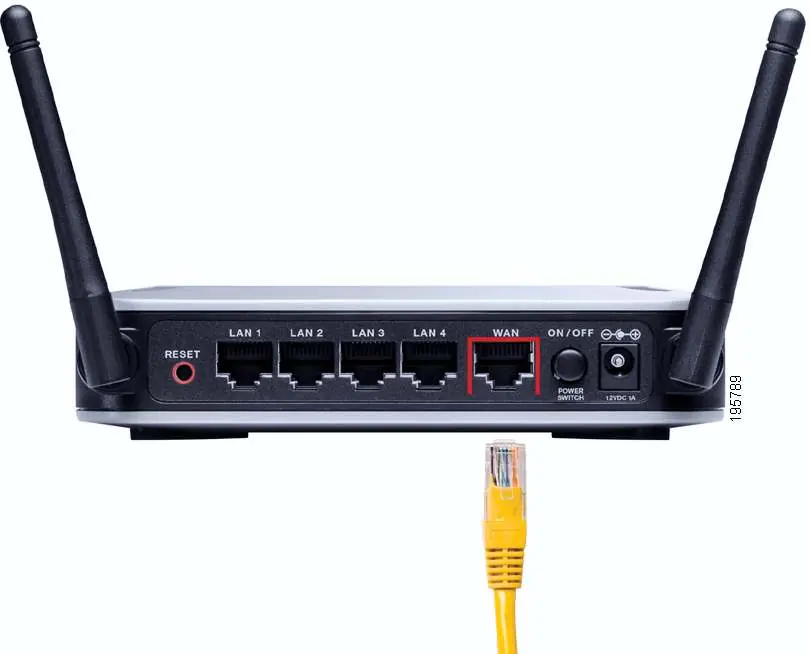
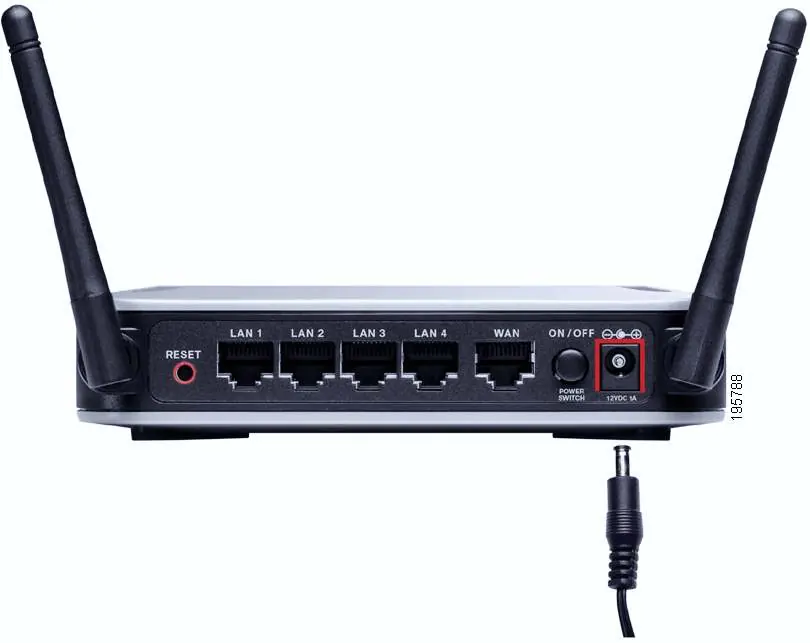
- WAN Connection: Unplug the Ethernet cable from your PC and plug it into the port marked WAN on the unit.
- LAN Connection: Connect one end of an Ethernet cable to a LAN port on the back of the unit and the other end to your PC.
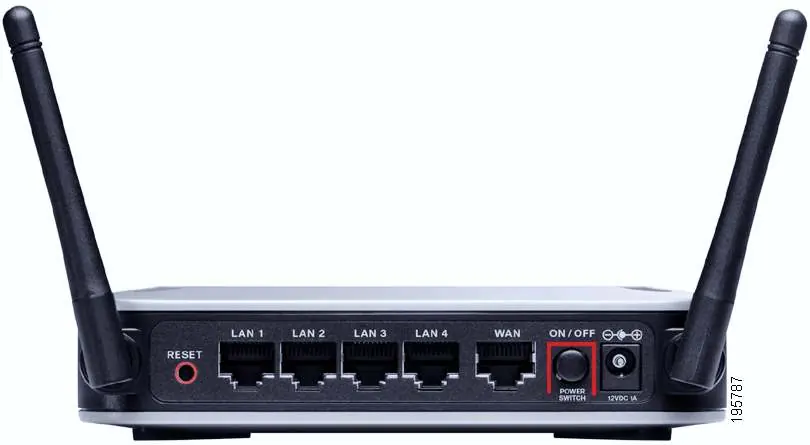
- Power: Connect the supplied power adapter to the power port and plug it into an electrical outlet. Press the ON/OFF power switch to turn the unit on.
Using the Setup Wizard
The Setup Wizard guides you through the installation process. Ensure your PC has a functional network adapter and that MSXML software is installed.
- Power off all network hardware.
- Insert the provided CD into your PC.
- Click Start to begin the installation.
- Follow the on-screen instructions to verify your network adapter and configure your Internet connection.
Configuring Security
During setup, you will be prompted to configure security settings:
- Administration Password: Change the default password (admin). Use a mix of letters, numbers, and symbols (8-30 characters).
- SSID: Set a unique name for your wireless network.
- Security Type: WPA2 is recommended for best security. If your devices do not support WPA2, choose WPA.
Device Features
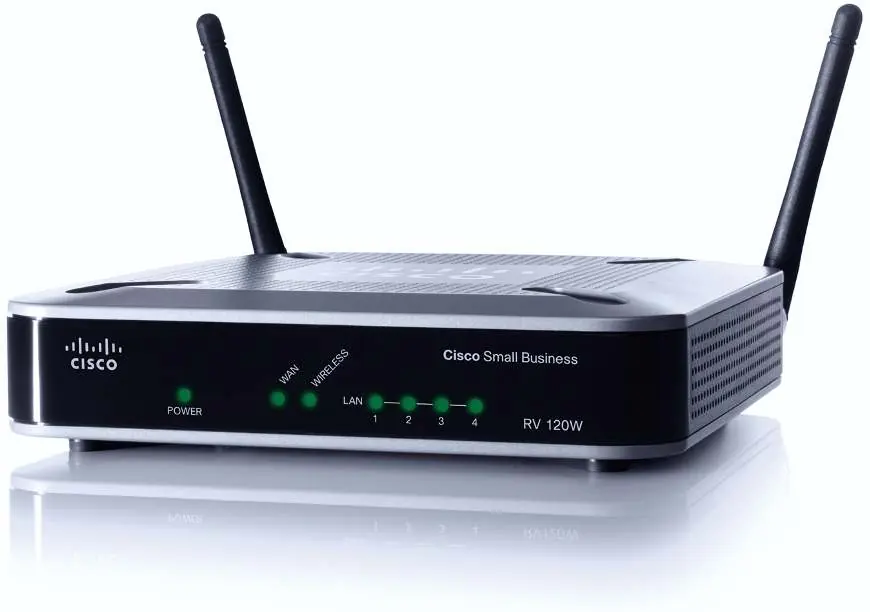
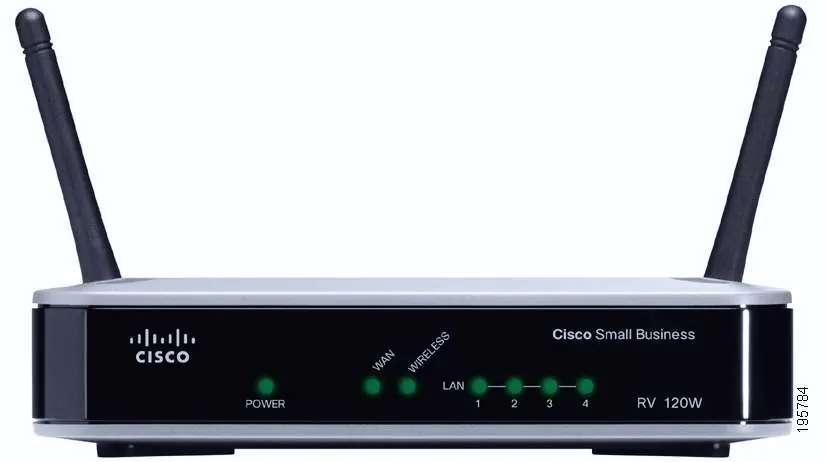
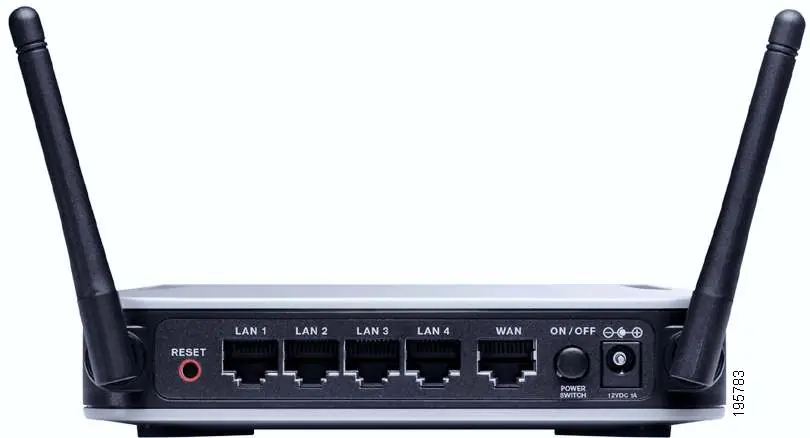
The front panel features LEDs for Power, WAN, Wireless, and LAN (1-4). The back panel contains the Reset button, LAN ports, WAN port, Power switch, and Power port.
Reset Button Functions
- Reboot: Press for less than 5 seconds to reboot the device.
- Factory Reset: Press and hold for 10 seconds to restore factory defaults and clear all settings.
Troubleshooting and Support
If you experience issues, ensure all cables are securely connected and the power is on. For further assistance, visit the Cisco Small Business Support Community at www.cisco.com/go/smallbizsupport or access online technical support at www.cisco.com/support.
Official resources from the manual
Manufacturer information
Cisco Systems, Inc.
Practical help
Common problems
Cannot connect to the Internet
Ensure the WAN cable is connected to your modem and the modem is powered on. Verify your ISP settings in the Setup Wizard.
Forgot administrator password
Perform a factory reset by holding the Reset button on the back panel for 10 seconds. Note that this clears all custom settings.
Setup Wizard fails to detect network adapter
Ensure your PC's network adapter is enabled and functional. Check that Microsoft Core XML Services (MSXML) is installed on your PC.
Before use
- Functional Internet connection (Broadband DSL or cable modem)
- Ethernet cable for WAN connection
- PC with a functional Ethernet network adapter
- Web browser (Internet Explorer 6.0+, Firefox 3.0+, or Safari 3.0+)
- Software CD (provided)
Specs in practice
- LAN Ports (1-4)
- Connects local network devices like PCs, printers, or switches.
- Reset Button
- Used for rebooting (<5s) or restoring factory defaults (10s).
- Power Switch
- Physical button to turn the unit on or off.
Images and diagrams
- Front Panel: Displays status LEDs for Power, WAN, Wireless, and LAN ports.
- Back Panel: Contains physical ports (LAN, WAN), power input, power switch, and reset button.
Model compatibility
- Setup Wizard is supported on Windows 2000, XP, Vista, and 7.
- Requires MSXML software installed on the PC for the Setup Wizard.

Manual page author
Emily Carter
User documentation editor
Prepares concise manual descriptions and highlights the most useful setup, operation, and maintenance information for readers.