Automotive / Towing Accessories
Installation Guide for CURT Class 2 Trailer Hitch 12198
Step-by-step installation instructions for the CURT Class 2 Trailer Hitch (Model 12198) designed for the Subaru Forester. Includes required tools, hardware specifications, fishwire techniques, and torque settings.
Table of contents
Manual images
Click an image to enlargeQuick guide from the manual
This installation guide is for the CURT Class 2 Trailer Hitch, model 12198, specifically for the Subaru Forester (2019-Current). Installation is rated as moderate difficulty, with an estimated time of 30 minutes for professionals and 60 minutes for DIY installers. Two people are recommended for the installation process. Always wear safety glasses during installation.
Tools required
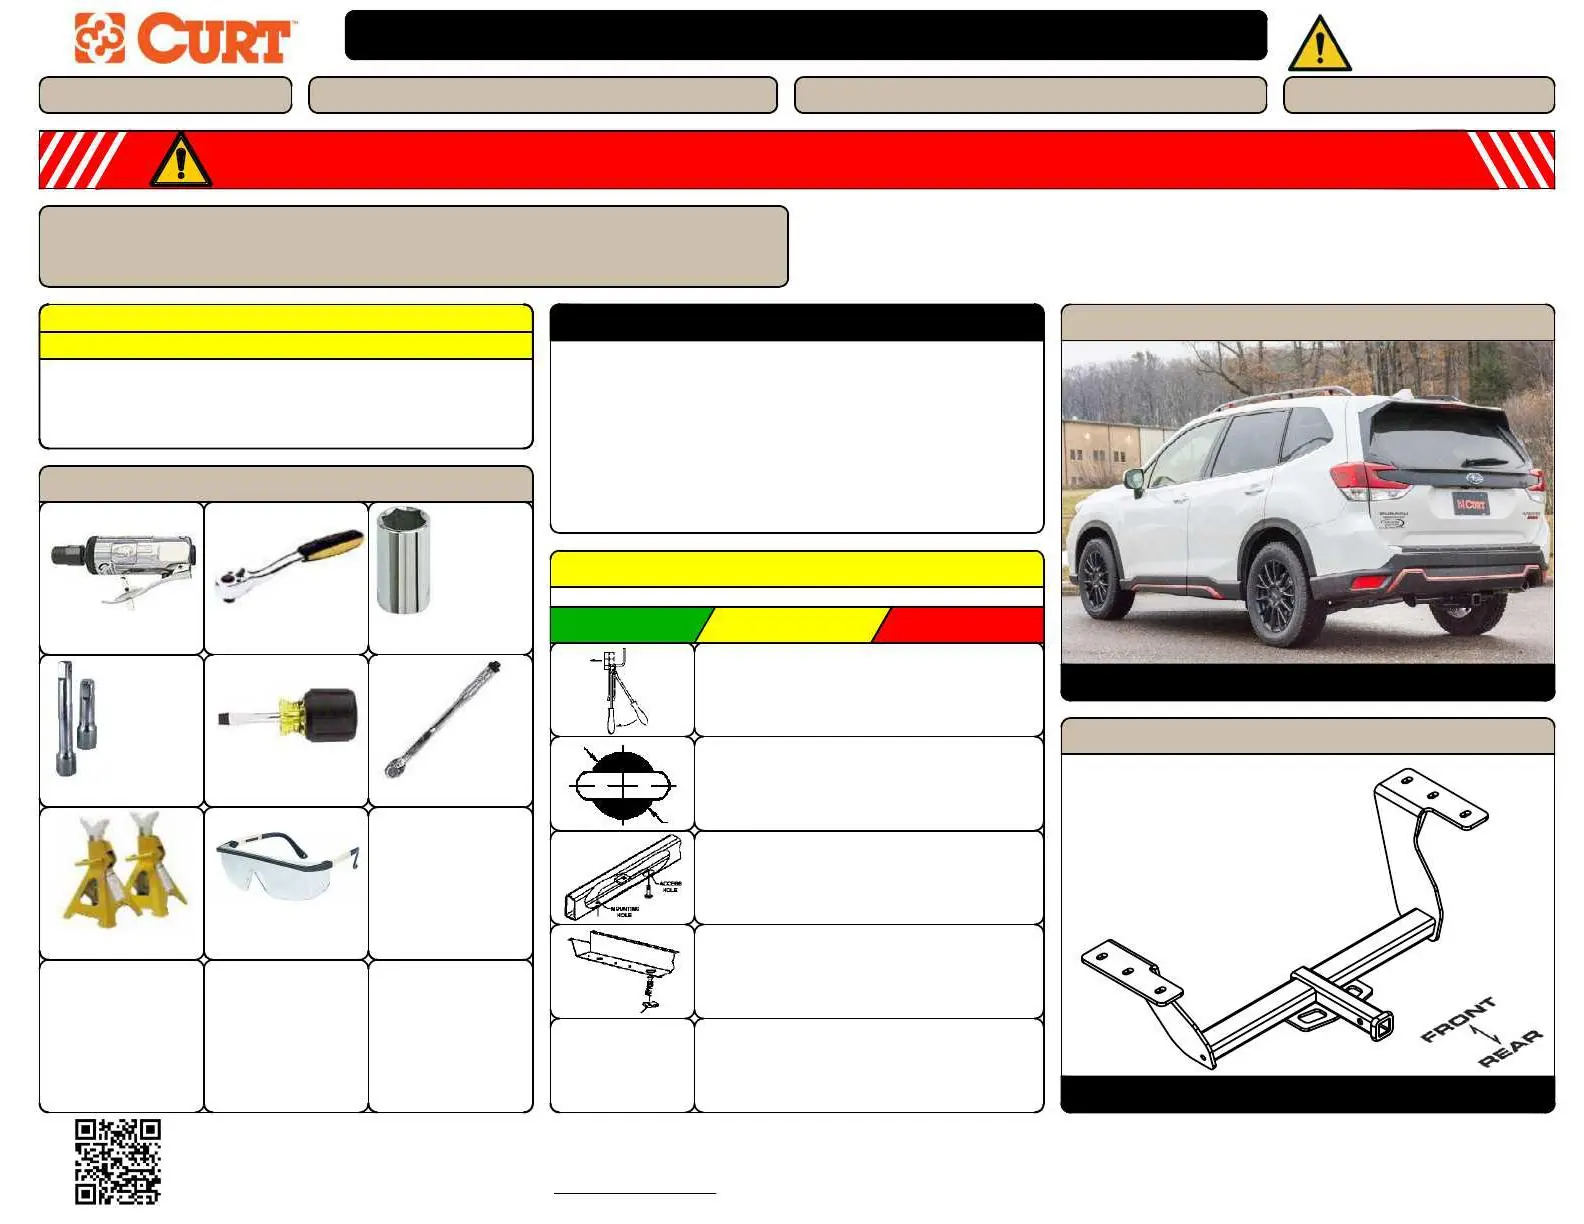
- Die grinder
- Ratchet
- 10mm and 3/4" socket
- 6" socket extension
- Screwdriver
- Torque wrench
- Jack stands
- Safety glasses
Installation steps
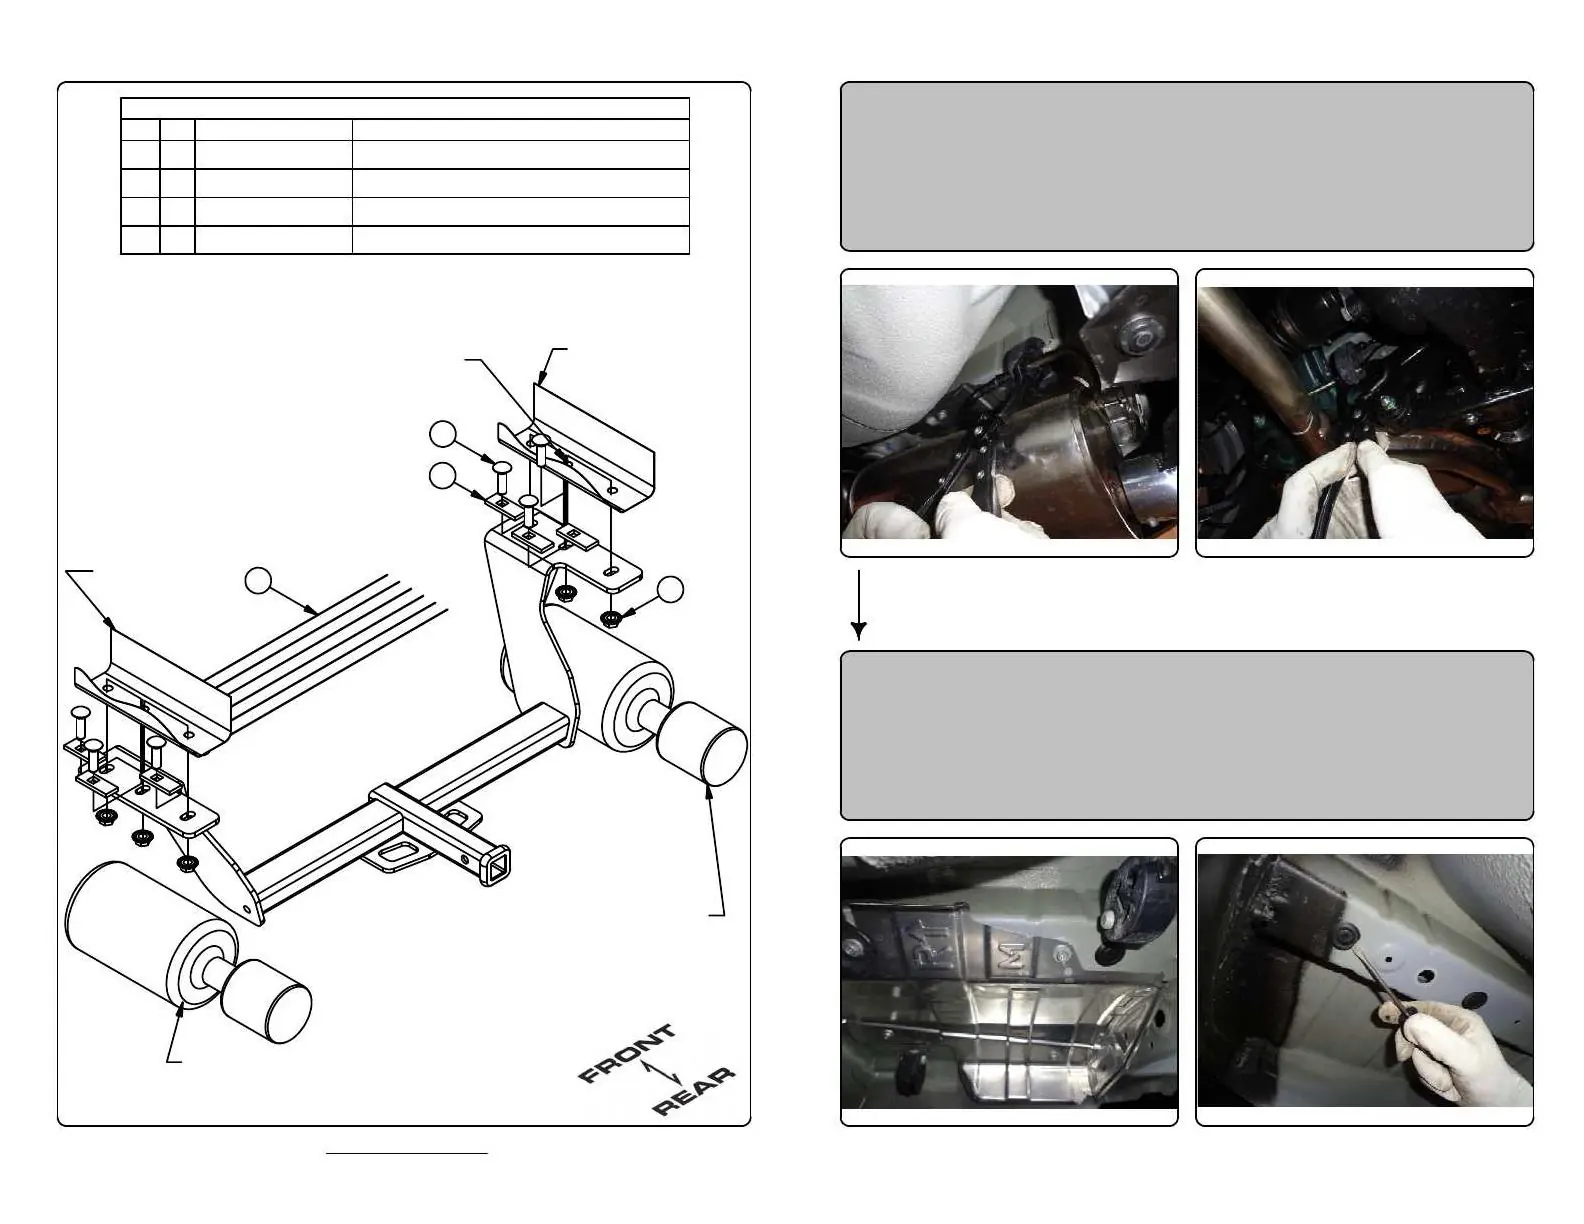
- Exhaust removal: Remove (2) exhaust hangers from the passenger side muffler and (1) exhaust hanger from the center front of the vehicle. For dual exhaust vehicles, remove (2) exhaust hangers from the driver side muffler as well. Support the lowered exhaust.
- Panel removal: Remove (4) heat shield attachments using a Phillips head screwdriver or 10mm socket. Remove the underbody panel from the driver side frame rail by removing (2) screws and (5) push fasteners. Save these parts for reinstallation.
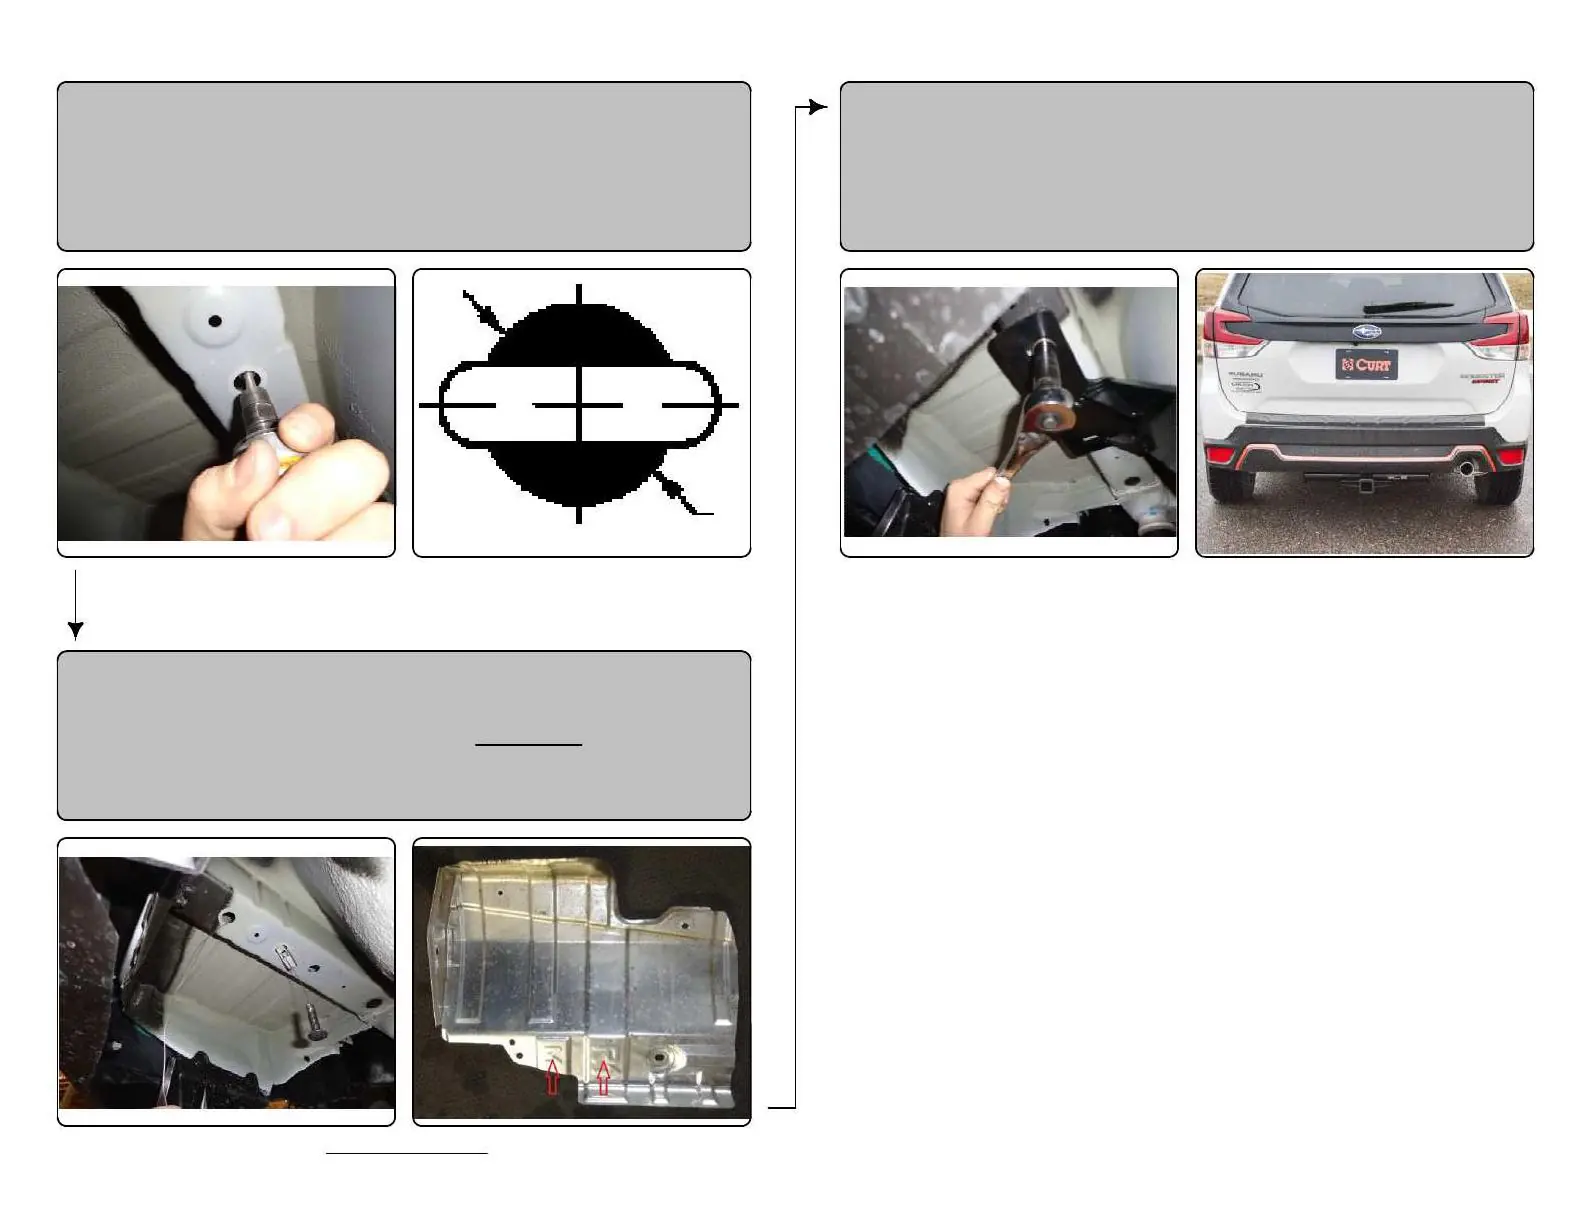
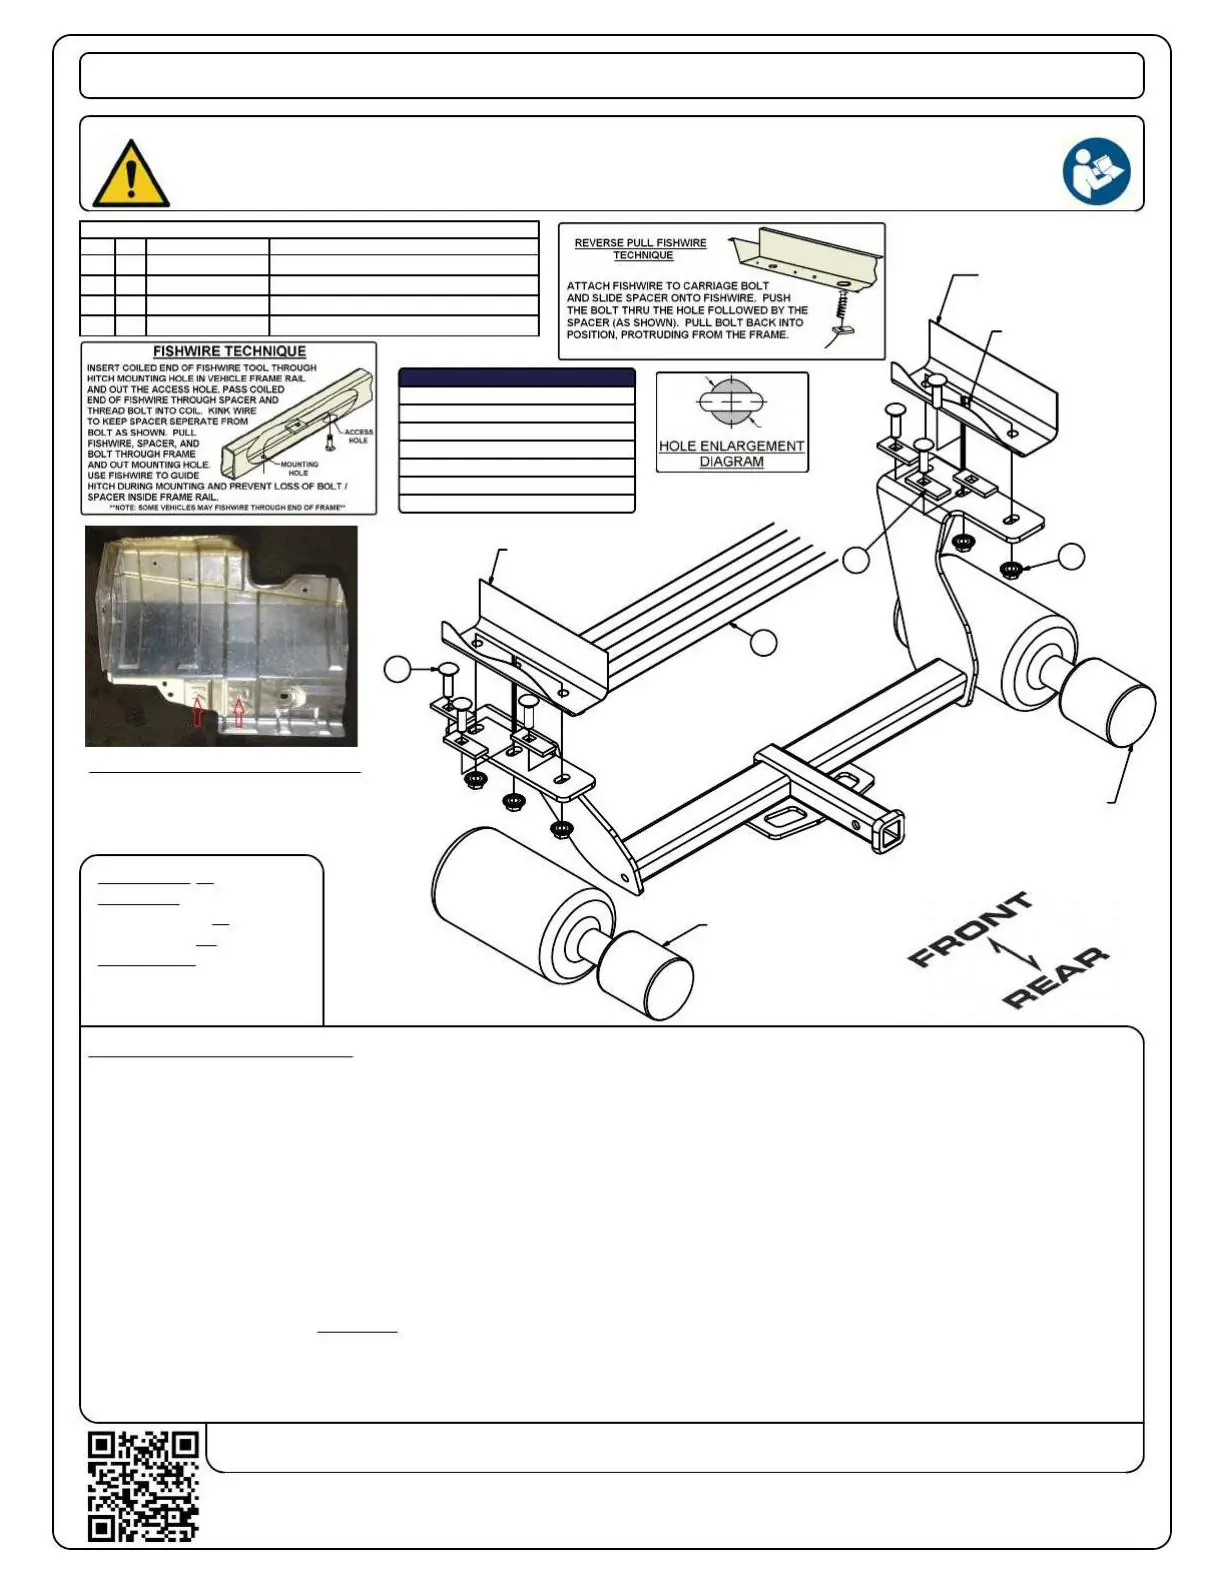
- Hole preparation: Remove (3) hole plugs from each frame rail. Enlarge the center hole on each frame rail to approximately 1 1/8" to allow the mounting hardware to pass through.
- Fishwiring: Fishwire the 1/2" carriage bolt and spacer through the front and rear frame holes in both frame sides. Reverse fishwire the center hole on both sides. Optional: Drill 5/8" clearance holes in the heat shield using dimples as guides and reinstall the heat shield without the rear-most frame attachment.
- Final assembly: Raise the hitch into place and secure it to the frame using the provided 1/2" hardware. Torque all 1/2" hardware to 110 ft-lbs. Reinstall the underbody panel and exhaust hangers removed in previous steps.
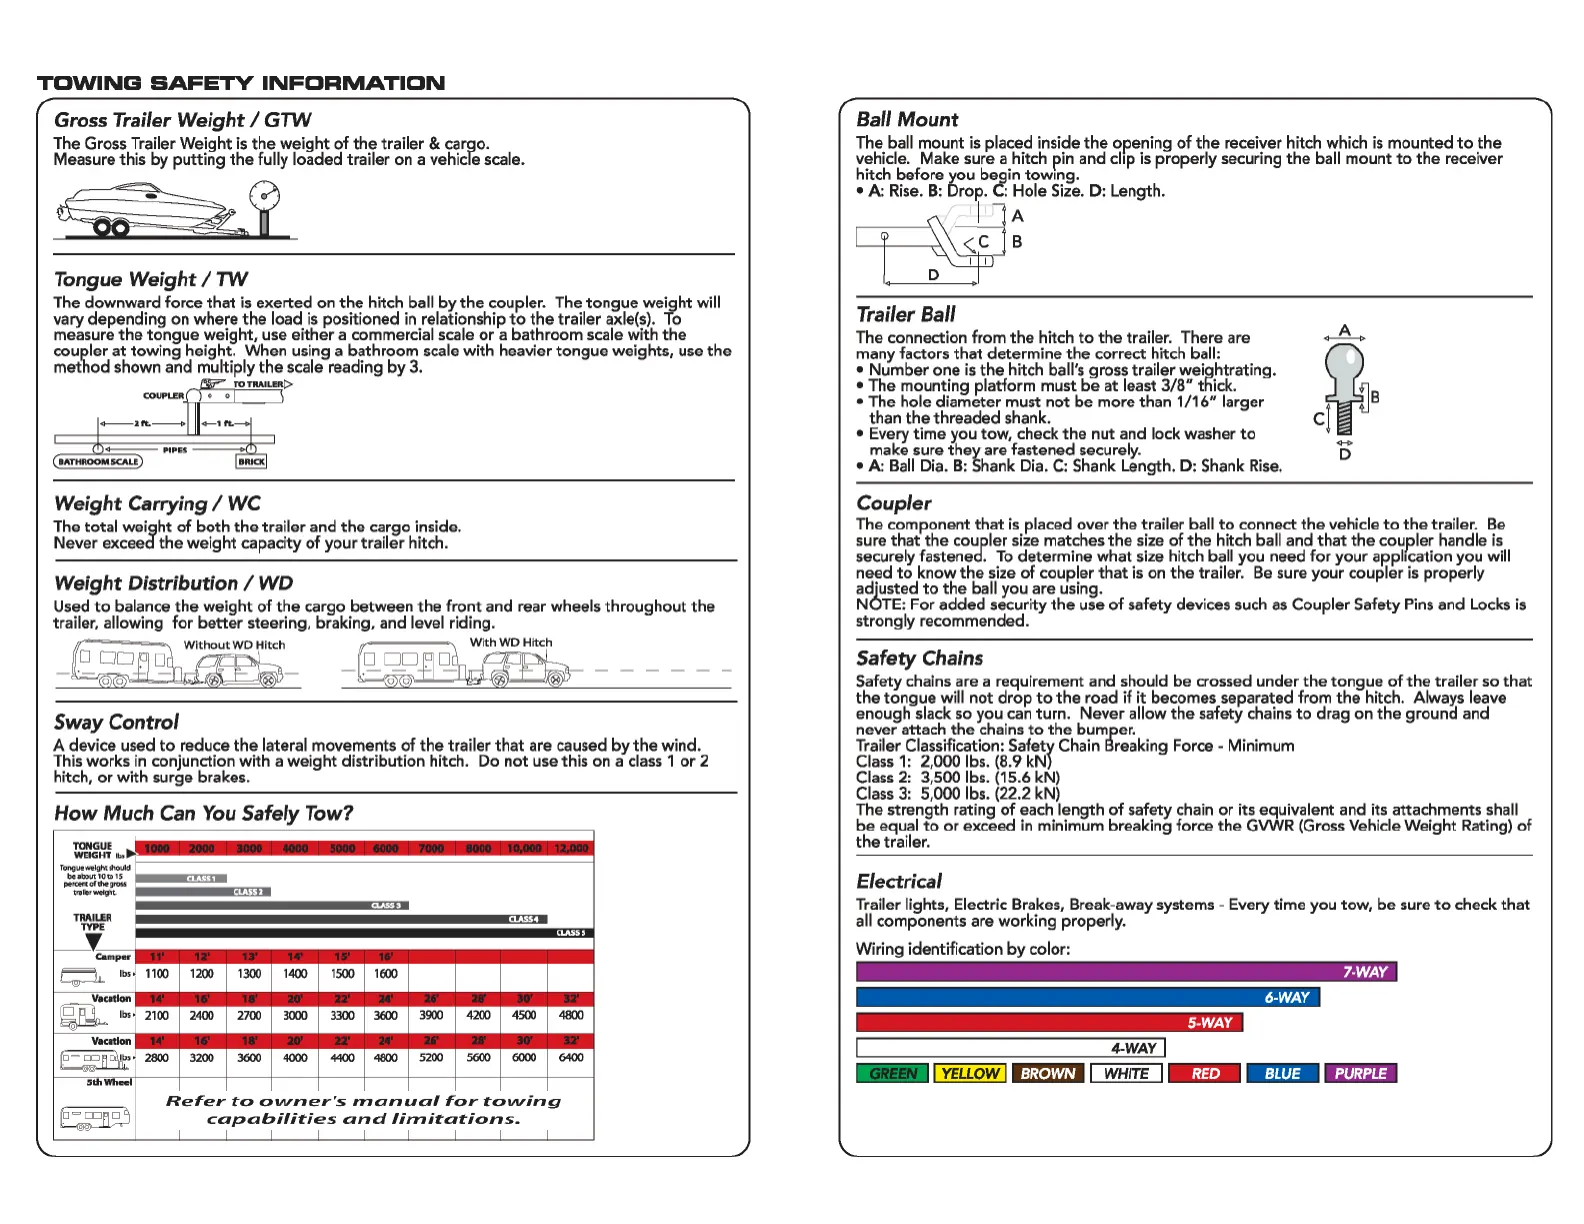
Towing safety information
Always adhere to the vehicle manufacturer's recommended towing capacity. The gross load capacity for this hitch is 3500 lbs trailer weight and 350 lbs tongue weight. Periodically check the receiver hitch to ensure all fasteners are tight and all structural components are sound.
Practical help
Common problems
Difficulty accessing mounting holes
Remove the hole plugs from the frame rails and enlarge the center hole to 1 1/8".
Heat shield interference
Drill 5/8" clearance holes in the heat shield using the provided dimples as guides.
Exhaust in the way
Remove the exhaust hangers to lower the muffler and support it during installation.
Before use
- Wear safety glasses at all times
- Verify vehicle compatibility (Subaru Forester 2019-Current)
- Ensure two people are available for the installation
- Gather all required tools (die grinder, torque wrench, etc.)
- Check that all fasteners are tight and structural components are sound
Specs in practice
- Trailer Weight
- Maximum weight of the trailer and cargo: 3500 lbs.
- Tongue Weight
- Maximum downward force on the hitch: 350 lbs.
- Torque Specification
- Tighten all 1/2" hardware to 110 ft-lbs.
Images and diagrams
- Fishwire technique: Use the provided wire to pull the carriage bolt and spacer through the frame holes.
- Hole enlargement: The center hole must be enlarged to 1 1/8" to allow hardware passage.
Model compatibility
- Designed for Subaru Forester (2019-Current).
- Not for use on vehicles exceeding manufacturer's towing capacity.

Manual page author
David Miller
Documentation analyst
Organizes user manual content into clear summaries, with attention to model details, product context, and everyday usability.