Computers / Laptops
DELL Inspiron 5590 Laptop User Guide
Comprehensive setup and technical specifications guide for the DELL Inspiron 5590 laptop, covering hardware features, ports, keyboard shortcuts, and system configuration.
Table of contents
Manual images
Jump to the sectionProduct Overview
The DELL Inspiron 5590 is a high-performance laptop designed for versatility and productivity. This guide provides essential information for setting up the device, understanding its hardware components, and utilizing its technical features.
Initial Setup
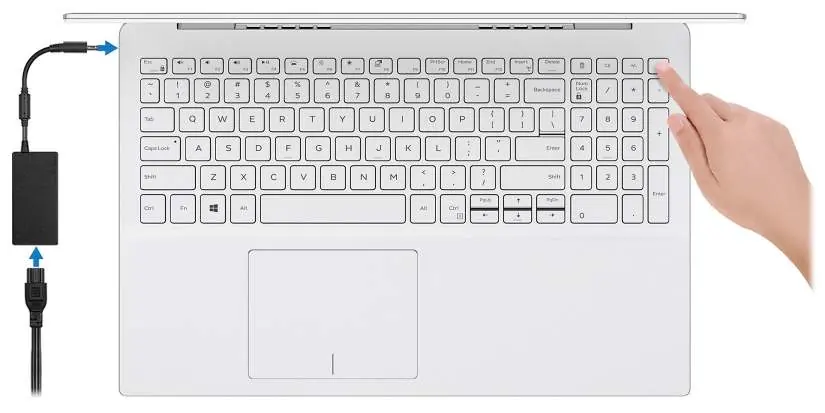
To begin using your Inspiron 5590, connect the power adapter to the power-adapter port and press the power button. If the battery is in power-saving mode, connecting the power adapter is required to wake the system. Follow the on-screen instructions to complete the operating system setup for Windows or Ubuntu. It is recommended to connect to a network during setup to ensure all necessary updates are installed.
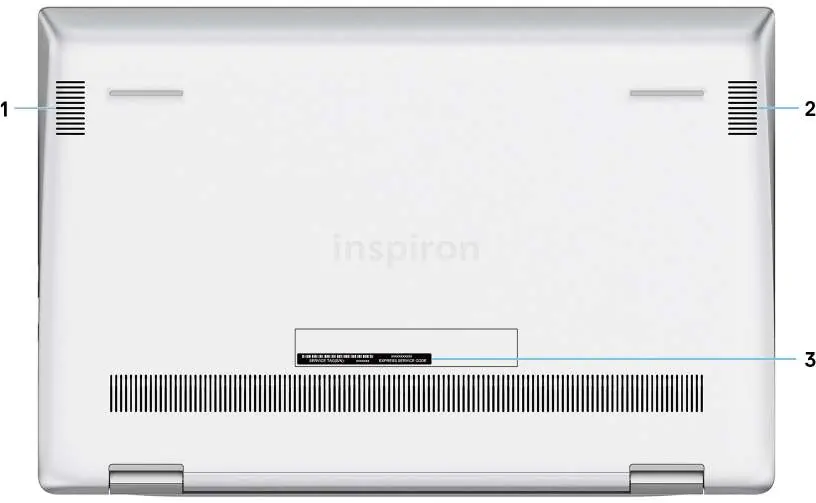
Hardware Features and Ports
The laptop is equipped with a variety of ports for connectivity:
- Right side: Includes a microSD-card slot, a headset port, a USB 2.0 port, and a wedge-shaped security-cable slot.
- Left side: Features the power-adapter port, an HDMI 1.4b port, and two USB 3.1 Gen 1 ports.
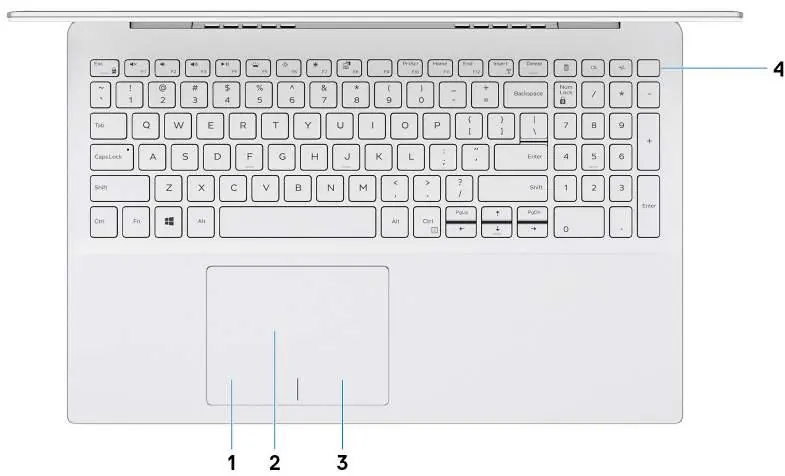
- Base: Contains the touchpad with integrated left/right-click areas and an optional power button with an integrated fingerprint reader.
- Display: Features an HD RGB camera with dual-array microphones for video conferencing.
Technical Specifications
The Inspiron 5590 supports 10th Generation Intel Core i3, i5, or i7 processors. Memory configurations include a single SODIMM slot supporting dual-channel DDR4 RAM at 2666 MHz, with a maximum capacity of 16 GB (or 20 GB in specific configurations). Storage options are flexible, supporting 2.5-inch hard drives and M.2 solid-state drives, with optional Intel Optane memory for enhanced performance.
Keyboard and Shortcuts
The keyboard features a standard QWERTY layout with optional backlighting. Function keys (F1-F12) provide multimedia controls. Users can toggle between primary function key behavior and multimedia controls using the Fn + Esc combination or by adjusting settings in the BIOS setup program.
Maintenance and Support
To maintain system health, use the pre-installed Dell applications such as SupportAssist, which proactively checks hardware and software status. For further assistance, visit www.dell.com/support to access knowledge base articles, drivers, and manuals. You can also contact Dell support directly via www.dell.com/contactdell.
Official resources from the manual
Manufacturer information
Dell Inc.
Practical help
Common problems
Computer does not turn on
Connect the power adapter and press the power button. If the battery is in power-saving mode, this is required to wake the system.
Force shutdown required
Press and hold the power button for 10 seconds to force a shutdown.
Battery reset
Press and hold the power button for 25 seconds to reset the battery.
Cannot connect to DisplayPort device
A USB Type-C to DisplayPort adapter (sold separately) is required to connect a DisplayPort device to the USB Type-C port.
Before use
- Connect the power adapter to the power-adapter port.
- Press the power button to turn on the computer.
- Follow on-screen instructions to complete OS setup.
- Connect to a wireless network for system updates.
- Register your product using the Dell Product Registration app.
Images and diagrams
- The right side includes a microSD slot, headset port, USB 2.0, and security slot.
- The left side includes the power port, HDMI, and two USB 3.1 Gen 1 ports.
- The base features the touchpad and power button (with optional fingerprint reader).
- The display bezel houses the camera and dual microphones.
Model compatibility
- Intel Optane memory requires 7th Gen or higher Intel Core processors and Windows 10 64-bit.
- Intel Optane memory with SSD requires 9th Gen or higher Intel Core processors.
- Bluetooth 5 requires the latest Windows 10 updates.

Manual page author
Michael Turner
Technical manual editor
Reviews PDF manuals for structure, safety notes, and practical product details so readers can find the right information quickly.