General / Other Manuals
Dogtra ARC 1200S Dog Training Collar User Guide
Quick guide for the Dogtra ARC 1200S training collar, covering setup, stimulation levels, charging, and troubleshooting.
Table of contents
Manual images
Jump to the sectionQuick guide from the manual
The Dogtra ARC 1200S is a remote training collar system designed for dog behavior modification. Key operations include turning the transmitter and receiver on/off, adjusting stimulation levels (0-127), and using the pager function. Always ensure the collar is fitted correctly to avoid skin irritation and monitor your dog's reaction to stimulation levels.
Device Overview
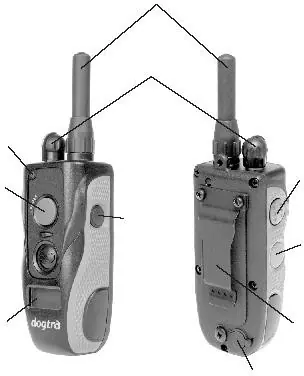
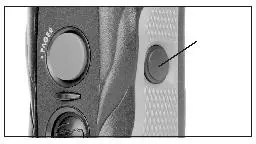
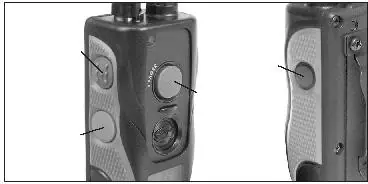
The system consists of a transmitter and a receiver/collar. The transmitter features a rheostat dial for stimulation intensity, a pager button, and buttons for momentary and continuous stimulation. The receiver has a power button and contact points.

Setup and Operation
- Powering On/Off: Press and hold the blue button on the back of the transmitter to turn it on/off. For the receiver, press and hold the power button until the LED turns green (on) or red (off).
- Stimulation: Use the rheostat dial to select levels from 1 to 127. Start at the lowest level and increase gradually based on your dog's response.
- Modes: The transmitter offers momentary (short pulse) and continuous (up to 12 seconds) stimulation.
Fitting the Collar
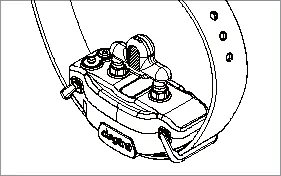
The collar must be tight enough so that the stainless steel contact points are pressed firmly against the dog's skin. You should be able to fit one or two fingers between the contact points and the dog's skin. The receiver should be positioned on the side of the trachea.
Charging
Charge the device fully before first use. Lift the rubber cover on the charging port, connect the charger, and wait for the LED to turn green. Always replace the rubber cover after charging to maintain water resistance.
Maintenance and Safety
Check the dog's neck regularly for signs of irritation. If irritation occurs, remove the collar and consult a veterinarian. Do not charge the device near flammable materials. For technical support, contact +4 031 229 5337 or visit www.zgarzi-electro.ro.
Official resources from the manual
Manufacturer information
Dogtra
Practical help
Common problems
Dog does not respond to stimulation
Ensure the receiver is on, the collar is tight enough for contact, or increase the stimulation level. If using long hair, use the included contact extensions.
Test light works, but no stimulation felt
Test on your fingertips for higher sensitivity, ensure the battery is charged, or re-code the receiver to the transmitter.
Reduced range
Avoid touching the antenna, as this significantly reduces range. Ensure the transmitter is held away from your body and clear of obstacles like trees or buildings.
Device does not hold charge
Clean the charging port of debris, ensure the metal pin is straight, or replace the battery if the unit is older than two years.
Before use
- Charge the device fully before the first use.
- Ensure the receiver and transmitter are properly paired.
- Check that the collar is fitted correctly (one or two fingers space).
- Verify the contact points are touching the dog's skin.
- Test the stimulation level using the provided test light.
Specs in practice
- Stimulation Levels (0-127)
- Adjustable intensity range to suit the dog's temperament and sensitivity.
- LED Indicators
- Green (fully charged), Yellow (medium), Red (needs charging).
Images and diagrams
- Transmitter: Shows antenna, rheostat, pager button, and stimulation buttons.
- Receiver: Shows contact points, charging port, and power button.
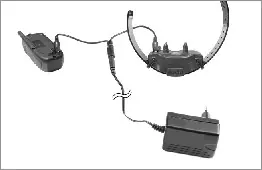
- Charging: Illustrates connecting the charger to both units using the splitter cable.
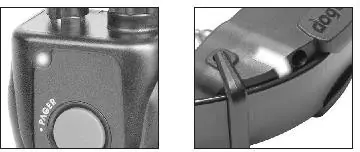
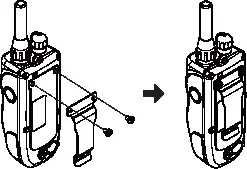
- Belt Clip: Shows the assembly process for attaching the clip to the transmitter.
Model compatibility
- The system can be expanded to accommodate up to 4 dogs.
- The car charger is designed for 10V systems.
- The European charger is designed for 230V outlets.

Manual page author
Emily Carter
User documentation editor
Prepares concise manual descriptions and highlights the most useful setup, operation, and maintenance information for readers.