Power / EV Chargers
Easee Charge Lite User Guide
Quick user guide for the Easee Charge Lite electric vehicle charger. Learn how to charge, understand LED status indicators, use the Easee App, and perform basic maintenance.
Table of contents
Manual images
Click an image to enlargeQuick guide from the manual
Before using the Easee Charge Lite, ensure the following requirements are met:
- The product and electrical connection must be installed by an authorized electrician.
- The charger must be properly configured.
- The software must be up to date.
- If access control is enabled, unlock it using a registered RFID tag or via the Easee App.
How to charge
- Check the charging cable and connector for damage, foreign objects, or water ingress.
- Connect the charging cable to the Charging Robot and your electric car. The charging process will start and adapt automatically to the car and available energy.
Smart charging: Some operators offer smart charging, which delays charging based on electricity prices. When active, the LED strip is lit blue, and charging will not start until the operator's criteria are met.
Apps and interfaces
- Easee App: Provides full control and status over your charger. Intended for everyday use via the Easee Cloud.
- Local interface: Intended for local operations when no internet is available.
- Easee Portal: A tool for site owners, installers, and administrators to manage multiple products and sites.
Features
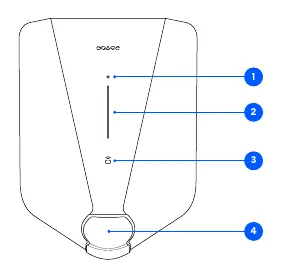
- Touch button: Used to activate the local interface.
- Light strip: Communicates the status of the Charging Robot at all times.
- RFID area: Integrated reader for access control and user identification.
- Type 2 socket: Universal socket for charging any electric vehicle. Note: Adaptors should not be used.
Charging Robot interface
The light strip indicates the status of the charger:
- White (constant, bottom): Standby.
- White (constant): Car connected.
- White (pulsating): Charging in progress.
- Blue (constant): Smart charging enabled.
- Blue (pulsating): Smart charging in progress.
- White (flashing): Waiting for RFID authentication.
- Red (flashing with sound): Critical error. Disconnect cable and contact support.
- Red (constant): General error. Unplug and replug the charging cable.
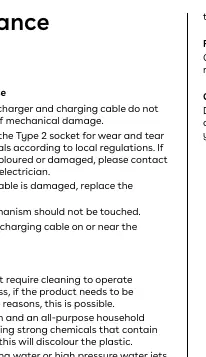
Maintenance
- General: Visually inspect the Type 2 socket for wear and tear. If the charging cable is damaged, replace it. Do not touch the locking mechanism.
- Cleaning: Use a damp cloth and an all-purpose household cleaner. Avoid strong chemicals containing oil or alcohol. Do not use running water or high-pressure jets.
- Serviceable parts: The Chargeberry (complete unit), front cover socket cap, and front cover can be exchanged. Do not open or disassemble the Chargeberry.
Practical details
The device is covered by a 3-year limited warranty. The charger is designed for residential use only and must use an individual's private connection to the electricity grid. It is not MID compliant.
Manufacturer information
Easee
Practical help
Common problems
Red flashing light with warning sounds
Critical error. Turn off power, remove charging cable, and contact customer support. The charger is blocked and must be replaced.
Red constant light
General error. Unplug the charging cable and replug it. If the light persists, check the Easee App or knowledge base.
Red pulsating light
Abnormal temperature detected. The charger has entered safe mode.
Yellow flashing light (bottom only)
The charger is waiting to be configured. Consult an authorized electrician.
Before use
- Ensure installation was performed by an authorized electrician.
- Verify the charger is properly configured.
- Ensure the software is up to date.
- Unlock access control via RFID tag or Easee App if enabled.
- Inspect the charging cable and connector for damage or water.
Specs in practice
- Operating temperature
- -30 °C to +40 °C
- Type designation
- Easee AC Charger Platform CB-A3-2
Images and diagrams
- Touch button: Activates the local interface.
- Light strip: Indicates charger status.
- RFID area: Used for user authentication and access control.
- Type 2 socket: Universal connection for electric vehicles.
Model compatibility
- Not MID compliant.
- Designed strictly for residential use.
- Do not use adaptors on the charger or charging cable.
- Charging cable must have appropriate sockets on each end.

Manual page author
David Miller
Documentation analyst
Organizes user manual content into clear summaries, with attention to model details, product context, and everyday usability.