Garden / Outdoor Heaters
User Manual for East Oak 1500W Infrared Patio Heater (SPH22002 / TPH22002)
Comprehensive user guide for the East Oak 1500W Infrared Patio Heater. This manual covers installation for both wall-mount (SPH22002) and tower (TPH22002) models, remote control operation, safety guidelines, maintenance, and...
Table of contents
Manual images
Click an image to enlargeQuick Guide
The East Oak 1500W Infrared Patio Heater is designed for both indoor and outdoor use. It features 3 heat settings, 24-hour timing, and an IP65 waterproof rating. The unit is available in two configurations: a wall-mounted version (SPH22002) and a tower version (TPH22002). Always ensure the heater is used by adults only and kept at least 3 feet away from combustible materials.
Safety Guidelines
- Overheating Protection: Do not cover the heater while in use. If the unit overheats, turn it off, unplug it, and remove any obstructions. Wait 5-10 minutes for it to cool before restarting.
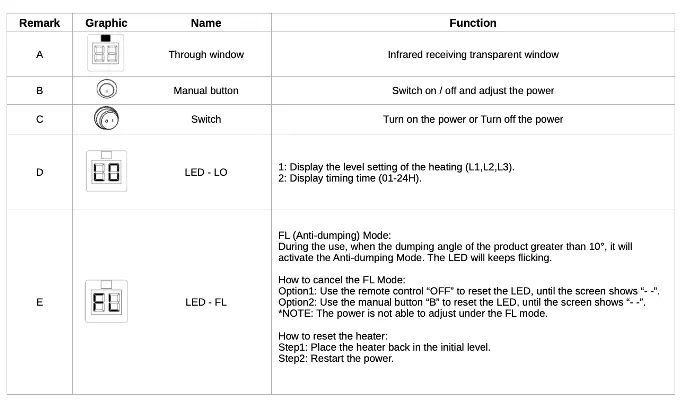
- Tip-over Protection: The heater includes an anti-dumping mode. If the unit tilts more than 10 degrees, it will activate. To reset, place the heater back in an upright position and restart the power.
- Clearance: Keep all combustible items (furniture, curtains, bedding, paper) at least 3 feet away from all sides of the heater.
- Electrical Safety: Connect only to properly grounded 120V outlets. Do not use extension cords or power strips. Do not place the heater immediately below a socket outlet.
Installation
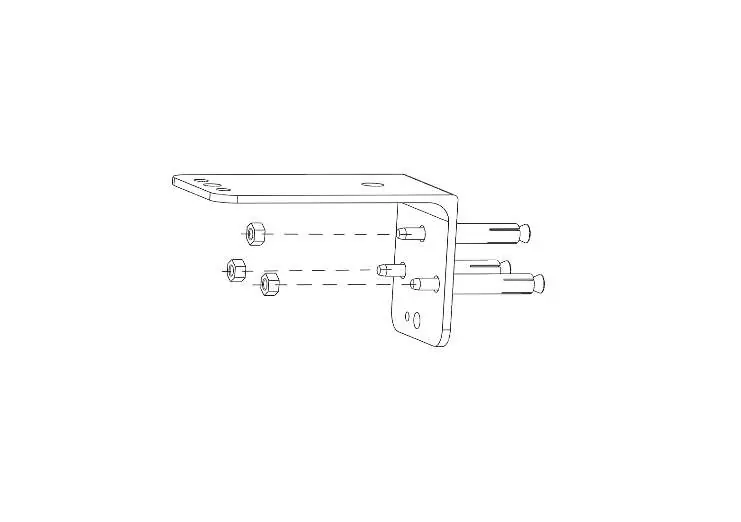
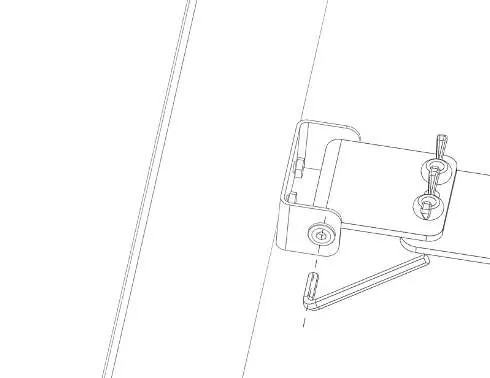
Wall Mount (SPH22002): Inspect all components for damage before assembly. Use the provided L-shaped bracket to mount the unit to the wall using anchor dowels. Connect the heater to the bracket and adjust the angle as required, ensuring the T-nut is tightened securely.
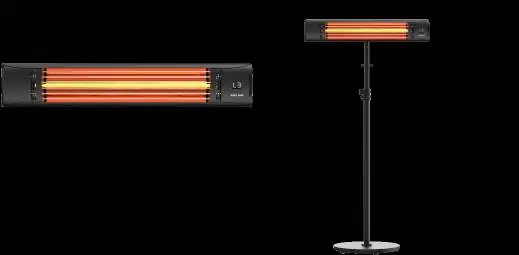

Tower (TPH22002): Place the product vertically on the ground. Ensure it is on a stable, level surface to avoid triggering the tip-over protection.
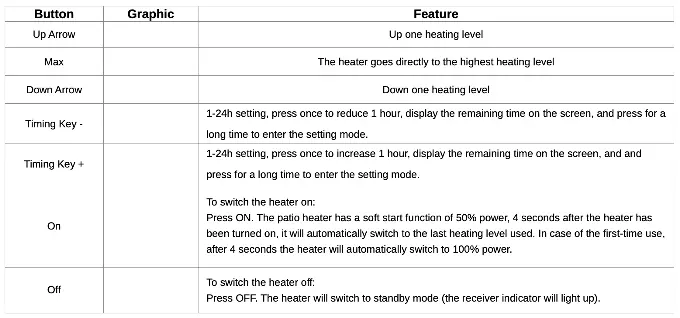
Operation
The heater can be operated using the manual button on the unit or the included remote control. The LED display indicates the heating level (L1, L2, L3) and the timing setting (01-24H). The remote control has a range of 3-4 meters and should be aligned with the receiver for optimal performance.
Maintenance and Storage
- Always unplug the device and allow it to cool completely before cleaning or moving.
- Wipe the exterior with a clean, lint-free cloth or soft bristle brush.
- Do not use abrasive cleaners, rough brushes, or chemical products.
- If the heater will not be used for an extended period, remove the batteries from the remote control.
- Do not move, reroute, or wrap the power cord while the heater is in use.
Grounding Instructions
This heater is compatible with 120-volt sockets. If you must use an adapter to connect a three-blade plug to a two-slot socket, the green grounding extension must be connected to a permanent ground, such as an outlet box. Do not use an adapter if a three-slot socket is available.
Practical help
Common problems
Heater shuts off unexpectedly
Check if the Overheat Protection or Anti-dumping (tip-over) mode has been activated. Ensure the heater is upright and not covered.
Remote control not working
Ensure there is no physical blockage between the remote and the receiver. Check that the 2 AAA 1.5V batteries are installed correctly and have power.
Heater does not turn on
Verify the power cord is securely plugged into a grounded 120V outlet. Check if the circuit breaker has tripped.
Before use
- Inspect the main unit, supply cord, and plugs for any signs of damage.
- Ensure the installation surface is stable and appropriate for the model.
- Verify that the outlet is properly grounded.
- Maintain a 3-foot clearance from all combustible materials.
- Check that the voltage on the nameplate matches your outlet.
Images and diagrams
- The remote control should be pointed directly at the receiver on the heater unit for optimal signal reception.
- The wall mount bracket installation requires securing the L-bracket to the wall with anchor dowels before attaching the heater.
Model compatibility
- Compatible with 120V grounded sockets only.
- Not suitable for use with extension cords or power strips.

Manual page author
David Miller
Documentation analyst
Organizes user manual content into clear summaries, with attention to model details, product context, and everyday usability.