Home Appliances / Cleaning Robots
User Manual for Eureka EEOT 10LS Oven Toaster
Quick guide for the Eureka EEOT 10LS 10-liter oven toaster. Includes setup instructions, operating steps for toasting, safety warnings, and maintenance procedures.
Table of contents
Manual images
Click an image to enlargeQuick guide from the manual
Before using your Eureka EEOT 10LS oven toaster for the first time, it is essential to perform a burn-in process to remove factory residues. Ensure the oven is unplugged and the timer is set to OFF. Wash all accessories in warm, soapy water and dry them thoroughly. Plug the oven in and run it at the highest temperature (250°C) on the toast function for approximately 15 minutes. You may notice minimal smell and smoke during this time; this is normal and harmless.
Safety instructions
- Always use handles or knobs to avoid touching hot surfaces.
- Do not immerse the cord, plug, or oven in water or other liquids.
- Do not let the cord hang over the edge of a table or counter.
- Unplug the appliance when not in use and before cleaning.
- Do not cover the crumb tray or any part of the oven with metal foil, as this may cause overheating.
- Do not clean the interior with metal scouring pads.
- Always wear insulated oven gloves when inserting or removing items.
- The door and outer surfaces may become hot during operation.
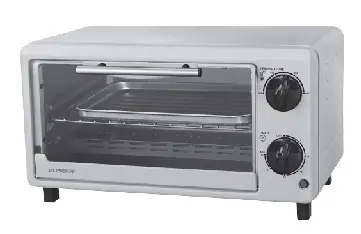
Getting to know your oven
The oven consists of the following main components:

- A: Housing
- B: Front panel
- C: Temperature control knob
- D: Timer
- E: Indicator light
- F: Oven foot
- G: Lower door frame
- H: Upper door frame
- I: Handle
- J: Bake tray
- K: Wire rack
How to toast
The toast function utilizes all heating elements. To operate:
- Set the Temperature Control Knob to the desired temperature.
- Place food on the wire rack in the center of the oven.
- Turn the time control knob to the desired cooking time.
- A bell will ring to signal the end of the cycle.
- When finished, turn the function control to OFF.
Note: The wire rack should be positioned in the middle of the oven with the indentations pointing down.
Cleaning and maintenance
Clean the appliance after every use:
- Remove the plug from the wall socket and allow the oven to cool down completely.
- Clean the baking tray, grille, and removal tool with warm water and a small amount of washing-up liquid. Rinse and dry thoroughly.
- Use a damp cloth to clean the interior and exterior of the oven and the door.
- Never use corrosive or scouring cleaning agents or sharp objects like knives or hard brushes.
- Never immerse the appliance or power cord in water.
Practical help
Common problems
Minimal smell and smoke during first use
This is normal and harmless. It is caused by the burning of protective substances applied to heating elements in the factory.
Oven overheating
Do not cover the crumb tray or any part of the oven with metal foil.
Risk of electric shock during cleaning
Do not clean the inside of the oven with metal scouring pads, as pieces can break off and touch electrical parts.
Before use
- Ensure the oven is unplugged and the timer is set to OFF.
- Wash all accessories (bake tray, wire rack) in hot, soapy water.
- Thoroughly dry all accessories before re-assembling.
- Run the oven at 250°C for 15 minutes to eliminate packing residue.
- Ensure the wire rack is positioned in the middle with indentations pointing down.
Images and diagrams
- The oven features a temperature control knob (C) and a timer (D) on the front panel.
- The bake tray (J) and wire rack (K) are removable accessories for cooking.
- The indicator light (E) shows when the heating element is active.
Model compatibility
- Suitable for toasting 4 to 6 slices of bread, muffins, frozen waffles, or pancakes.
- Use only metal or ovenproof glass containers.

Manual page author
Emily Carter
User documentation editor
Prepares concise manual descriptions and highlights the most useful setup, operation, and maintenance information for readers.