Tools / Drills
User Manual for Fieldmann FDV 10350-A Cordless Drill
Quick guide for the Fieldmann FDV 10350-A cordless drill. Includes setup, battery charging, torque settings, drilling techniques, maintenance, and troubleshooting.
Table of contents
Manual images
Click an image to enlargeQuick guide from the manual
The Fieldmann FDV 10350-A is a cordless drill designed for home use. Before first use, it is recommended to charge the battery for 3-5 hours. Always ensure the battery is removed before changing tools or performing adjustments. The drill features a keyless chuck, adjustable torque settings, and a two-speed switch.
Machine description
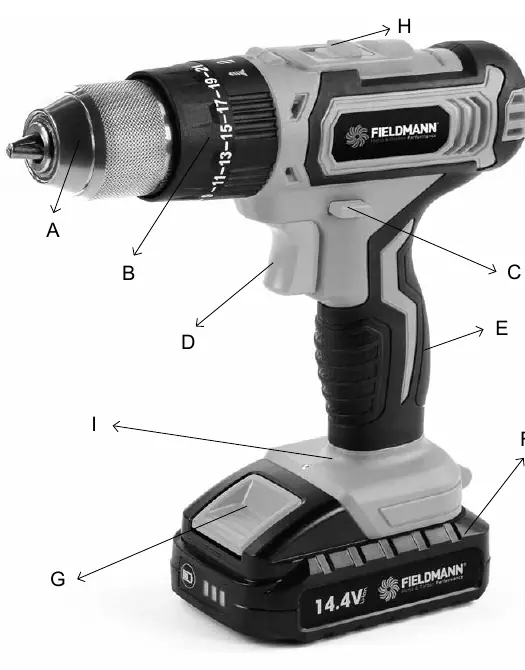
- A: Keyless chuck
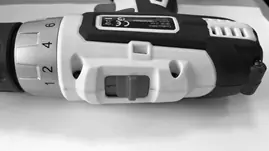
- B: Torque setting ring
- C: Rotation direction switch
- D: Trigger switch
- E: Handle
- F: Battery
- G: Battery release button
- H: 2 speed switch
- I: LED working area light
Putting into operation
Charging the machine
- Remove the battery by pressing the release button and pulling down.
- Place the charger on a table near a power socket.
- Insert the battery into the charger.
- Connect the charger to a power socket. Both red and green lights will be on.
- When fully charged, the green light stays on and the red light turns off.
Drill chuck
To open the chuck, hold the rear part and turn the front part anticlockwise. Insert the tool, then tighten by turning the front part clockwise while holding the rear part.
Torque control
The torque ring has 18 positions plus 1 drilling position. Use low values for small screws and soft materials, and high values for large screws and hard materials. Start with the lowest setting and increase until the desired torque is achieved.
Instructions for proper use
Screwing
Drill a pilot hole before screwing into wood to prevent damage. Use slow rotation speeds for screwing.
Drilling
- Do not use torque control when drilling into wood; use the standard drilling position.
- Use wood bits for wood, and metal bits for metals or plastics.
- Use maximum speed for soft wood and lower speed for hard wood.
LED Battery charge level
When the trigger is pressed, the LED light indicates the charge level. If all diodes are on, the battery is sufficiently charged. If only one is on, the battery is nearly flat.
Maintenance and storage
- Clean plastic parts with a soft cloth and lukewarm water. Do not use aggressive solvents.
- Do not clean under running water or submerge the tool.
- Store in a dry location away from heat sources.
- Regularly check for worn or damaged parts.
Troubleshooting
- Product does not start: Check power supply or battery connection.
- Product does not reach full power: Check for low voltage, blocked air vents, or unsuitable extension cord.
- Unsatisfactory result: Drill bit may be dull or unsuitable for the material.
- Excessive vibration or noise: Drill bit may be dull or damaged.
Technical specifications
- Nominal voltage: 14.4V
- Idling speed: 0-350 / 0-1400 rpm
- Battery: 1.4Ah Li-ion
- Torque: 19+1 positions
- Charging time: 3-5 hours
Manufacturer information
Fieldmann
Practical help
Common problems
Product does not start
Check if the battery is connected properly and charged. If the issue persists, consult a specialist.
Product does not reach full power
Ensure the extension cord is suitable, check for low voltage, or clear blocked air vents.
Unsatisfactory drilling results
The drill bit may be dull or not suitable for the workpiece material. Replace with a proper bit.
Excessive vibration or noise
The drill bit is likely dull or damaged. Replace with a new one.
Before use
- Charge the battery fully (3-5 hours for the first charge).
- Ensure the drill bit is securely fastened in the chuck.
- Check that the rotation direction switch is set correctly.
- Secure the workpiece to a workbench.
- Verify the battery is properly inserted.
Specs in practice
- Nominal voltage
- 14.4V DC power supply.
- Idling speed
- 0-350 rpm (low gear) / 0-1400 rpm (high gear).
- Charging time
- 3-5 hours for a full charge.
Images and diagrams
- A: Keyless chuck for holding drill bits.
- B: Torque ring to adjust screwing strength.
- C: Switch for forward/reverse rotation.
- D: Trigger switch to control speed and start/stop.
- H: 2-speed switch on top of the drill.
Model compatibility
- Use only the battery and charger supplied with this tool.
- Not designed for professional use.
- Do not use in explosive environments or with flammable materials.

Manual page author
David Miller
Documentation analyst
Organizes user manual content into clear summaries, with attention to model details, product context, and everyday usability.