Lighting / Decorative Lighting
User Manual for Gainsborough 20PC Solar Bulb String Lights K337
Quick guide for Gainsborough 20PC Solar Bulb String Lights (K337). Includes setup, charging instructions, battery replacement, and maintenance tips.
Quick answers from the manual
Quick answer
- To operate, set the switch on the back of the solar case to 'ON' and charge in direct sunlight for at least 8 hours. The lights will automatically turn on at night. p. 1
Key actions
- Battery Replacement p. 2
First start
- Remove protective film, set switch to ON, and charge for 8 hours in direct sunlight. p. 1
Problems and fixes
Light does not turn on
Check switch position, ensure panel is not shaded, and verify it is not near other light sources.
p. 1Maintenance and reset
- Clean solar panel with a soft sponge every couple of weeks. p. 1
Technical specifications
| Parameter | Value | Meaning | Pages |
|---|---|---|---|
| Battery | 1x AA 1.2v 600Mah, Ni-MH, Rechargeable | Required battery type for replacement | p. 1, 2 |
Where to find it in the PDF
- Operation and Maintenance p. 1
- Battery Replacement and Disposal p. 2
Table of contents
Manual images
Click an image to enlargeQuick guide from the manual
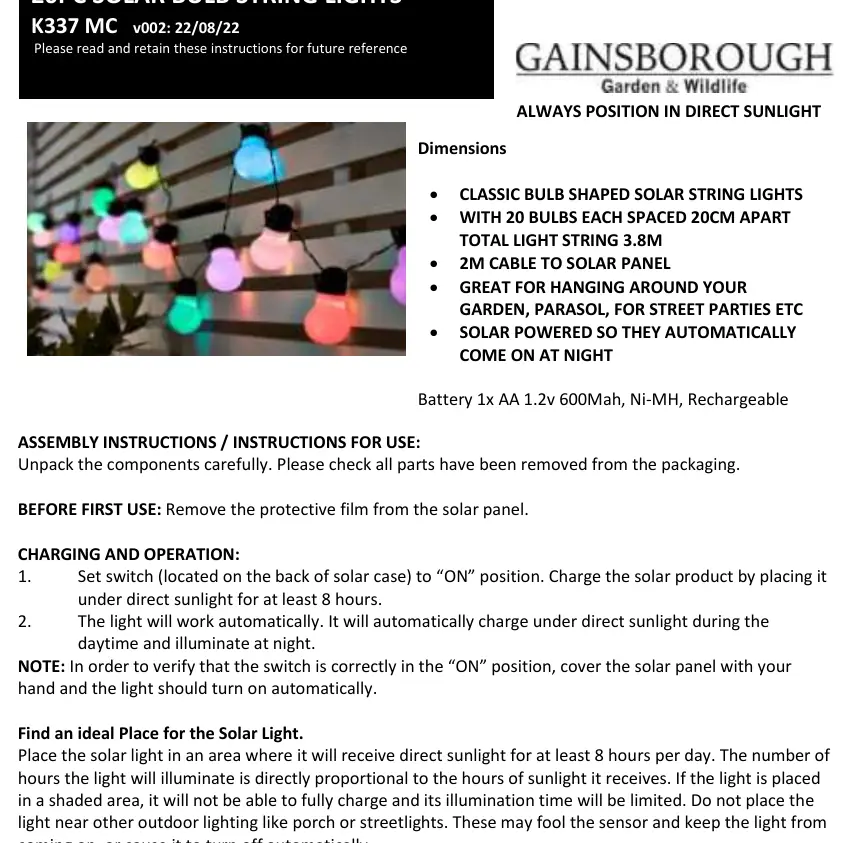
The Gainsborough 20PC Solar Bulb String Lights are designed for outdoor use. To ensure proper operation, the solar panel must be placed in an area with direct sunlight for at least 8 hours per day. The lights feature an automatic sensor that turns them on at night and charges them during the day. If the lights fail to turn on, ensure the switch is in the ON position and that the panel is not obstructed by shade or other artificial light sources.
Assembly and Operation
Before first use: Remove the protective film from the solar panel.
- Locate the switch on the back of the solar case.
- Set the switch to the ON position.
- Place the solar product in direct sunlight for at least 8 hours to charge.
- The light will work automatically, charging during the day and illuminating at night.
Verification: To verify the switch is in the ON position, cover the solar panel with your hand; the light should turn on automatically.
Placement
For optimal performance, place the solar light in an area receiving direct sunlight for at least 8 hours daily. Illumination time is directly proportional to the amount of sunlight received. Avoid placing the light near other outdoor lighting, such as porch or streetlights, as this may interfere with the sensor and prevent the lights from turning on.
Battery Replacement
If the solar product does not light up after 8–12 months of use, the rechargeable battery may need replacement.

- Unscrew the battery compartment cover using a Phillips head screwdriver.
- Remove the exhausted battery.
- Install one new AA 1.2v 600mAh Ni-MH rechargeable battery, ensuring correct +/- polarity.
- Replace the battery compartment cover, screw it back into position, and ensure it is properly sealed.
- Charge the new battery in direct sunlight for at least 8 hours.
Care and Maintenance
- Clean the solar panel with a soft sponge every couple of weeks.
- Regularly check that all connectors are tight and that no water is entering the unit.
Safety and Disposal
- Keep batteries away from children and pets.
- Do not mix used and new batteries.
- Remove batteries if the product is left unused for long periods.
- Never dispose of batteries in a fire.
- Dispose of packaging and batteries in accordance with local recycling regulations.
Manufacturer information
Gainsborough
Practical help
Common problems
Light does not turn on at night
Ensure the switch on the back of the solar case is set to 'ON'. Verify the solar panel is not in a shaded area or near other artificial lights (porch/streetlights) that may interfere with the sensor.
Light performance is weak or does not work after 8-12 months
The rechargeable battery may be worn out. Replace with a new 1x AA 1.2v 600mAh Ni-MH rechargeable battery.
Before use
- Remove the protective film from the solar panel
- Set the switch on the back of the solar case to 'ON'
- Charge the unit in direct sunlight for at least 8 hours
Specs in practice
- String Length
- 3.8m total length with 20 bulbs spaced 20cm apart
- Cable Length
- 2m cable from the lights to the solar panel
Images and diagrams
- The solar panel unit features an ON/OFF switch on the back.
- The battery compartment is secured with screws and requires a Phillips head screwdriver to open.
Model compatibility
- Requires direct sunlight for charging; shaded areas will limit illumination time.
- Do not place near other outdoor lighting as it may fool the sensor.

Manual page author
David Miller
Documentation analyst
Organizes user manual content into clear summaries, with attention to model details, product context, and everyday usability.