Documents / Warranty Safety
User Manual for Garmin Rally 110/210 Power Meter Pedals
Quick guide for Garmin Rally 110/210 power meter pedals. Learn how to install, pair, calibrate, charge, and maintain your pedals for accurate power data.
Table of contents
Manual images
Jump to the sectionQuick guide from the manual
The Garmin Rally 110/210 pedals are shipped in travel mode to conserve battery. Before first use, you must connect them to a power source to wake them up. Ensure you have the correct tools, including a 15 mm wrench and a torque wrench (35 Nm recommended for accuracy). Always set the correct crank length in your Garmin device or the Garmin Connect app to ensure accurate power data.
Getting started
The pedals are shipped in travel mode. To wake them up, connect them to a power source using the provided USB-C charging adapter. Once awake, pair the pedals with the Garmin Connect app on your smartphone to receive software updates and enable secure pairing with other devices.
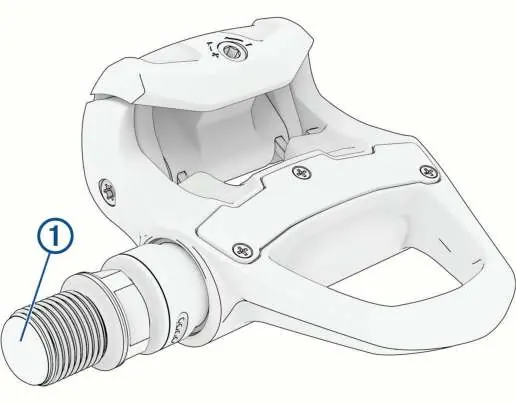
Installation
Proper installation is critical for accurate power measurement and to prevent damage to the pedal electronics.
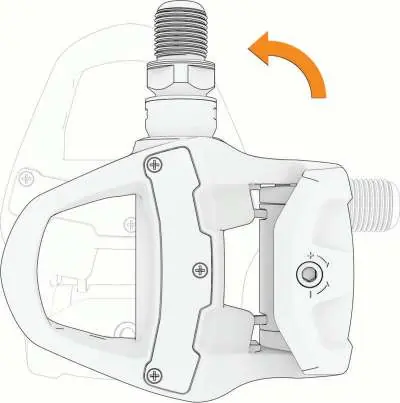

- Apply a thin layer of grease to the pedal axle threads before installation.
- Install the right pedal first.
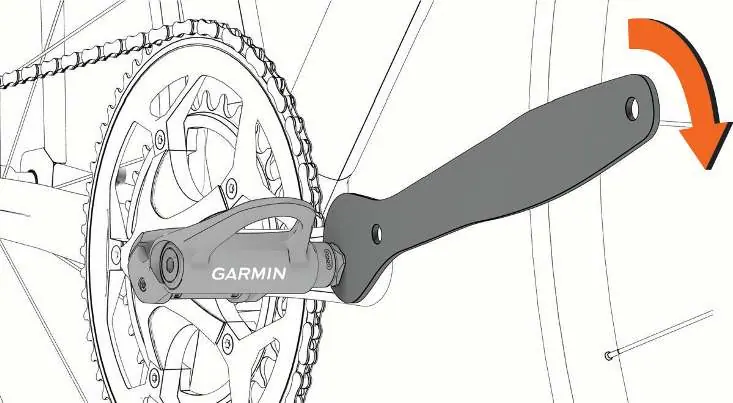
- Tighten the pedal axle to 35 Nm (26 lbf-ft) using a torque wrench and a 15 mm wrench.
- The left pedal axle has left-handed (reverse) threads.
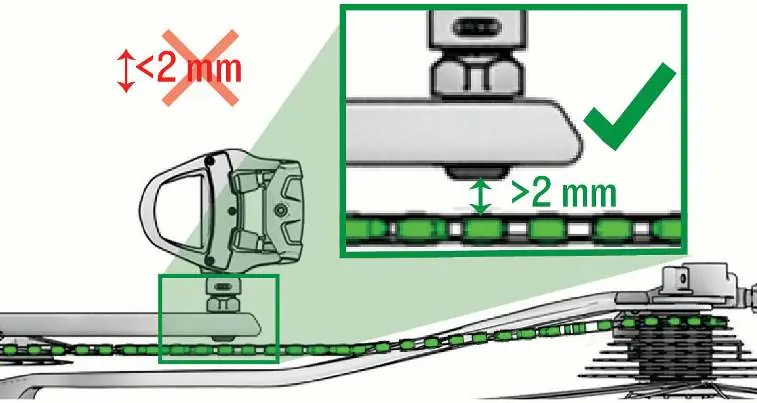
- Ensure there is at least 2 mm of clearance between the pedal axle and any part of the bike (crank, chain, frame). If clearance is insufficient, use the included washers. Do not use more than one washer per pedal.
Cleat installation
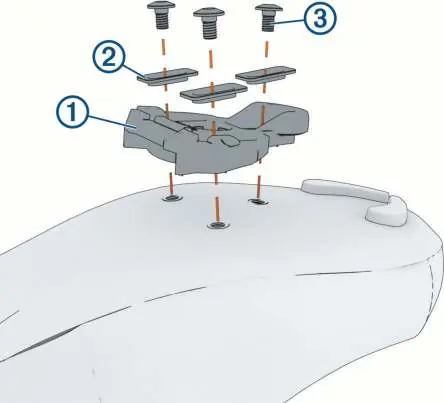
The pedals include cleats that must be installed on your cycling shoes.
- For Rally RK and RS: Align the cleat, washers, and bolts. Tighten bolts to 5–8 Nm.
- For Rally XC: Install the two-hole cleat nut and washer inside the shoe if necessary, then align and tighten the cleat bolts to 5–8 Nm.
- You can adjust the cleat position after a test ride.
Battery charging
The pedals are rechargeable via a USB-C port on the pedal axle.
- Connect the USB-C cable to the charging adapter.
- Attach the adapter to the pedal axle, aligning the pins with the charging contacts.
- Connect the other end to a power source (2–2.5 W).
- The LED on the axle indicates charging status: flashing indicates charging, solid indicates fully charged.
Calibration
Rally pedals calibrate automatically when idle. If you need to calibrate manually, ensure the bike is upright and stationary, and nothing is touching the pedals. You can trigger calibration via the Garmin Connect app or your compatible Garmin head unit.
Maintenance
Regular maintenance ensures longevity and accuracy.
- Clean and re-grease the pedal axles and bodies every 100 hours of riding or after significant exposure to wet conditions.
- If replacing pedal bodies or axles, follow the specific disassembly and reassembly instructions provided in the manual, ensuring all seals and O-rings are properly greased.
- Always wipe away excess grease after maintenance.
Technical specifications
- Operating temperature: -10 to 50 °C (14 to 122 °F)
- Battery life: Up to 90 hours
- Water resistance: IPX7
- Wireless frequency: 2.4 GHz
Manufacturer information
Garmin Ltd.
Practical help
Common problems
Pedal does not wake up or connect
The pedal is likely in travel mode. Connect it to a power source using the charging adapter to wake it up.
Inaccurate power readings
Verify that the correct crank length is set in your Garmin device or the Garmin Connect app. Ensure the pedals are tightened to the recommended 35 Nm.
Difficulty engaging or releasing from pedals
Adjust the tension screw on the pedal body using a 3 mm hex key. Ensure both pedals are adjusted equally.
Before use
- Charge the pedals to exit travel mode.
- Apply grease to pedal axle threads.
- Tighten pedals to 35 Nm.
- Check for 2 mm clearance between axle and bike components.
- Set correct crank length in settings.
- Install cleats on cycling shoes.
Specs in practice
- Crank length
- Essential setting for accurate power calculation; defaults to 172.5 mm if not set.
Images and diagrams
- Installation: Grease threads and tighten to 35 Nm.
- Clearance: Ensure >2 mm gap between axle and bike parts.
- Cleats: Align and tighten bolts to 5-8 Nm.
- Charging: Attach adapter to axle and connect USB-C.
Model compatibility
- Rally 110 is a single-sensing system; Rally 210 is a dual-sensing system.
- Some advanced features (like torque effectiveness) require ANT+ connection and are not supported via Bluetooth.
- Not all Garmin head units support all settings; check your device manual.

Manual page author
Michael Turner
Technical manual editor
Reviews PDF manuals for structure, safety notes, and practical product details so readers can find the right information quickly.