Plumbing / Toilets Urinals
Installation manual for Geberit Delta 120mm Concealed Cistern
A comprehensive installation guide for the Geberit Delta 120mm concealed cistern. This manual provides step-by-step instructions for dimensional planning, wall mounting, water supply connection, and flush plate installation.
Table of contents
Manual images
Click an image to enlargeQuick guide from the manual
This document provides the necessary steps for the professional installation of the Geberit Delta 120mm concealed cistern. It covers the required dimensions, mounting procedures, water supply connection, and final assembly of the flush plate. Ensure all local plumbing codes are followed during installation.
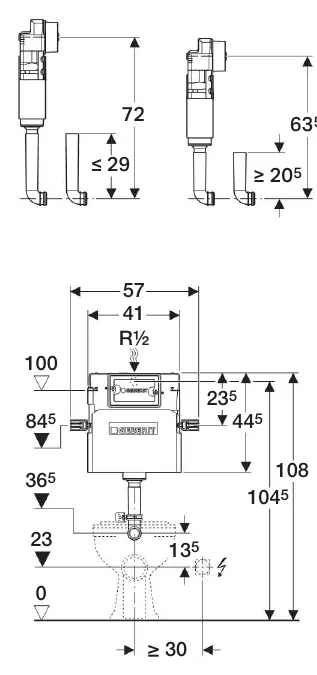
Dimensional planning
Before beginning the installation, verify the available space against the dimensions provided in the manual. The cistern requires specific clearances for the water supply (R 1/2) and mounting points. Ensure the wall structure is capable of supporting the cistern weight.
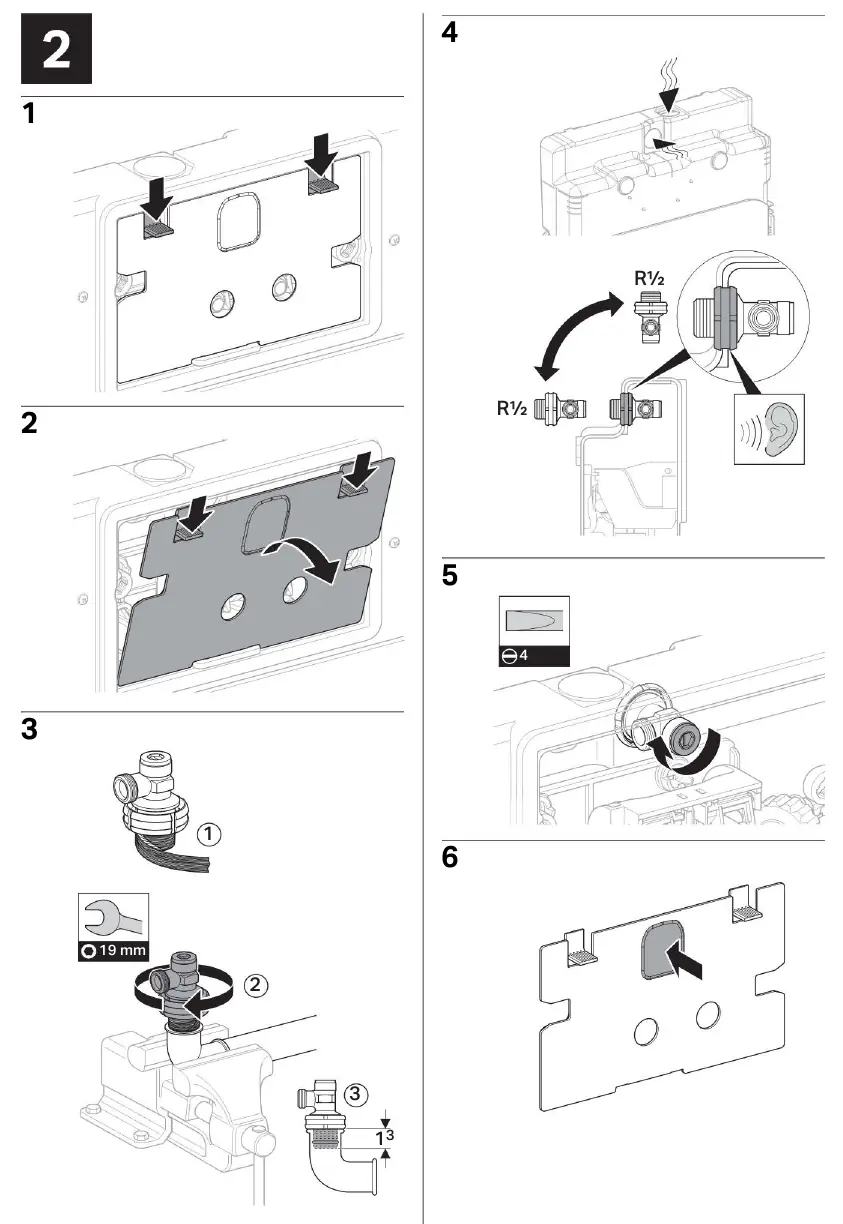
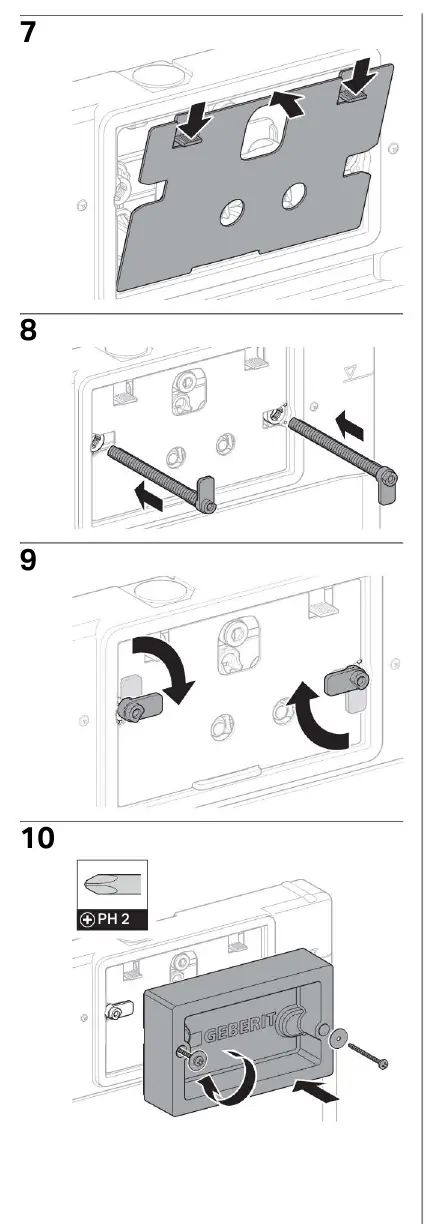
Installation steps
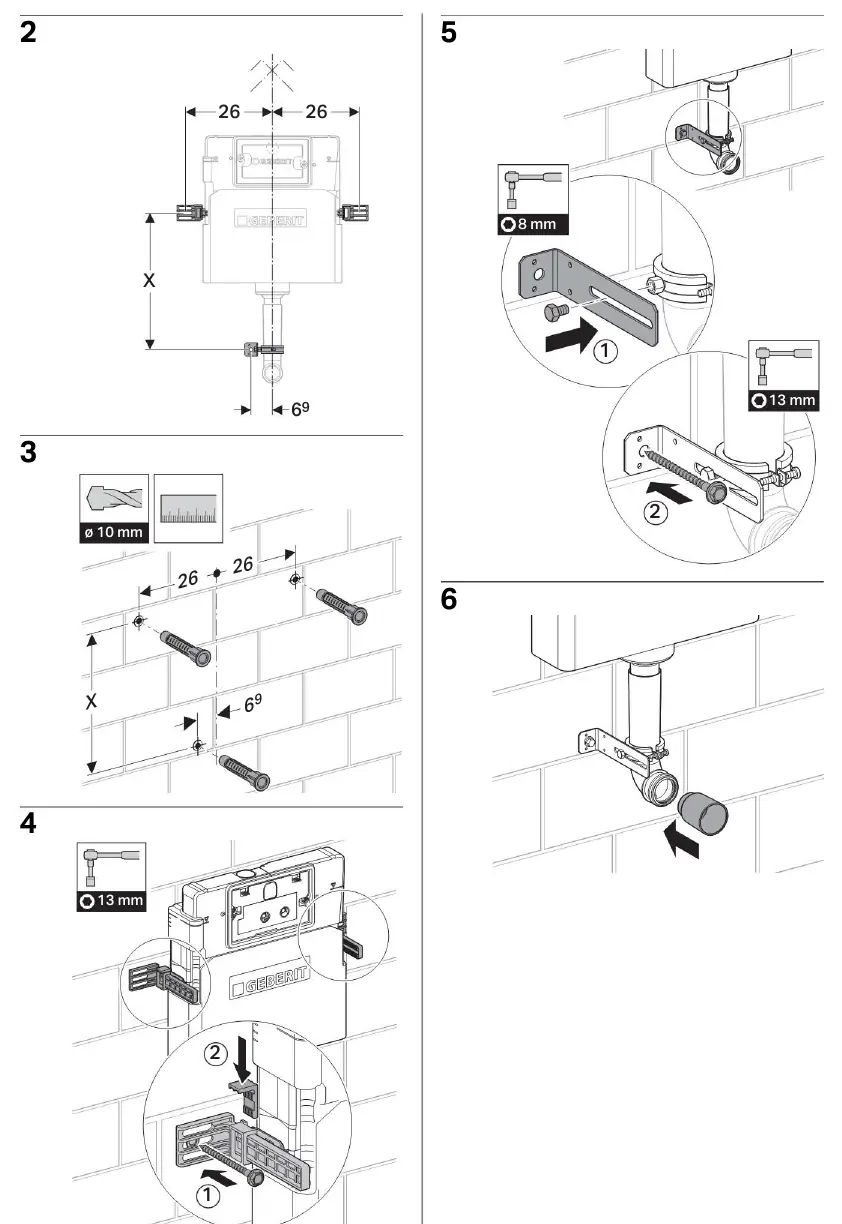
- Preparation: Mark the drilling points on the wall based on the provided dimensional diagrams.
- Drilling: Use a 10mm drill bit to create the necessary mounting holes.
- Mounting: Secure the cistern to the wall using the provided brackets and screws. Ensure the unit is level and stable.
- Water supply connection: Connect the water supply to the cistern inlet using the R 1/2 connection. Ensure all seals are properly seated to prevent leaks.
- Final assembly: Once the cistern is mounted and connected, install the protective cover and the flush plate. Use a PH 2 screwdriver for the final fastening steps.
Maintenance and safety
Always ensure the water supply is shut off before performing any maintenance or adjustments to the cistern. Regularly check the flush mechanism and water connections for signs of wear or leakage.
Manufacturer information
Geberit Group
Practical help
Common problems
Water leakage at connection
Ensure the R 1/2 connection is tightened correctly and the seal is properly seated.
Cistern not level
Adjust the mounting brackets before fully tightening the screws to ensure the unit is perfectly level.
Before use
- Verify wall space for 120mm depth
- Ensure water supply is shut off before connection
- Check that all mounting hardware is present
- Verify drill bit size (10mm)
- Ensure a PH 2 screwdriver is available
Images and diagrams
- Dimensional drawings show required clearances for installation
- Step-by-step sequence for mounting the cistern to the wall
- Water supply connection procedure
Model compatibility
- Designed for standard wall-mounted toilet installations
- Requires R 1/2 water supply connection

Manual page author
David Miller
Documentation analyst
Organizes user manual content into clear summaries, with attention to model details, product context, and everyday usability.