Plumbing / Toilet Flushers
Installation Manual for Geberit Sigma10 Electronic WC Flush Control
A comprehensive installation guide for the Geberit Sigma10 Electronic WC Flush Control. This manual provides step-by-step visual instructions for both Sigma 12 cm and Sigma 8 cm installation variants, including mounting, water connection...
Table of contents
Manual images
Click an image to enlargeQuick Guide from the Manual
This document provides installation instructions for the Geberit Sigma10 Electronic WC Flush Control. The manual is primarily visual, utilizing pictograms to guide the installer through the process. It is critical to identify whether your installation requires the Sigma 12 cm or Sigma 8 cm variant before beginning.
Installation Variants
The manual covers two distinct installation types based on the cistern depth:
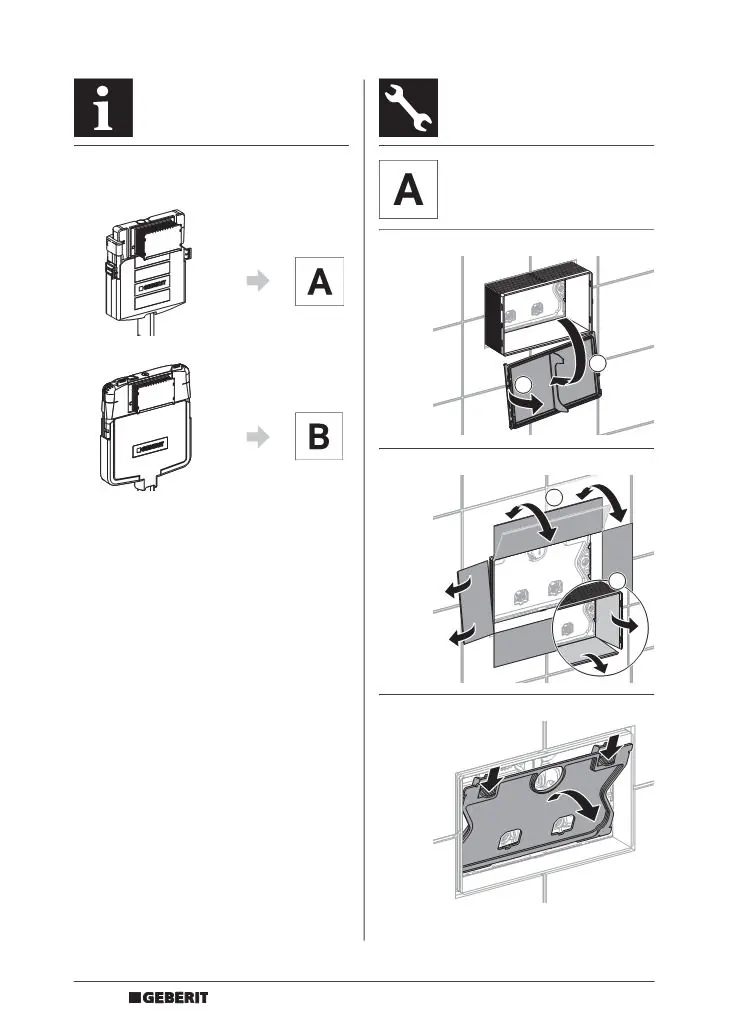
- Sigma 12 cm: Follow the procedure starting on page 2.
- Sigma 8 cm: Follow the procedure starting on page 7.
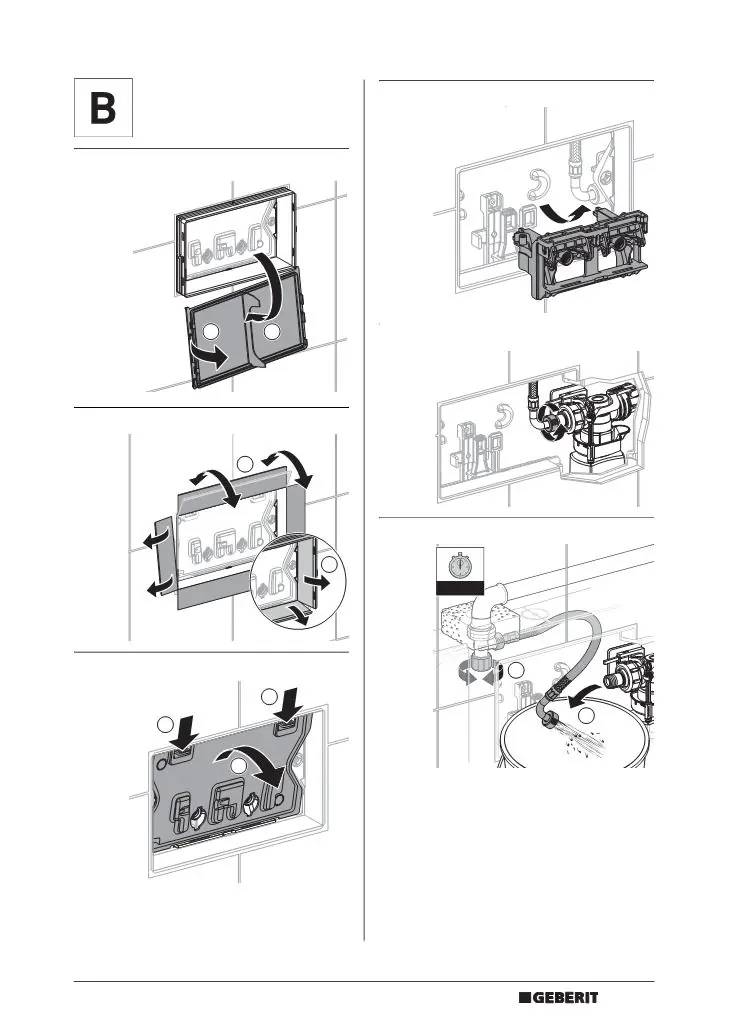
Installation Steps (Sigma 12 cm)
For the 12 cm variant, follow these general steps:
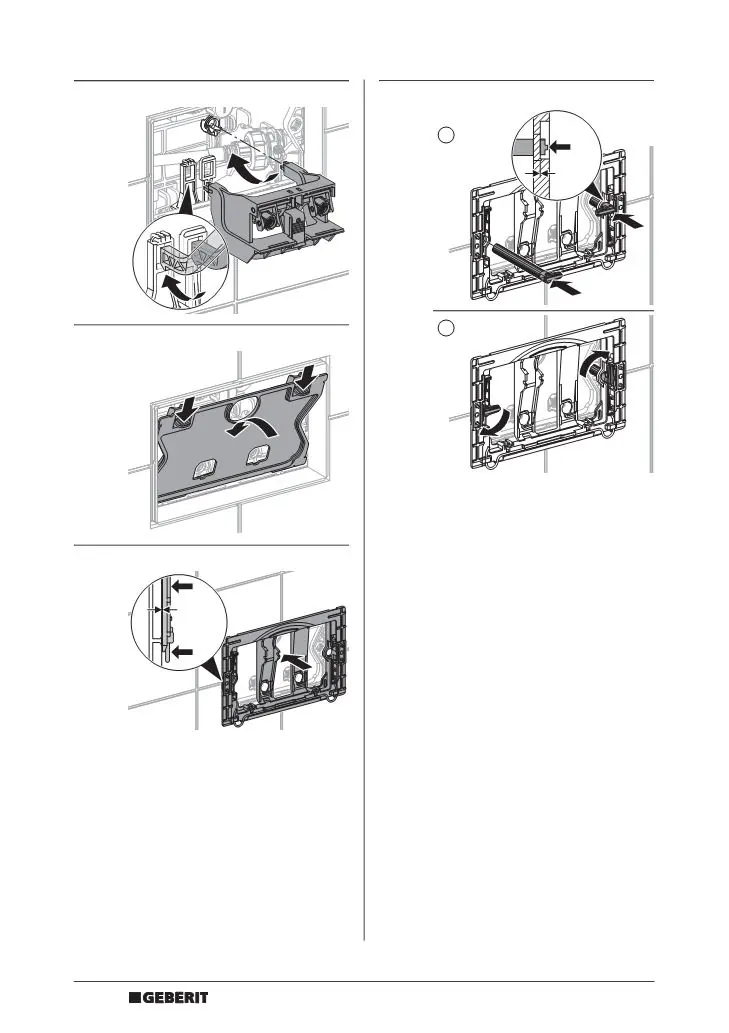
- Remove the existing cover and frame.
- Prepare the mounting frame for the electronic unit.
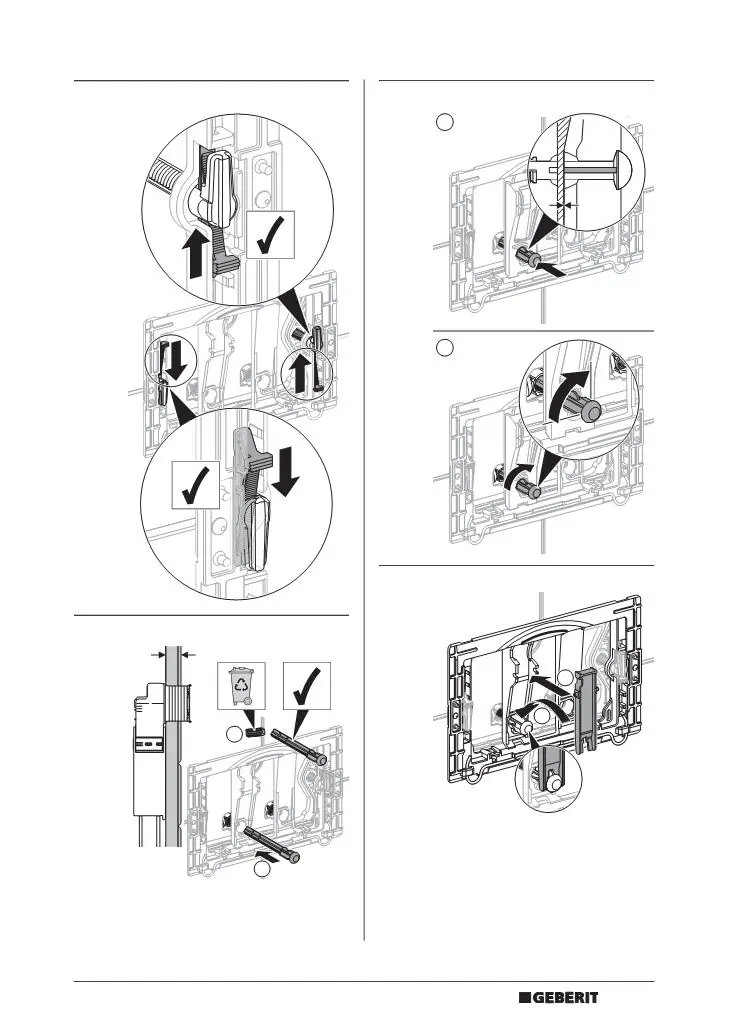
- Connect the water supply and flush mechanism.
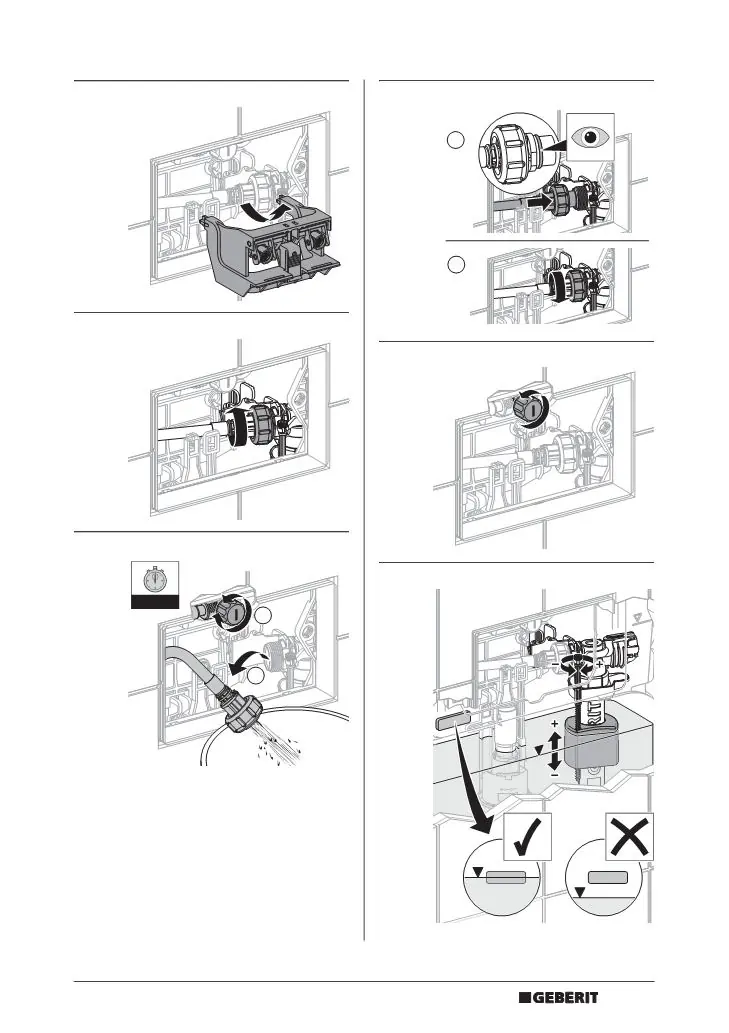
- Perform the 45-second flush test to ensure proper operation.
- Adjust the flush volume settings as required.
- Secure the mounting frame, ensuring a 0 mm clearance for proper fit.
Installation Steps (Sigma 8 cm)
For the 8 cm variant, the process is similar but adapted for the shallower cistern:
- Remove the cover and frame.
- Install the specific mounting components for the 8 cm system.
- Connect the water supply and flush mechanism.
- Perform the 45-second flush test.
- Adjust the flush volume settings.
- Finalize the mounting frame installation.
Final Assembly
Once the internal components are installed and tested:
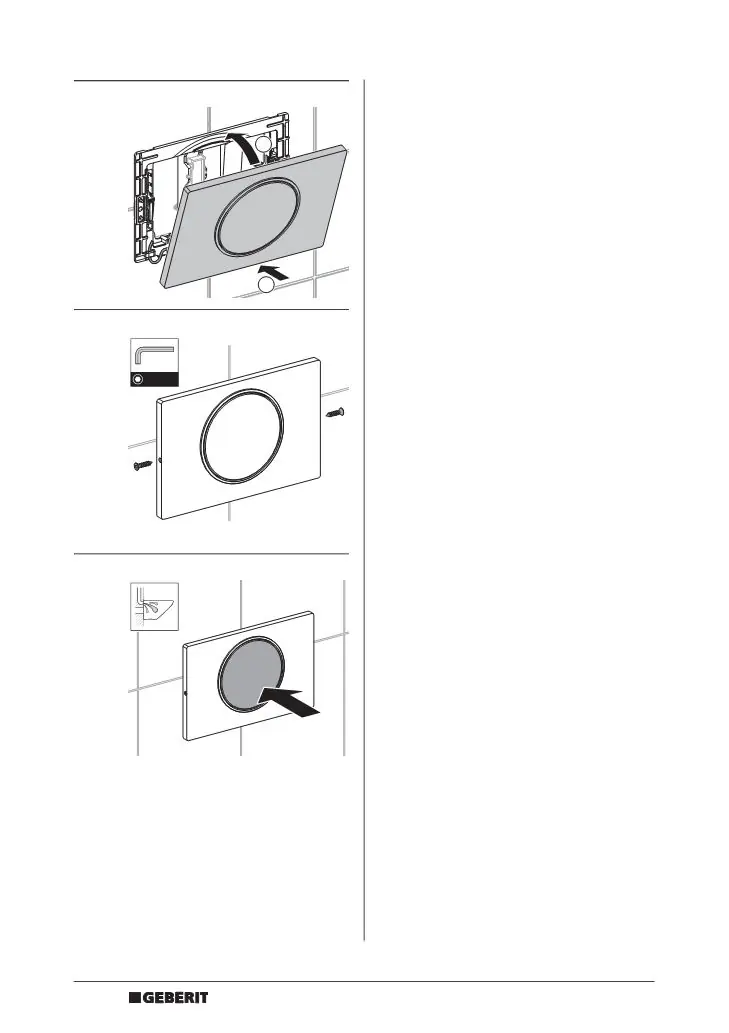
- Attach the flush plate to the mounting frame.
- Secure the plate using the provided screws (requires a 2 mm Allen key).
- Ensure the plate is flush with the wall and operates correctly.
Manufacturer information
Geberit Group
Practical help
Common problems
Incorrect flush volume
Adjust the flush volume settings on the flush valve mechanism as shown in the installation steps.
Flush plate not fitting
Ensure the mounting frame is perfectly aligned and the distance is set to 0 mm as indicated in the installation diagrams.
Before use
- Identify your installation type (Sigma 12 cm or Sigma 8 cm).
- Ensure the water supply is accessible.
- Have a 2 mm Allen key ready for final assembly.
- Verify the mounting frame is level and flush with the wall.
Images and diagrams
- The manual uses pictograms to guide installation.
- Arrows indicate movement or direction of assembly.
- Checkmarks indicate correct positioning or settings.
Model compatibility
- Compatible with Geberit Sigma cisterns.
- Ensure the correct variant (12 cm or 8 cm) is selected based on your specific cistern model.

Manual page author
Emily Carter
User documentation editor
Prepares concise manual descriptions and highlights the most useful setup, operation, and maintenance information for readers.