Plumbing / Toilet Flushers
Installation Guide for Geberit 115.240.KM.1 Dual Flush Plate
Step-by-step installation guide for the Geberit 115.240.KM.1 dual flush plate. Includes instructions for mounting the frame, connecting the water supply, adjusting actuator rods, and attaching the flush plate.
Table of contents
Manual images
Click an image to enlargeQuick guide from the manual
This document provides visual instructions for installing the Geberit 115.240.KM.1 dual flush plate. It covers the assembly of the mounting frame, connection of the water supply, adjustment of the actuator rods, and final installation of the flush plate.
Installation Steps
Follow these steps to install the flush plate:

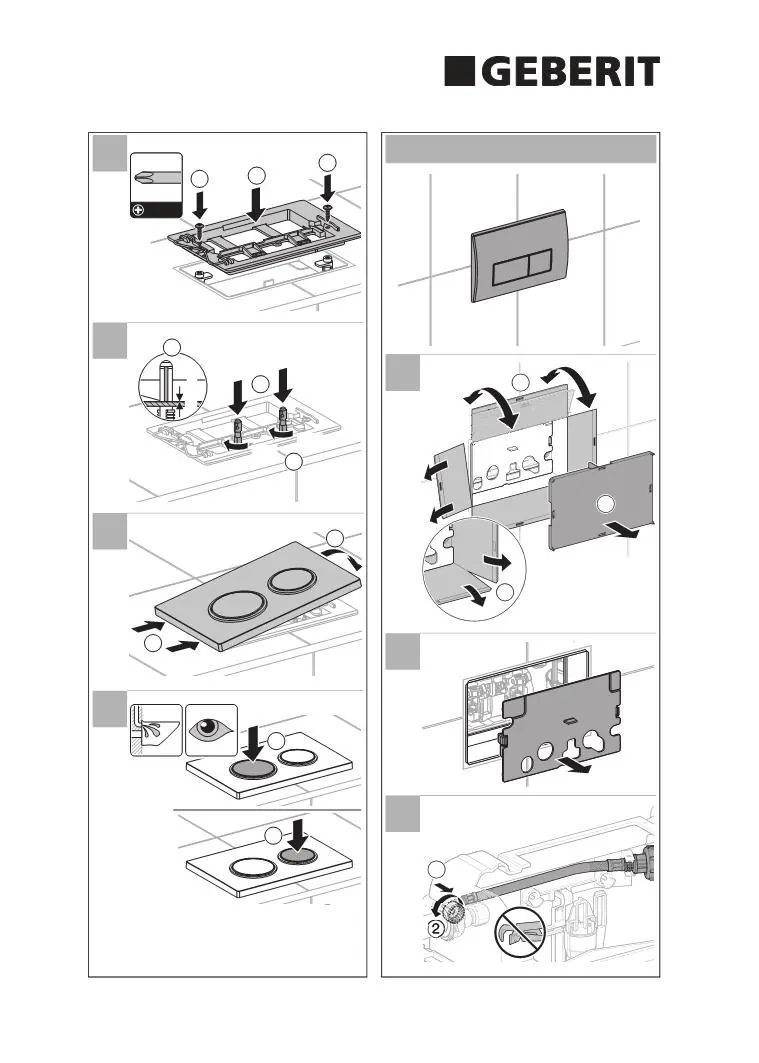
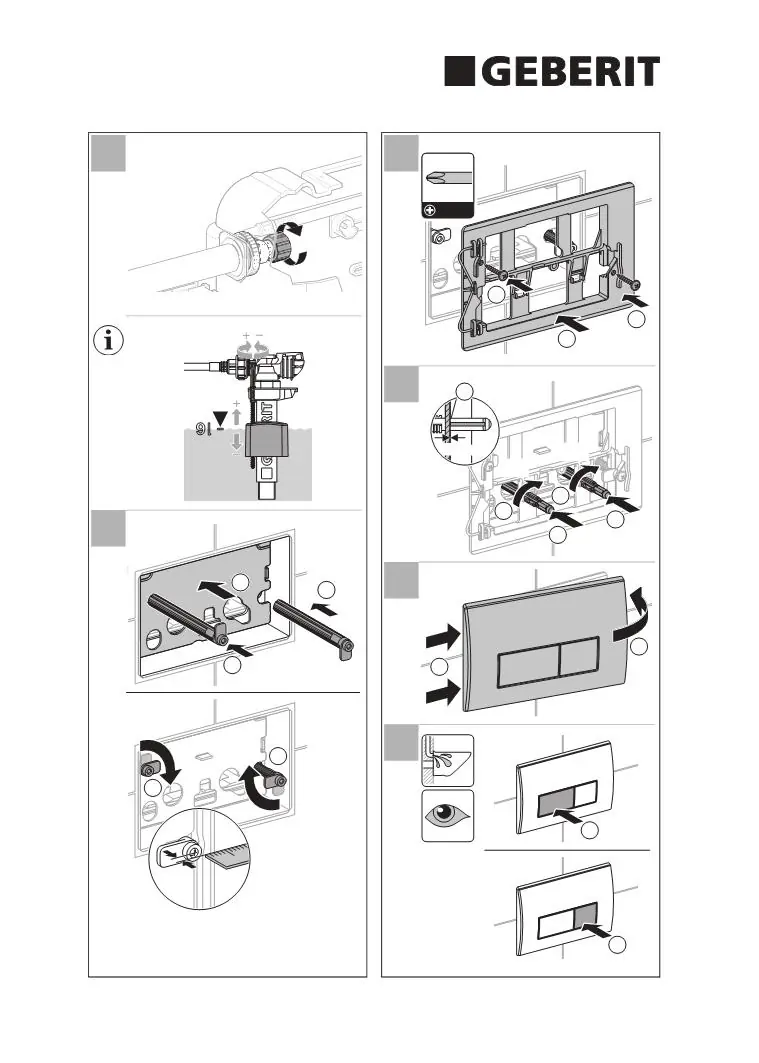

- Remove Protective Cover: Remove the protective cover from the installation box to access the internal components.
- Connect Water Supply: Connect the water supply hose to the flush valve mechanism. Ensure the connection is secure.
- Install Mounting Frame: Position the mounting frame over the installation box. Secure the frame using the provided screws. A PH3 screwdriver is required for this step.
- Adjust Actuator Rods: Adjust the actuator rods to the correct length. There should be a 2-3mm clearance between the rods and the flush mechanism.
- Attach Flush Plate: Align the flush plate with the mounting frame and snap it into place.
Adjustment and Testing
After installation, verify the operation of the flush plate:
- Ensure the flush plate sits flush against the wall.
- Test both flush buttons to ensure they activate the flush mechanism correctly.
- If the flush is not activating properly, re-check the actuator rod adjustment to ensure the 2-3mm clearance is maintained.
Contact Information
For further assistance, contact Geberit International AG, Schachenstrasse 77, CH-8645 Jona. Website: www.geberit.com. Email: [email protected].
Official resources from the manual
Manufacturer information
Geberit Group
Practical help
Common problems
Flush button does not activate flush
Check the actuator rod adjustment. Ensure there is a 2-3mm clearance between the rods and the mechanism.
Flush plate is loose
Verify that the mounting frame screws are fully tightened and the plate is properly snapped into the frame.
Before use
- Ensure the water supply hose is connected to the flush valve.
- Verify the mounting frame is securely screwed to the installation box.
- Check that the actuator rods are adjusted to the 2-3mm clearance specification.
- Ensure the flush plate is correctly aligned and snapped into the frame.
Images and diagrams
- The diagrams illustrate the sequence of removing the protective cover, connecting the hose, securing the frame, and snapping the plate into place.
- Specific diagrams show the 90-degree rotation required for locking components and the measurement for rod adjustment.
Model compatibility
- This guide is specific to the Geberit 115.240.KM.1 dual flush plate model.

Manual page author
David Miller
Documentation analyst
Organizes user manual content into clear summaries, with attention to model details, product context, and everyday usability.