Plumbing / Toilet Flushers
Installation Manual for Geberit Omega20 Actuator Plate
A comprehensive installation guide for the Geberit Omega20 actuator plate. This manual provides step-by-step instructions for mounting the frame, connecting the water supply, adjusting the flush mechanism, and final assembly.
Table of contents
Manual images
Click an image to enlargeInstallation Overview
This document provides the necessary steps to install the Geberit Omega20 actuator plate. The process involves mounting the frame, connecting the water supply, flushing the system, and performing final adjustments to ensure proper operation.
Mounting the Frame and Water Connection
Begin by preparing the installation area. Use a PH2 screwdriver to secure the mounting frame to the wall. Ensure the frame is level and properly aligned with the flush cistern.
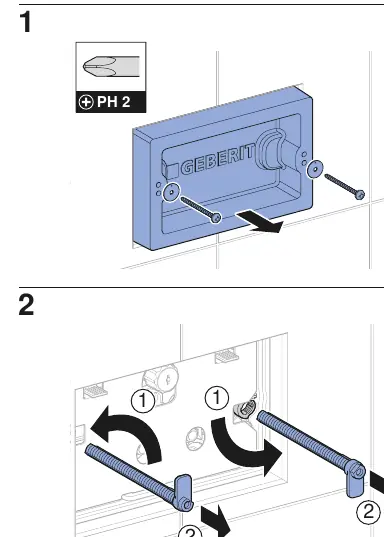

- Frame Installation: Secure the mounting frame using the provided screws. Ensure the distance is adjusted correctly according to the wall depth.
- Water Supply: Connect the water supply hose to the flush valve. Ensure all connections are tight and secure to prevent leaks.
Flushing and Final Assembly
Before attaching the final plate, it is essential to flush the system to clear any debris from the lines.
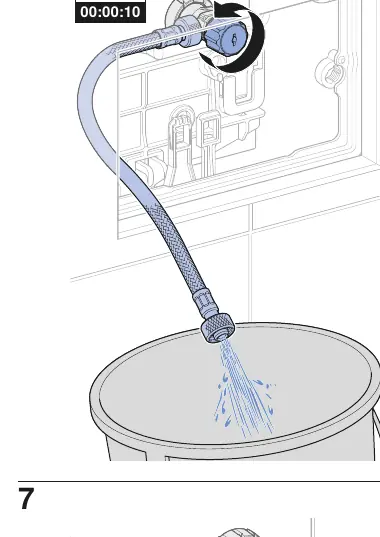
- Flushing: Open the water supply and allow the system to flush for approximately 10 seconds to clear the lines.
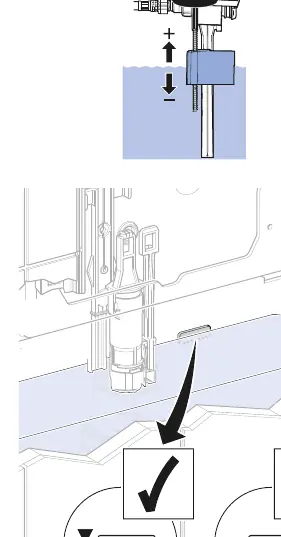
- Adjustment: Use the adjustment mechanism to set the flush volume. Ensure the mechanism is set to the correct position as indicated in the diagram.
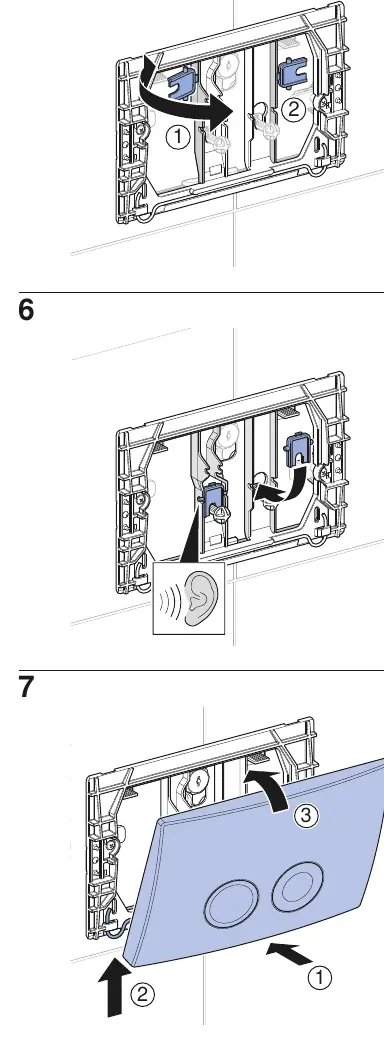
- Final Assembly: Once the system is flushed and adjusted, attach the actuator plate to the mounting frame. Ensure it clicks into place securely.
Manufacturer information
Geberit Group
Practical help
Common problems
Flush mechanism not operating correctly
Check that the water supply is fully open and the connection hose is not kinked or blocked.
Actuator plate does not sit flush against the wall
Verify that the mounting frame is installed at the correct depth and that the adjustment screws are set to 2-3mm as specified.
Before use
- Ensure the water supply is connected and turned on.
- Verify the mounting frame is securely fastened to the wall.
- Perform a test flush to ensure the mechanism operates smoothly.
- Check that the actuator plate is properly snapped into the mounting frame.
Images and diagrams
- Steps 1-3: Mounting frame installation using a PH2 screwdriver.
- Steps 4-5: Connecting the water supply hose to the flush valve.
- Step 6: Flushing the system for 10 seconds.
- Step 11: Adjusting the flush mechanism settings.
- Steps 5-7 (Page 6): Final assembly and attachment of the actuator plate.
Model compatibility
- Designed specifically for Geberit Omega20 series cisterns.
- Requires standard plumbing tools (PH2 screwdriver).

Manual page author
David Miller
Documentation analyst
Organizes user manual content into clear summaries, with attention to model details, product context, and everyday usability.