Lighting / LED Drivers
User Manual for Guangzhou 1DRAG8 LED Rock Lights
Quick guide for Guangzhou 1DRAG8 LED Rock Lights. Includes installation steps, wiring instructions, remote control usage, and app setup.
Quick answers from the manual
Quick answer
- The 1DRAG8 LED Rock Lights are 12V DC automotive lighting fixtures controlled via RF remote or the Magic Lantern Bluetooth app. Installation requires drilling 1/4" holes and wiring directly to the vehicle battery. p. 1, 2
Key actions
- Perform a functional test before installation. p. 1
- Connect positive and negative wires to the car battery. p. 2
First start
- Connect to 12V power, verify operation with remote, then proceed to mount. p. 1, 2
Show 2 more answers Show less
Technical specifications
| Parameter | Value | Meaning | Pages |
|---|---|---|---|
| Input Voltage | 12V DC | Power requirement | p. 1 |
| Wattage | 10 Watts | Power consumption | p. 1 |
| Protection Level | IP68 | Water and dust resistance | p. 1 |
Where to find it in the PDF
- Specifications and Remote Control p. 1
- Installation Guide p. 2
- FCC Notice p. 3
Table of contents
Manual images
Click an image to enlargeQuick guide from the manual
This document provides instructions for the installation and operation of the 1DRAG8 LED Rock Lights. Before permanent installation, it is essential to perform a functional test to ensure all components are working correctly.
Specifications
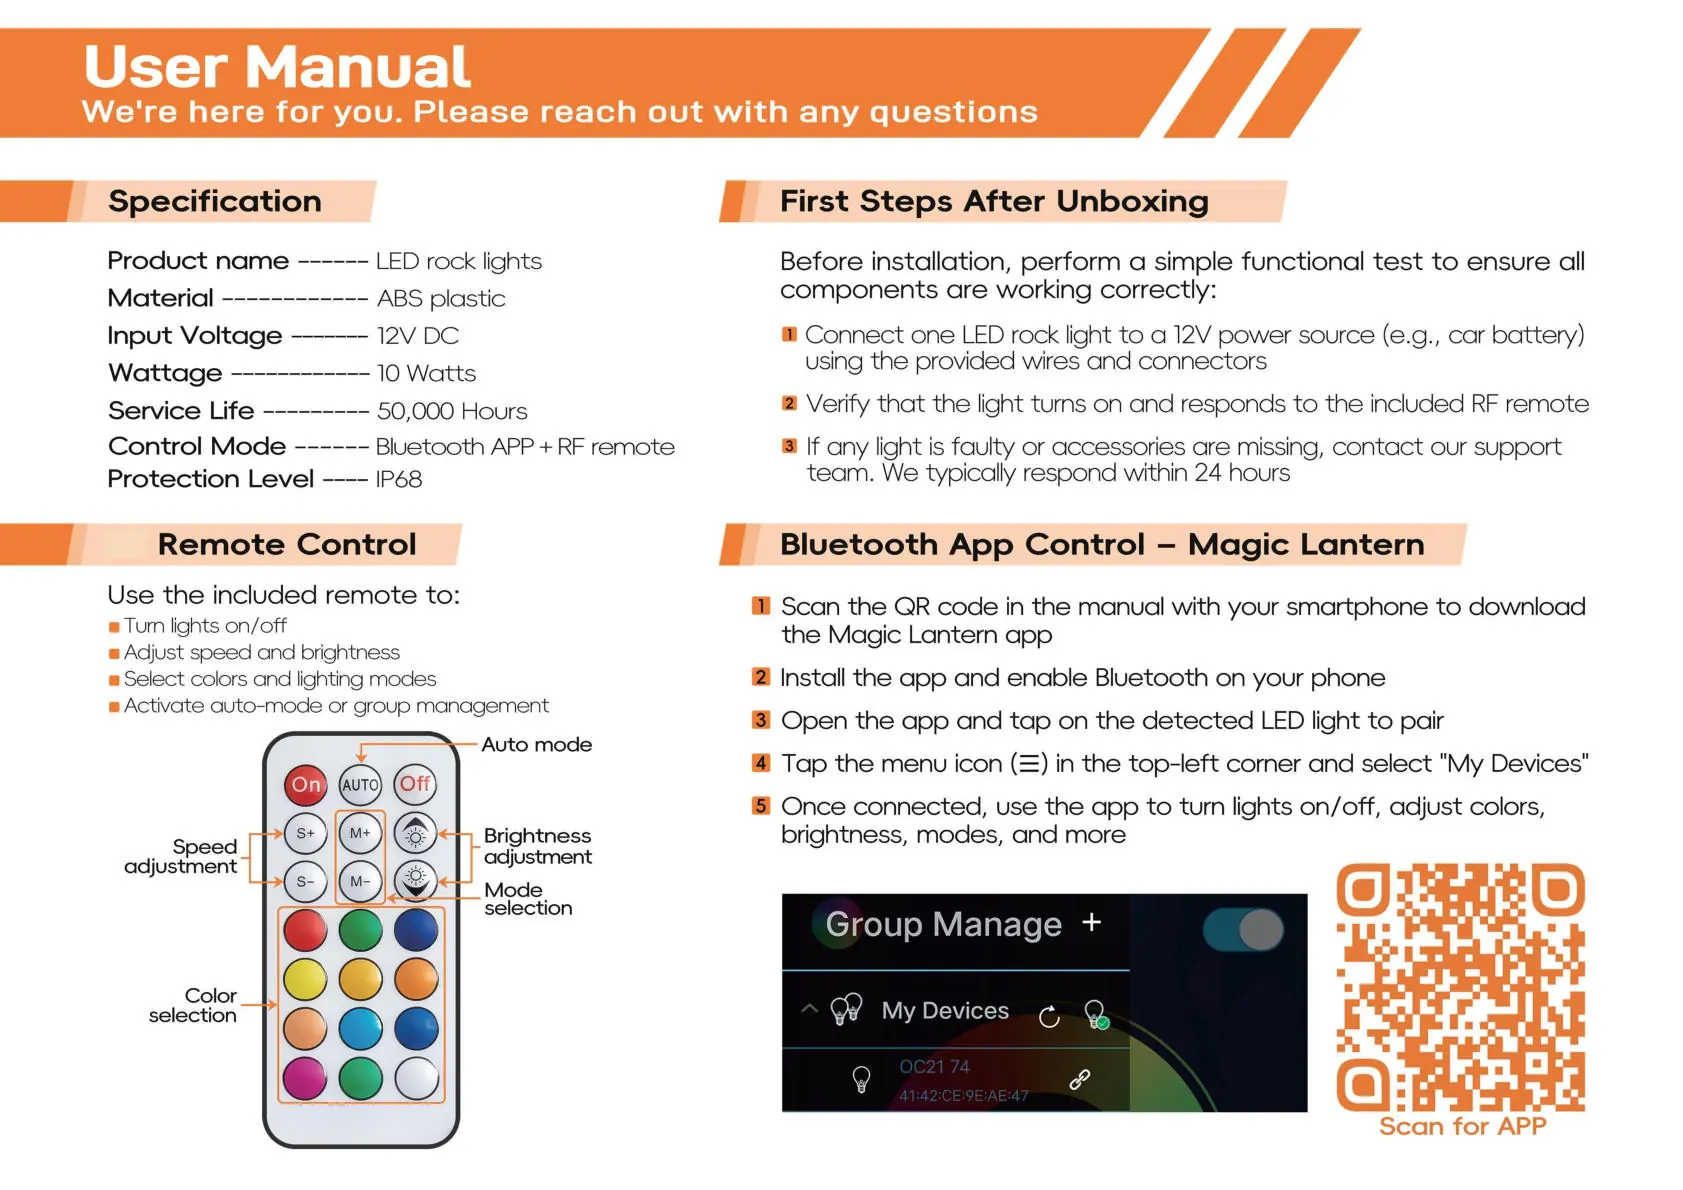
- Product name: LED rock lights
- Material: ABS plastic
- Input Voltage: 12V DC
- Wattage: 10 Watts
- Service Life: 50,000 Hours
- Control Mode: Bluetooth APP + RF remote
- Protection Level: IP68
First Steps After Unboxing
Before installing the lights on your vehicle, perform a simple functional test:
- Connect one LED rock light to a 12V power source (e.g., car battery) using the provided wires and connectors.
- Verify that the light turns on and responds to the included RF remote.
- If any light is faulty or accessories are missing, contact support.
Installation Guide
Follow these steps for a secure and professional installation:
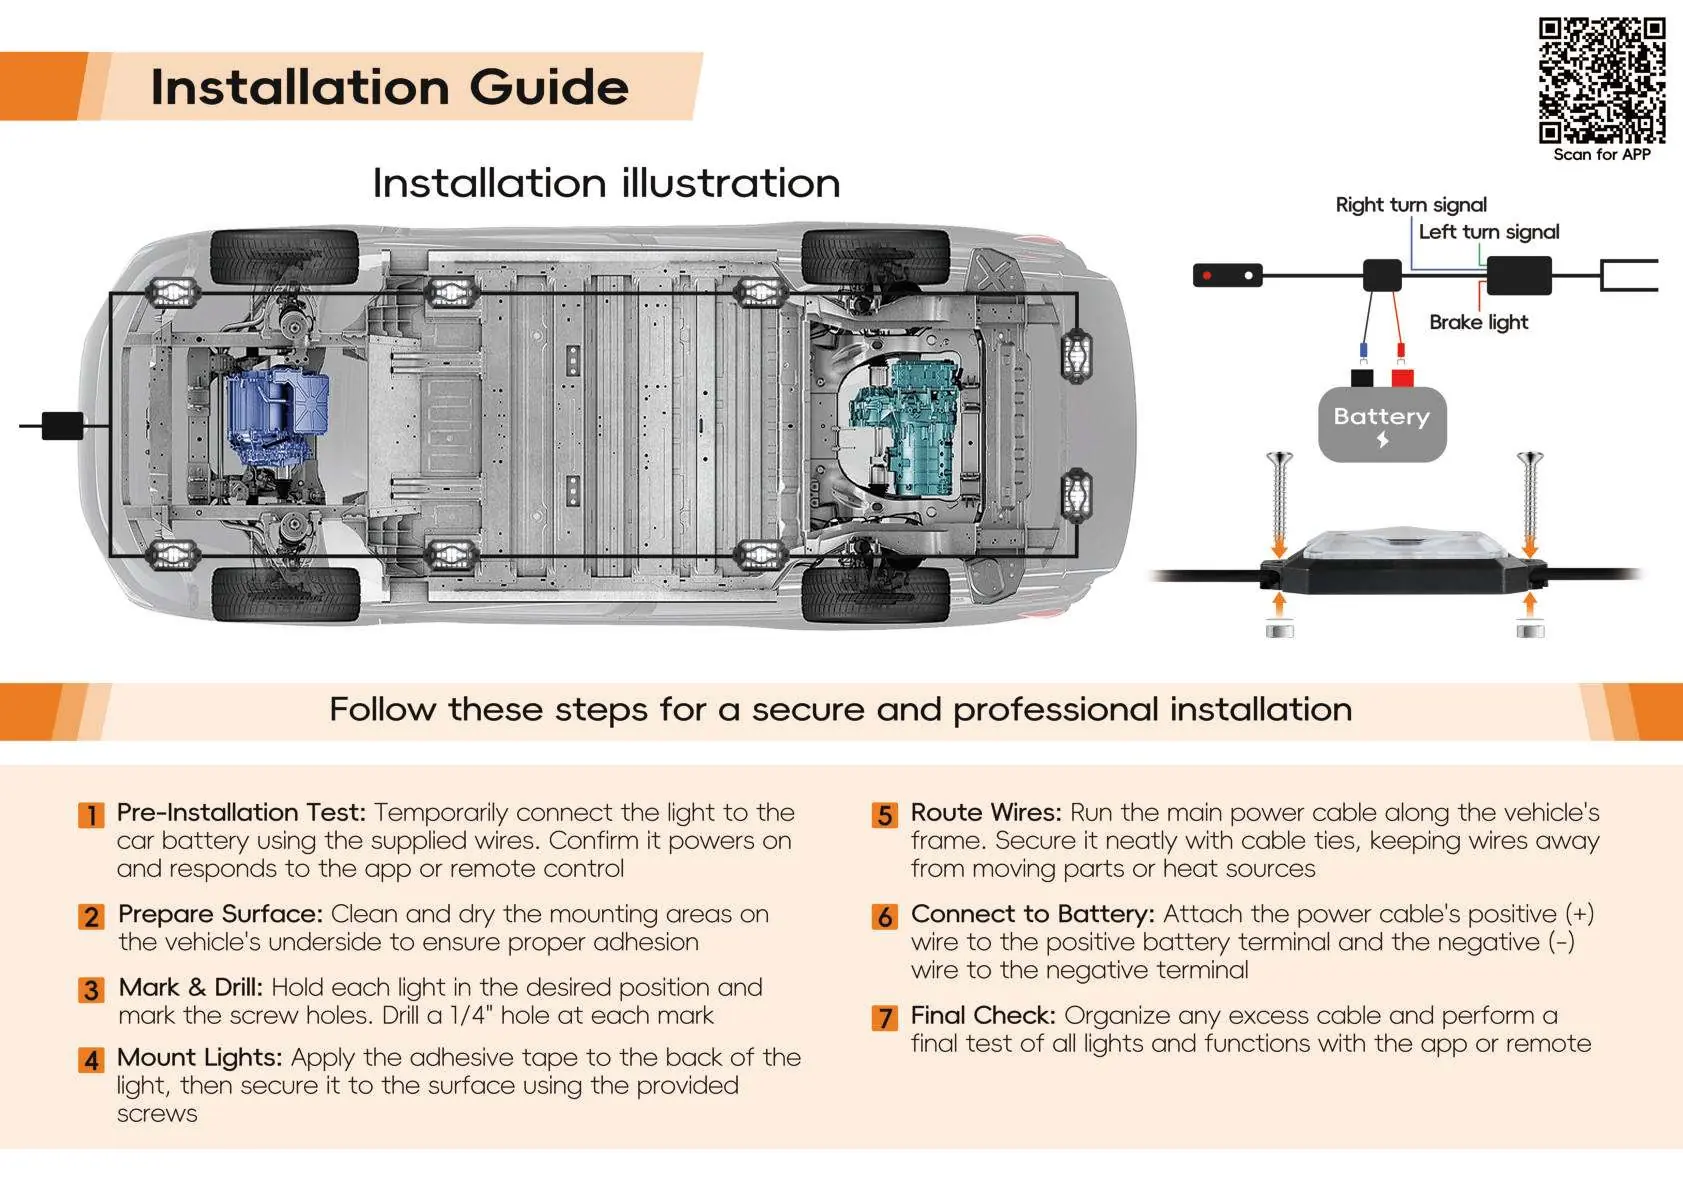
- Pre-Installation Test: Temporarily connect the light to the car battery to confirm it powers on and responds to controls.
- Prepare Surface: Clean and dry the mounting areas on the vehicle's underside to ensure proper adhesion.
- Mark & Drill: Hold each light in the desired position, mark the screw holes, and drill a 1/4" hole at each mark.
- Mount Lights: Apply the adhesive tape to the back of the light, then secure it to the surface using the provided screws.
- Route Wires: Run the main power cable along the vehicle's frame, securing it neatly with cable ties away from moving parts or heat sources.
- Connect to Battery: Attach the power cable's positive (+) wire to the positive battery terminal and the negative (-) wire to the negative terminal.
- Final Check: Organize any excess cable and perform a final test of all lights and functions.
Remote Control
The included remote allows you to:
- Turn lights on/off
- Adjust speed and brightness
- Select colors and lighting modes
- Activate auto-mode or group management
Bluetooth App Control
To use the Magic Lantern app:
- Scan the QR code in the manual to download the app.
- Install the app and enable Bluetooth on your phone.
- Open the app and tap on the detected LED light to pair.
- Tap the menu icon in the top-left corner and select "My Devices".
- Use the app to turn lights on/off, adjust colors, brightness, and modes.
Practical help
Common problems
Lights do not turn on during test
Verify the 12V DC power source connection and ensure the positive and negative wires are correctly attached to the battery terminals.
App cannot find the device
Ensure Bluetooth is enabled on your smartphone and the lights are powered on.
Before use
- Test lights with a 12V power source before installation
- Clean and dry vehicle mounting surfaces
- Ensure you have a 1/4 inch drill bit for mounting
- Verify all components are present
Show more Show less
Specs in practice
- Input Voltage
- Requires 12V DC power, typical for automotive batteries.
Images and diagrams
- Wiring diagram illustrates connection to vehicle battery and integration with turn signals/brake lights.
- Remote control diagram identifies buttons for mode selection, brightness, and speed.
Model compatibility
- Designed for 12V DC vehicle electrical systems.

Manual page author
Emily Carter
User documentation editor