Automotive / Electrical Accessories
Installation Manual for SSV Works 230-SWTS-MAVR Turn Signal Kit
Complete installation and operation guide for the SSV Works 230-SWTS-MAVR Turn Signal Kit with Horn for 2024-Up Can-Am Maverick R XR. Includes wiring diagrams, mounting instructions, and switch operation.
Quick answers from the manual
Quick answer
- This manual provides installation instructions for the SSV Works 230-SWTS-MAVR Turn Signal Kit on a 2024-Up Can-Am Maverick R XR, including wiring, mounting, and operation of the horn and turn signals. p. 1, 3, 4, 5
Key actions
- Install the TANGO2 brain module p. 4
- Mount the rocker switch p. 4
- Connect wiring harnesses p. 4, 5, 6, 7
- Drill 3/4 inch holes for LED lamps p. 5
First start
- Ensure all connections are secure and the system is powered via the factory busbar. p. 7
Show 4 more answers Show less
Problems and fixes
Horn mounting
Mount away from moving parts, as high as possible, and facing downward.
p. 6Maintenance and reset
- LED Backlight Color Change: With ACC off, hold left or right button for 4 seconds, select color, press horn to save. p. 8
Technical specifications
| Parameter | Value | Meaning | Pages |
|---|---|---|---|
| Horn | 500Hz | Operating frequency | p. 2 |
Where to find it in the PDF
- Parts List p. 2
- Wiring Diagram p. 3
- Installation Steps p. 4, 5, 6, 7
- Operation p. 8
Table of contents
Manual images
Click an image to enlargeQuick Guide
This manual provides instructions for installing the SSV Works 230-SWTS-MAVR Turn Signal Kit on a 2024-Up Can-Am Maverick R XR. The kit includes a TANGO2 module, rocker switch, horn, and necessary wiring harnesses. Ensure you have a Phillips screwdriver, drill, and a 3/4" hole saw before beginning installation.
Parts List
- Tango2 Turn Signal Module
- Tango2 Turn Signal Rocker Switch
- Tango2 Turn Signal Main Harness [B-H3271]
- Can-Am X3 Rear Turn Signal Harness [B-H3205]
- Tango2 Front Turn Signal LED Lamps (x2) [B-H2813]
- Front Turn Signal Extension Harness (x2) [B-S2959]
- Horn Assembly, 500hz [A-SW-HRN]
- Power Input Harness [B-H3413]
- Zip Ties (x10)
- 3-Pin Dummy Plug
Wiring Diagram
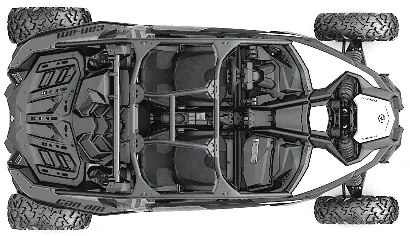
The system connects the TANGO2 module to the rocker switch, front LED lamps, rear turn signal harness, and the vehicle's power busbar. The rear harness integrates with the factory tail light connectors.
Installation Instructions


- Module Mounting: Find a suitable location for the TANGO2 brain module and secure it with screws or zip ties.
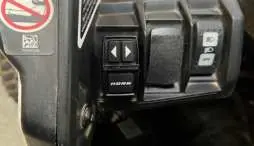
- Switch Installation: Insert the TANGO2 rocker switch into a vacant slot on the dash and route the cable to the brain module.
- Harness Connection: Plug the controller cable, front extension cables, and rear harness into the TANGO2 main harness.
- Front LED Installation: Drill a 3/4" hole in the front of the vehicle for each LED lamp. Insert the lamps and connect them to the front extension harnesses.
- Horn Installation: Mount the horn using the supplied bracket. Ensure it is mounted away from moving parts, as high as possible, and facing downward to prevent water damage.
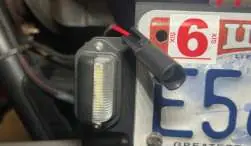
- Rear Wiring: Run the rear harness to the back of the vehicle. Unplug factory tail light connectors and integrate them with the "PASS INPUT" and "DRIVER OUTPUT" connectors of the harness.
- Power Connection: Crimp ring terminals to the Power Input Harness. Connect the BATT, GND, and ACC wires to the factory busbar located at the top center of the dashboard.
- Protection: Plug the provided dummy plug into the factory tail light connector to protect it from the elements.
Operation
Turn Signal Rocker Switch Functions
- Momentary Press: Activates the horn.
- Momentary Press (Left/Right): Activates turn signal with 8-flash auto turn off.
- Press and Hold (1 sec): Activates continuous flashing (press again to turn off).
- Press and Hold Both: Activates hazard lights (works with ACC off).
LED Backlight Color Change
With ACC off, press and hold either the left or right button for 4 seconds until the backlight turns bright. Use the left and right buttons to select the desired color, then press the horn button to save the setting.
Practical help
Common problems
Horn not working
Ensure the horn is mounted away from moving parts and facing downward. Check that power wires are connected securely to the terminals.
Water damage to horn
Ensure the horn is mounted facing downward to protect it from water ingress.
Before use
- Phillips screwdriver
- 3/4 inch hole saw
- Verify vehicle compatibility (2024-Up Can-Am Maverick R XR)
Show more Show less
Specs in practice
- Horn Frequency
- 500Hz
Images and diagrams
- Wiring diagram illustrates the connection path from the TANGO2 module to the rocker switch, front LEDs, horn, and rear tail lights.
- 180-degree viewing angle diagram shows the required visibility for turn signal lamps.
Model compatibility
- Designed specifically for 2024-Up Can-Am Maverick R XR.

Manual page author
Emily Carter
User documentation editor