Tools / Induction Heaters
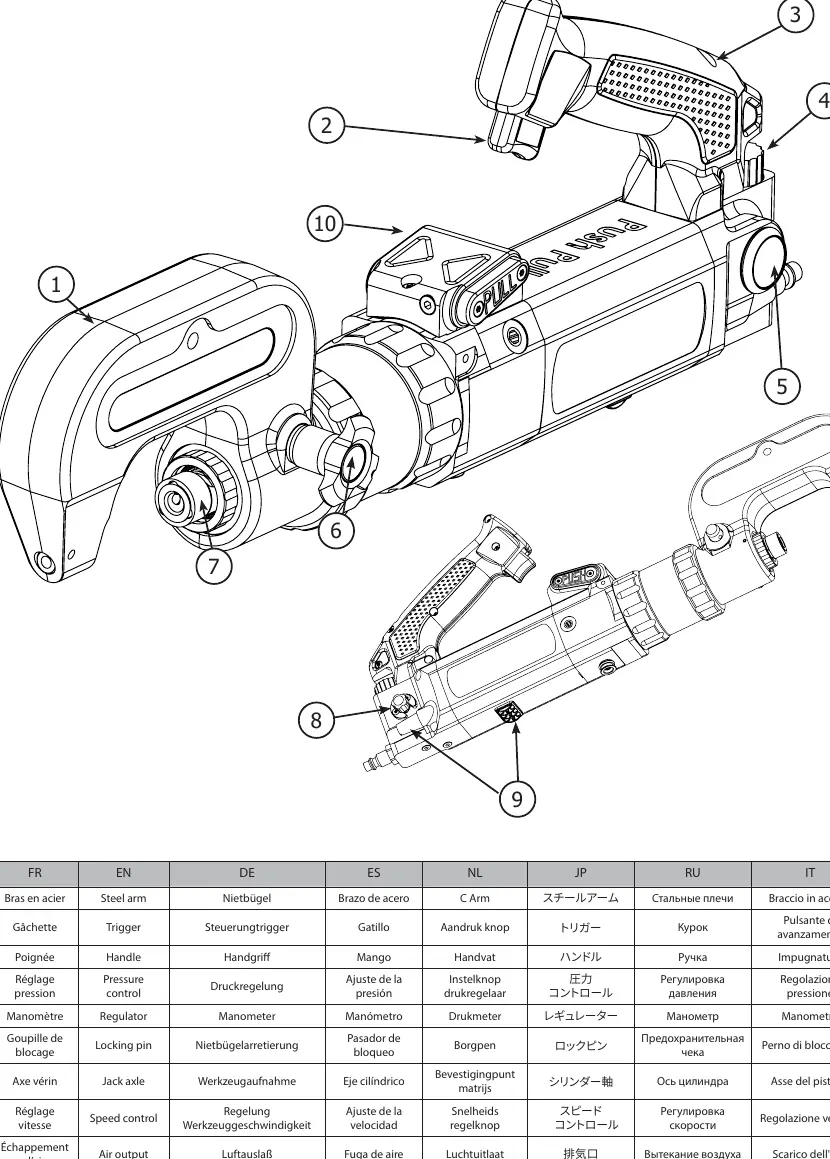
User Manual for GYS GYSPRESS 10T PUSH-PULL Riveting Machine
Comprehensive user guide for the GYS GYSPRESS 10T PUSH-PULL riveting machine. Includes setup, installation of arms and connectors, operating procedures for self-piercing and flow-form rivets, maintenance, and troubleshooting.
Table of contents
Manual images
Click an image to enlargeQuick Guide
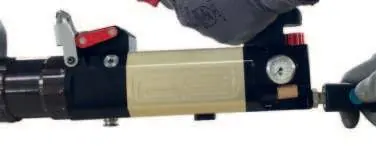
The GYS GYSPRESS 10T PUSH-PULL is a professional riveting machine designed for automotive body repair. Before use, ensure the air supply is clean, dry, and does not exceed 10 bar. Always wear appropriate personal protective equipment, including eye protection, hearing protection, and safety gloves. Ensure the riveting arm is correctly installed and locked with the locking pin before operation.
Product Description
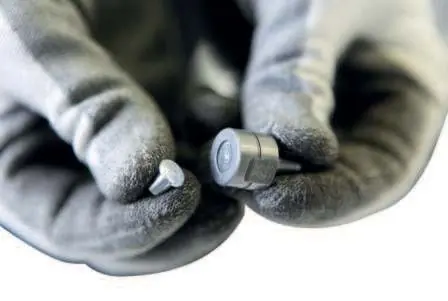
This riveting machine is specifically developed for installing main rivet types used in automotive repair, including self-piercing rivets (Punch Rivets) and Flow-Form rivets. It is ideal for sheet metal riveting applications up to 8.3 mm thick.
Installation
Compressed Air Connection: Connect the machine to a clean, dry compressed air supply. The maximum air pressure must not exceed 10 bar (145 psi). Moisture and impurities can damage the system.
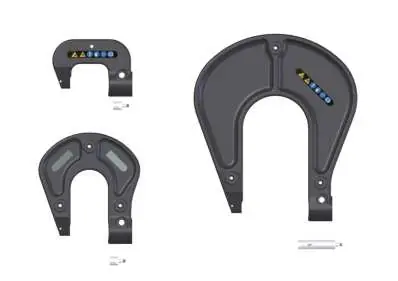
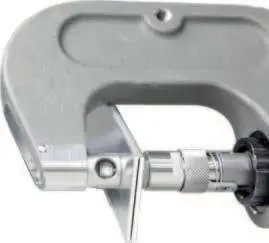
Setting Up an Arm: Choose the appropriate arm and prepare the locking pin. Carefully place the arm on the riveting machine nose, ensuring the two reference points are aligned. For larger arms (HR210, HR310), it is recommended to lay the arm flat on a table and insert the machine nose into the arm's orifice. Once positioned, insert the locking pin into the hole. The axle locks automatically.
Operation
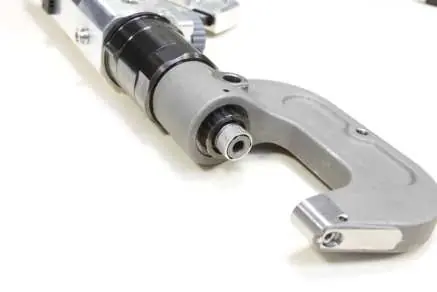
Connector Assembly: Screw the required connector kit into the arm support. Before each use, verify that the die and punch support are correctly associated and tightened using the provided special spanner. Loose components are dangerous and can damage the machine.
Speed and Pressure Control: The user can manually adjust the actuator speed and installation pressure based on the material type to prevent sheet deformation. Refer to the pressure control chart on page 77 for specific settings.
Riveting Procedures: For self-piercing rivets, ensure the matrix is placed on the metal sheets at a 90° angle. For Flow-Form rivets, pre-drilling the metal is necessary using the specific punching die before inserting the rivet.
Maintenance
The machine requires no special maintenance, but a periodic visual inspection is recommended to prevent breakdowns. Clean the machine at least once a week to remove dust and dirt using auto-cleaning cloths. Do not use water, flammable, or corrosive liquids. Always disconnect the compressed air supply before performing maintenance.
Troubleshooting
If the machine does not work, check if the air is connected, if the pressure is too low (adjust between 2 and 6.5 bar), or if the speed potentiometer is set to minimum. If the rivet is not placed correctly, check for faulty mandrels/matrices, glue residue, or incorrect rivet length.
Manufacturer information
GYS
Practical help
Common problems
Riveting machine does not work
Check air connection, ensure air pressure is between 2 and 6.5 bar, and verify the speed potentiometer is not set to minimum.
Rivet is not placed correctly
Check for faulty mandrel or matrix, clean any glue residue, ensure sufficient air pressure, and verify correct rivet length.
Air leak
Inspect the pipe, coupling, and seals for damage. Replace if necessary or contact the manufacturer for seal repair.
Before use
- Check that air pressure does not exceed 10 bar
- Ensure compressed air supply is clean and dry
- Verify the riveting arm is securely locked with the pin
- Check that the matrix and punch support are correctly associated and tightened
- Wear appropriate PPE (eye protection, gloves, hearing protection)
Specs in practice
- Max air pressure
- 10 bar (145 psi)
- Max clamping force
- 100 kN
Images and diagrams
- Machine parts diagram (Page 2)
- Arm installation steps (Page 7)
- Connector assembly (Page 8)
- Riveting angle (90°) (Page 9)
- Rivet extraction (Page 12)
Model compatibility
- Compatible with self-piercing rivets (Punch Rivets) and Flow-Form rivets
- Suitable for sheet metal up to 8.3 mm thick
- Use only GYS-recommended arms and consumables

Manual page author
Emily Carter
User documentation editor
Prepares concise manual descriptions and highlights the most useful setup, operation, and maintenance information for readers.