Furniture / Storage Cabinets
Assembly Instructions for Hokku Designs 173 2-Tier Computer Desk
Step-by-step assembly guide for the Hokku Designs 173 2-Tier Computer Desk. Includes hardware list, parts list, and assembly instructions to ensure proper setup.
Quick answers from the manual
Quick answer
- This manual provides assembly instructions for the Hokku Designs 173 2-Tier Computer Desk, including a parts list, hardware list, and step-by-step assembly guide. p. 1, 2, 3, 4
Key actions
- Assemble on a clean, flat surface. p. 1
- Do not fully tighten bolts until the desk is completely assembled. p. 2
- Check all bolts, screws, and knobs every 4 months. p. 2
Problems and fixes
Missing parts
Contact the store of purchase immediately.
p. 2Maintenance and reset
- Check all bolts, screws, and knobs every 4 months to ensure they remain tight. p. 2
Where to find it in the PDF
- Cover and Hardware List p. 1
- Parts List and Assembly Notes p. 2
- Assembly Steps 2-3 p. 3
- Assembly Steps 4-7 p. 4
Table of contents
Manual images
Click an image to enlargeImportant Information
Before beginning assembly, please read the following guidelines to ensure a smooth setup process:
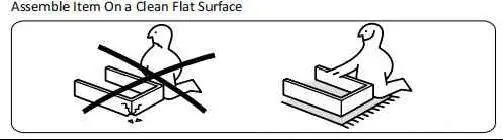
- Assemble on a clean, flat surface: This prevents damage to the desk panels during assembly.
- Tools required: You will need a hammer and screwdrivers.
- Do not fully tighten bolts: During the assembly process, do not tighten all bolts completely until the desk is fully assembled. This allows for minor adjustments.
- Missing parts: If you find that any parts or hardware are missing, contact the store where you purchased the item immediately.
Parts and Hardware
Ensure you have all the necessary components before starting:
- Parts: A, B, C, D, E, F, G, H.
- Hardware: 1 (M6*30), 2 (screw), 3 (M6*60), 4 (nut), 5.
Assembly Instructions
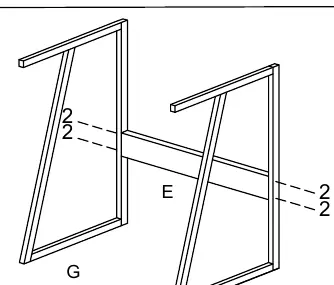
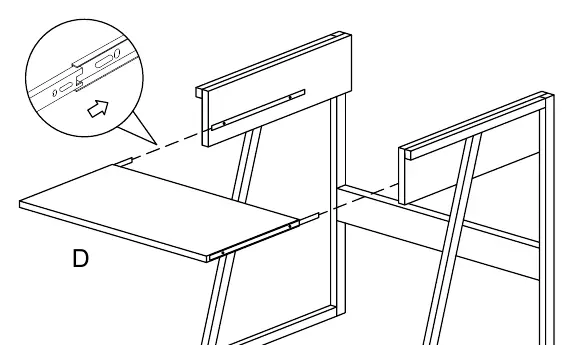
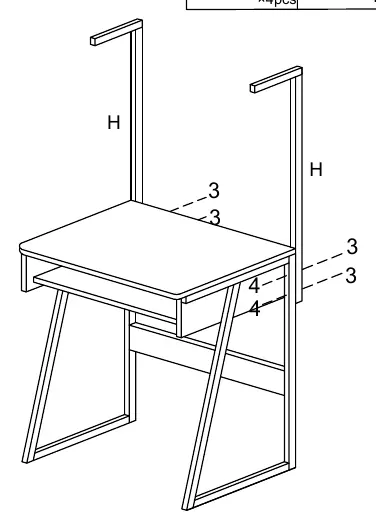
Step 1
Connect the side frames (G) using panel E and secure them with fitting 2.
Step 2 and 3
Install panels B and C using fitting 1. Then, attach panel D to the structure.
Step 4
Install panel A using fitting 1.
Step 5
Install the square tubes (H) using fittings 3 and 4.
Step 6
Install panel F using fitting 2 to complete the upper section.
Step 7
Verify that all parts are aligned and tighten all bolts securely to complete the installation.
Maintenance
To ensure the longevity and stability of your desk, check all bolts, screws, and knobs at least every 4 months to ensure they remain tight.
Practical help
Common problems
Missing parts or hardware
Contact the store where you purchased the item immediately.
Desk feels unstable or wobbly
Ensure all bolts are fully tightened after the initial assembly is complete.
Before use
- Clear a flat, clean surface for assembly.
- Verify all parts (A-H) are present.
- Verify all hardware (1-5) is present.
- Prepare a hammer and screwdrivers.
- Do not tighten bolts fully until the desk is completely assembled.
Images and diagrams
- The manual uses exploded views to show how parts A-H connect using hardware 1-5.
- Steps 1-7 guide you through the sequential assembly process.

Manual page author
Emily Carter
User documentation editor
Prepares concise manual descriptions and highlights the most useful setup, operation, and maintenance information for readers.