Furniture / Tables & Desks
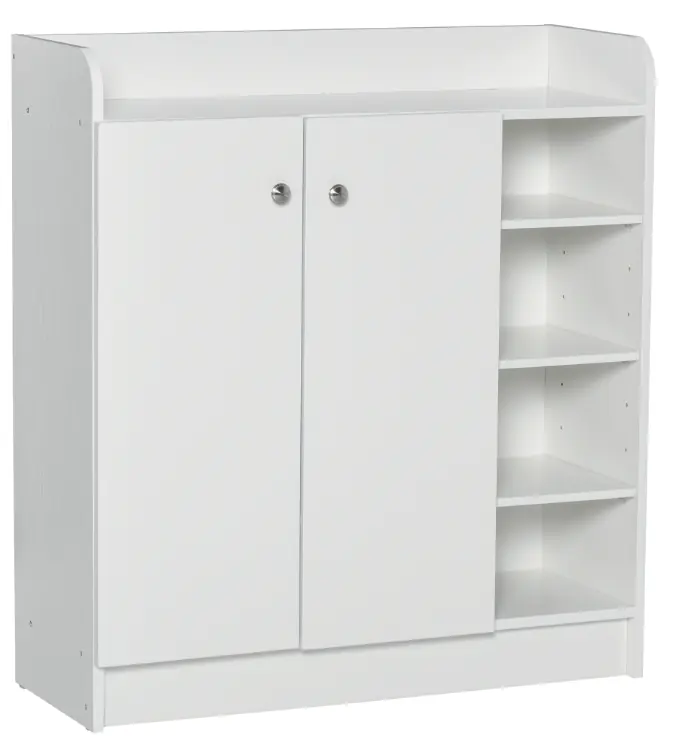
Assembly Instructions for Homcom 02-0622 2-Door Shoe Cabinet
Complete assembly guide for the Homcom 02-0622 and 02-0623 2-door shoe cabinet. Includes step-by-step installation instructions, hardware details, and hinge adjustment guide.
Quick answers from the manual
Quick answer
- This manual provides step-by-step assembly instructions for the Homcom 2-door shoe cabinet (models 02-0622 and 02-0623). p. 1, 4, 5
Key actions
- Assemble the cabinet frame using the provided hardware and panels. p. 4, 5
- Adjust door hinges for proper alignment. p. 3
First start
- Prepare the workspace and ensure all parts are present before beginning the 60-minute assembly process. p. 1, 4
Problems and fixes
Doors are not aligned
Adjust the hinge screws vertically, laterally, or for gap spacing.
p. 3Where to find it in the PDF
- Cover and Assembly Overview p. 1
- Hardware Assembly Tips p. 2
- Hinge Adjustment p. 3
- Parts List and Assembly Steps p. 4, 5
- Customer Support p. 6
Table of contents
Manual images
Click an image to enlargeQuick Guide
This manual provides assembly instructions for the Homcom 2-door shoe cabinet (models 02-0622 and 02-0623). The estimated assembly time is 60 minutes. It is recommended to have two people for the assembly process. Ensure you have a screwdriver available before starting.
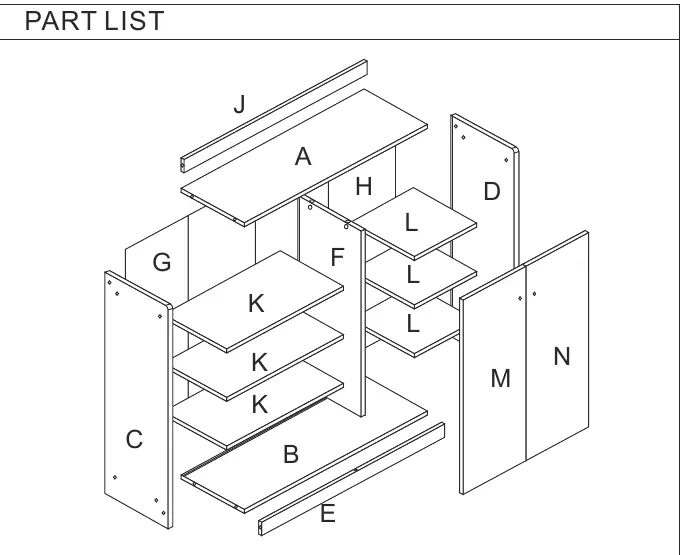
Hardware and Parts
Before beginning, verify that all parts listed in the parts list are present. The hardware kit includes various screws (ax15, bx24, cx24, dx2, ex2, fx4, gx2, hx2) and connectors required for assembly.
Assembly Steps
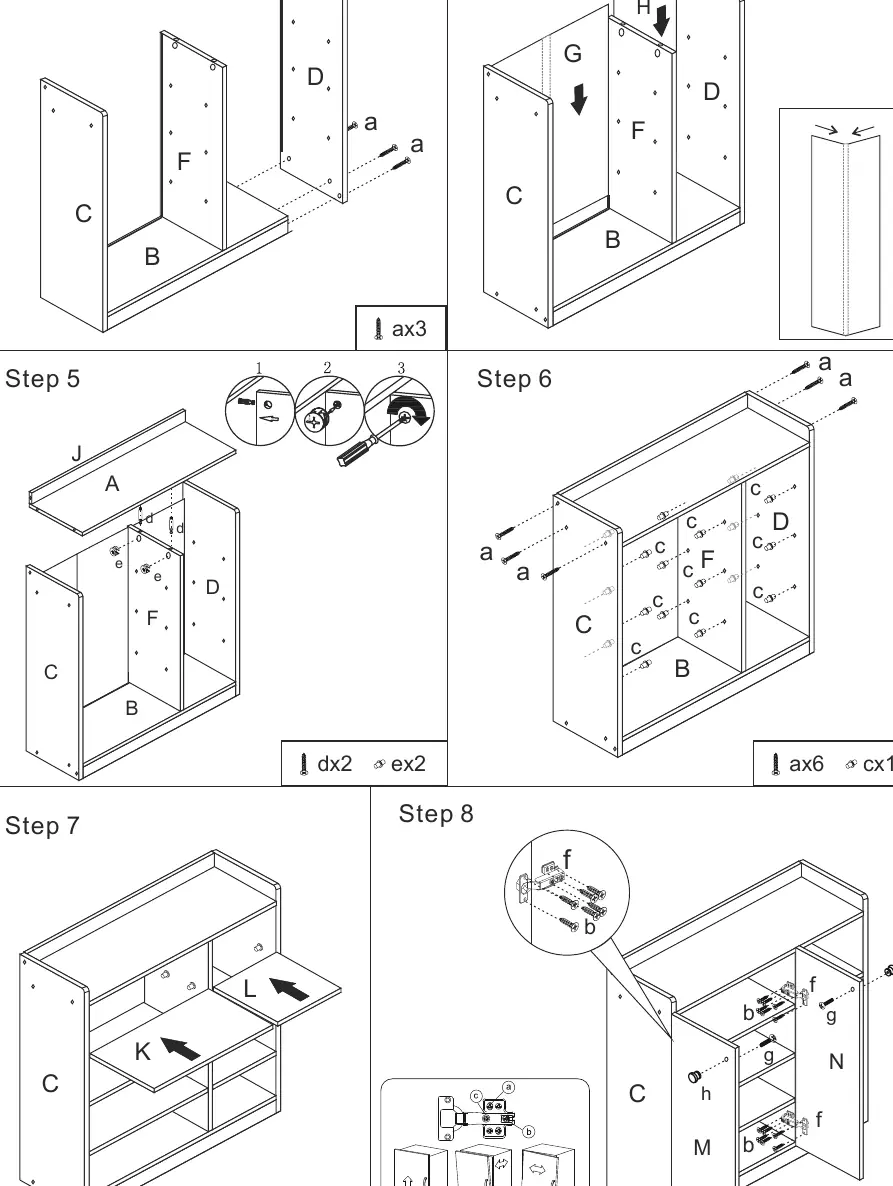
- Step 1-2: Assemble the base (B) and side panels (C, F) using the provided screws (a).
- Step 3-4: Attach the remaining side panels (D, G) and top/back panels (H) to the structure.
- Step 5: Install the cam locks and quickfit connectors (d, e) into the designated panels.
- Step 6: Secure the main frame structure using screws (a) and cam locks (c).
- Step 7: Insert the internal shelves (K, L) into the cabinet.
- Step 8: Attach the doors (M, N) using the hinges (f) and secure with screws (b, g, h).
Hinge Adjustment
If the doors are misaligned, use the hinge adjustment screws to correct their position:
- Vertical adjustment: Loosen the screw shown in the diagram and move the door up or down as needed.
- Gap adjustment: Turn the screw clockwise or anti-clockwise to adjust the gap between the door and the main frame.
- Lateral adjustment: Turn the screw to move the door laterally for proper alignment.
Customer Support
If you have any questions or require assistance, please contact the customer service center provided in the manual for your specific region. Contact details are available on the final page of the document.
Manufacturer information
HOMCOM
Practical help
Common problems
Doors are misaligned
Use the hinge adjustment screws to adjust the door vertically, laterally, or to change the gap between the door and the frame.
Before use
- Check all parts against the parts list
- Ensure you have a screwdriver
- Two people recommended for assembly
- Clear a 60-minute workspace
Images and diagrams
- Exploded view shows the assembly order of panels A through N.
- Step 5 details the correct installation of cam locks and quickfit connectors.
- Hinge adjustment diagrams show how to align doors vertically and laterally.
Model compatibility
- Models 02-0622 and 02-0623 share the same assembly instructions.

Manual page author
Michael Turner
Technical manual editor
Reviews PDF manuals for structure, safety notes, and practical product details so readers can find the right information quickly.