Home / Seasonal Decorations
User Manual for Home Accents Holiday 6ft LED Gold Encrusted Casket
Complete assembly and operation guide for the Home Accents Holiday 6ft LED Gold Encrusted Casket. Includes setup instructions for lying, standing, and leaning displays, safety warnings, and troubleshooting.
Quick answers from the manual
Quick answer
- This is a decorative Halloween casket. It requires assembly of panels and can be displayed lying down, standing, or leaning. It features LED lights with a built-in timer (6h on/18h off). p. 1, 3, 10
Key actions
- Assemble casket body p. 4, 5, 6
- Set up display stand p. 11, 12
- Activate LED lights p. 3, 10
First start
- Connect the adapter to the cable and plug into a 100V-240V outlet. Use the switch to select ON or TIMER mode. p. 3, 10
Show 4 more answers Show less
Problems and fixes
Product does not work
Check wire connections, ensure switch is in 'ON' position, and verify adapter is plugged into a working 100V-240V outlet.
p. 3Maintenance and reset
- Remove AC/DC adapter when not in use. For disassembly, use a screwdriver to remove hydraulic rod screws. p. 2, 9
Technical specifications
| Parameter | Value | Meaning | Pages |
|---|---|---|---|
| Power Input | 100V-240V | Standard household outlet voltage range. | p. 3, 10 |
| Adapter Output | 4.5V, 0.2A | Required power specifications for the LED lights. | p. 3, 10 |
Where to find it in the PDF
- Safety Instructions p. 2, 3
- Parts List p. 4
- Assembly p. 5, 6, 7, 8
- Display Options p. 11, 12
- Skeleton Display p. 13, 14
Table of contents
Manual images
Click an image to enlargeQuick Guide from the Manual
The Home Accents Holiday 6ft LED Gold Encrusted Casket is a decorative Halloween prop designed for indoor and outdoor use. It features LED lighting with a built-in timer function (6 hours on, 18 hours off). The product can be displayed in three ways: lying down, standing upright, or leaning. Important: This is not a toy. Do not sit, climb, or lie in the casket. Keep away from heat sources and do not use within 10 feet of a pool.
Safety Instructions
- General: Not a toy; for decorative purposes only. Not intended for children under 14.
- Electrical: Do not use extension cords. Use only the included UL-listed 4.5V, 0.2A adapter.
- Outdoor Use: Must be connected to a covered Class A GFCI protected receptacle that is weatherproof.
- Placement: Do not install in a bathroom or within 10 feet of a pool. Keep away from open fires, radiators, and stoves.
Parts List
Ensure all parts are present before assembly:
- Casket Sections: Upper (A), Middle Base (B), Middle Side (C), Lower (D), Bottom Lid (E), Top Lid (F)
- Supports: Front Metal Base (H), Back Metal Base (I), Upper Metal Support (J)
- Accessories: Pillow (G), Cable with Switch (K), AC/DC Adapter (L), Locking Plugs (M), Tools (N), Skeleton Holder (O), Ground Stakes (P)
Assembly
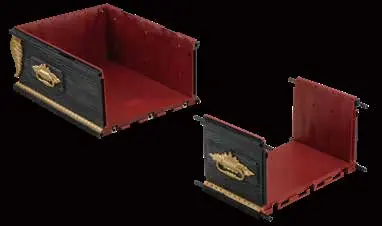
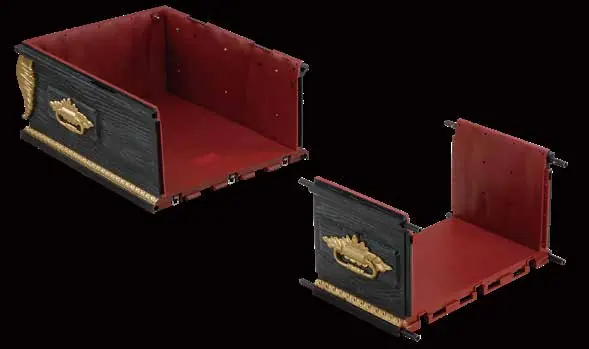
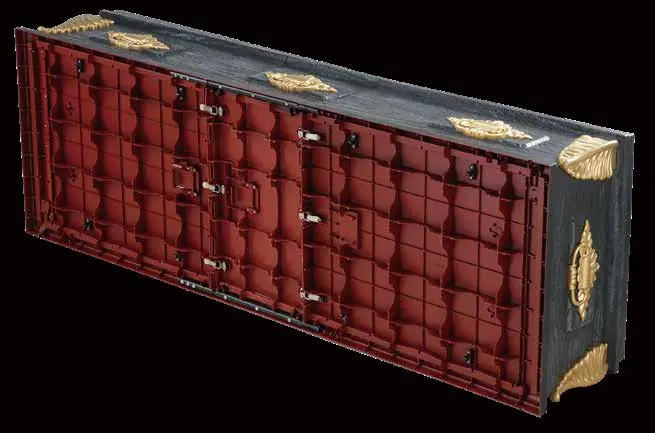
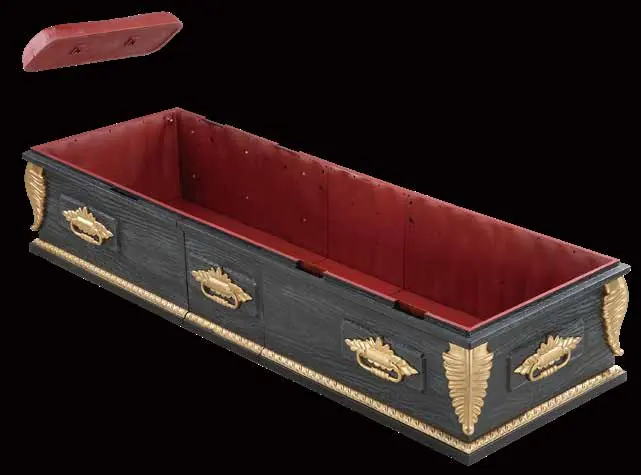
The casket is assembled by connecting the various panels using the provided locking keys and clips.
Casket Body Assembly
- Connect the Middle Base Panel (B) to the Middle Side Panels (C) using the locking keys located under part B.
- Attach the Upper Section (A) to the base assembly using the provided tools (N) to turn the locking keys inside part A.
- Attach the Lower Section (D) to the other side of the base assembly using the locking keys inside part D.
- Secure the casket parts together by closing the six locking clips located under parts A and D.
- Connect the power cable (K) to the casket and secure it using the cable holders.
- Attach the pillow (G) into the casket (A).
Lid Assembly
- Attach the Bottom Lid Panel (E) to the Lower Section (D).
- Attach the Top Lid Panel (F) to the Upper Section (A).
- Insert the locking plugs (M) into the holes of (A) and secure with tools (N).
- Attach the hydraulic rod connected to (F) into the ball-shaped protrusion on (A).
Display Options
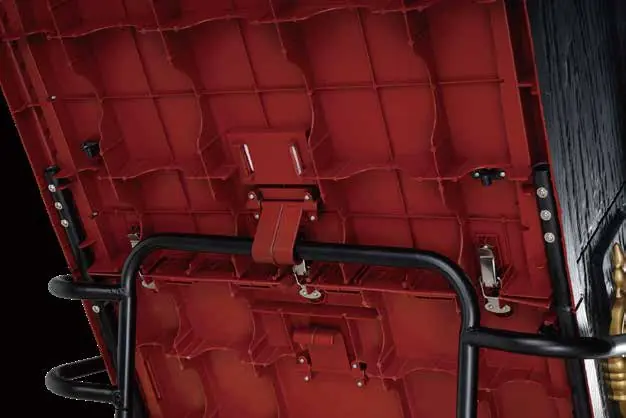
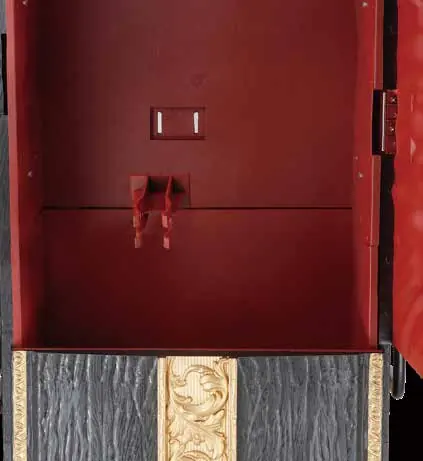
Stand Display
- Assemble the metal base by connecting the Front Metal Base (H) and Back Metal Base (I).
- Attach the Upper Metal Support (J) to the base.
- Secure the stand to the ground using the four ground stakes (P).
- Upright Display: Pull the lower position clip on the bottom of (B) down over the metal support (J).
- Leaning Display: Pull the upper position clip on the bottom of (A) down over the metal support (J).
Operation
Connect the included 4.5V 0.2A AC/DC Adapter (L) to the cable (K) and plug it into a standard 100V-240V household outlet.
- ON: Activates LED lights continuously.
- OFF: Turns off the lights.
- TIMER: Activates LED lights for 6 hours, then automatically shuts off for 18 hours.
Troubleshooting
- Product does not work: Check all wire connections, ensure the switch is in the "ON" position, and verify the adapter is plugged into a working power source.
Manufacturer information
Home Accents Holiday
Practical help
Common problems
Product does not work
Check wire connections, ensure switch is in 'ON' position, and verify adapter is plugged into a working 100V-240V outlet.
Unstable display
Ensure the surface is flat/level and use the included ground stakes for outdoor setups.
Before use
- Ensure all parts are present (A-P)
- Verify power source is 100V-240V
- Check for flat/level ground for outdoor display
- Ensure adult supervision for children
Show more Show less
Specs in practice
- Power Adapter
- 4.5V, 0.2A UL listed adapter included.
Images and diagrams
- Assembly involves connecting panels A, B, C, D, E, F using locking keys and clips.
- Stand assembly uses metal base H, I, J and ground stakes P.
- Skeleton holder O attaches to the back of panel A.
Model compatibility
- Not a toy; for decoration only.
- Not for use by children under 14.
- Do not use extension cords.
- Do not install within 10 feet of a pool.

Manual page author
Emily Carter
User documentation editor