Garden / Seasonal Decorations
Assembly Instructions for Home Accents Holiday 6ft Polar Wishes MOTION LED Snowman Juggling Snowballs
Quick guide for assembling and maintaining your 6ft Polar Wishes MOTION LED Snowman Juggling Snowballs. Includes step-by-step assembly instructions, troubleshooting tips, and care guidelines.
Quick answers from the manual
Quick answer
- This manual provides assembly instructions for the 6ft Polar Wishes MOTION LED Snowman Juggling Snowballs (Model 22RT13722111). It includes a parts list, step-by-step assembly, and troubleshooting tips. p. 1, 2
Key actions
- Assemble the snowman parts (Lower Body, Upper Body, Head, Hat, Arms) using the provided plastic ties. p. 2
- Secure the snowman to the ground using the provided anchoring strings and ground stakes. p. 2
First start
- Inspect the lighting string for damage before use. Assemble parts while laying flat on the ground. Connect to a wall outlet or UL Listed Power Cord. p. 1
Show 4 more answers Show less
Problems and fixes
Item does not light
Check for loose/broken bulbs, ensure correct plug connection, check for broken/burned out fuse in plug.
p. 1Maintenance and reset
- Wipe the unit with a damp cloth and allow to dry before storing. Store in a cool, dry location protected from sunlight. p. 1
Technical specifications
| Parameter | Value | Meaning | Pages |
|---|---|---|---|
| Power Rating | 19.8 Watts (0.165 Amps) | Electrical rating of the lighting string | p. 1 |
Where to find it in the PDF
- Assembly Instructions p. 1, 2
Table of contents
Manual images
Click an image to enlargeQuick Guide
This document provides assembly and care instructions for the 6ft Polar Wishes MOTION LED Snowman Juggling Snowballs. It is recommended to assemble the product while laying flat on the ground or a table. Assembly may require more than one person. Ensure you inspect the lighting string for any damage before use.
Parts List
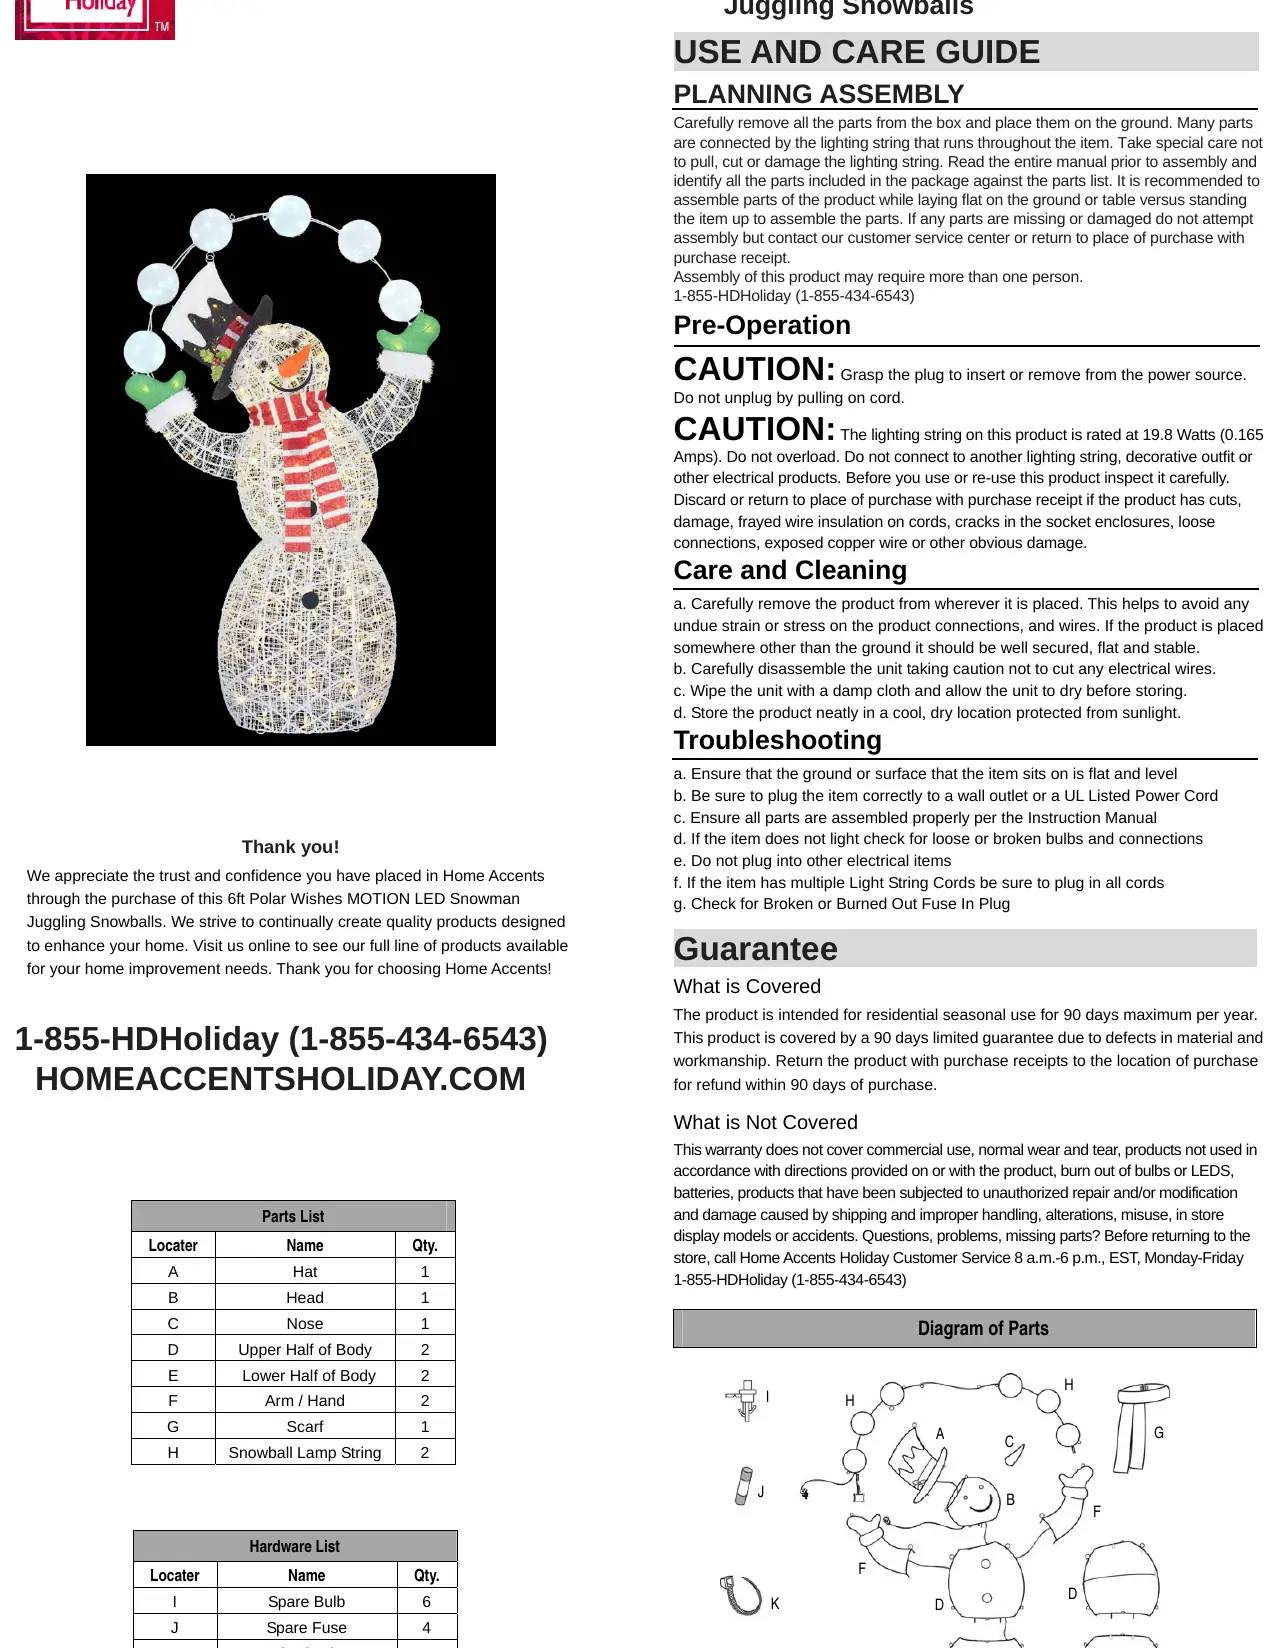
- A: Hat (1)
- B: Head (1)
- C: Nose (1)
- D: Upper Half of Body (2)
- E: Lower Half of Body (2)
- F: Arm / Hand (2)
- G: Scarf (1)
- H: Snowball Lamp String (2)
- Hardware: Spare Bulb (6), Spare Fuse (4), Plastic Tie (25), Ground Stake (8), Anchoring String (4)
Assembly Instructions
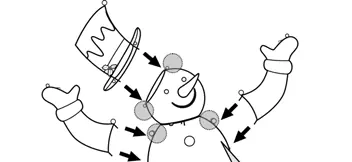
- Assembling the Lower Body: Align the two halves of the Lower Body (E) and fasten at the connecting loops with Plastic Ties (K).
- Assembling the Upper Body: Align the two halves of the Upper Body (D) and fasten at the connecting loops with Plastic Ties (K).
- Assembling the Upper & Lower Body together: Insert the connecting rods at the bottom of the Upper Body (D) into the connecting holes at the top of the Lower Body (E) and fasten with Plastic Ties (K).
- Assembling the Head and Nose: Insert the connecting rods at the bottom of the Head (B) into the top of the Upper Body (D) and fasten with Plastic Ties (K). Insert the Nose (C) into the front of the Head (B).
- Assembling the Hat and Arms: Insert the Hat (A) into the top of the Head (B). Insert the Arms (F) into the Upper Body (D) and fasten with Plastic Ties (K).
- Assembling the Snowball Lamp String: Connect the two sections of the Snowball Lamp String (H) and fasten with Plastic Ties (K). Insert the rods on the ends of the string into the Arms (F) and secure with Plastic Ties (K).
- Assembling the Scarf: Wrap the Scarf (G) around the neck. Connect the electrical plug from the right Arm/Hand (F) into the plug from the Snowball Lamp String (H).
- Assembling the Strings and Ground Stakes: Hook the Anchoring Strings (M) onto the shoulder area. Attach the free end to the Ground Stake (L), pull tight, and plant firmly into the ground.
Care and Cleaning
- Remove the product from its location to avoid strain on connections.
- If placed off the ground, ensure it is well secured, flat, and stable.
- Disassemble carefully, ensuring no electrical wires are cut.
- Wipe the unit with a damp cloth and allow it to dry before storing.
- Store in a cool, dry location protected from sunlight.
Troubleshooting
- Ensure the surface is flat and level.
- Verify the item is plugged correctly into a wall outlet or UL Listed Power Cord.
- Check that all parts are assembled properly.
- If the item does not light, check for loose or broken bulbs and connections.
- Check for a broken or burned-out fuse in the plug.
Warranty
This product is covered by a 90-day limited guarantee for residential seasonal use. It does not cover commercial use, normal wear and tear, unauthorized repairs, or damage caused by improper handling or accidents. For assistance, contact Home Accents Holiday Customer Service at 1-855-HDHoliday (1-855-434-6543).
Manufacturer information
Home Accents Holiday
Practical help
Common problems
Item does not light
Check for loose or broken bulbs, ensure the plug is connected correctly to a wall outlet, and check for a broken or burned-out fuse in the plug.
Parts missing or damaged
Do not attempt assembly. Contact customer service or return to the place of purchase with your receipt.
Before use
- Remove all parts from the box and identify them against the parts list.
- Ensure you have enough space to assemble the product while laying flat.
- Inspect the lighting string for cuts, damage, or frayed wire insulation.
- Check for cracks in the socket enclosures or loose connections.
- Ensure you have assistance if needed, as assembly may require more than one person.
Show more Show less
Specs in practice
- Power Rating
- The lighting string is rated at 19.8 Watts (0.165 Amps). Do not overload.
Images and diagrams
- The manual includes a 'Diagram of Parts' to help identify components.
- Step-by-step diagrams illustrate the use of plastic ties (K) to secure body parts and the connection of the snowball lamp string.
Model compatibility
- Intended for residential seasonal use only (90 days maximum per year).
- Do not connect to another lighting string, decorative outfit, or other electrical products.

Manual page author
Michael Turner
Technical manual editor