General / Other Manuals
User Guide for Honeywell Xenon Ultra 196X Series Area Imaging Scanner
A comprehensive user guide for the Honeywell Xenon Ultra 196X series, covering installation, interface programming, cordless system operation, maintenance, and troubleshooting.
Table of contents
Manual images
Jump to the sectionQuick guide from the manual
The Honeywell Xenon Ultra 196X series includes corded (1960) and cordless (1962) area imaging scanners. This guide provides instructions for installation, interface programming, and maintenance. Scanners are factory-programmed for common terminal settings; use the provided barcodes to customize configurations.
Device Overview
The scanner features an LED indicator, a trigger, and a scan window. Cordless models include a battery or supercapacitor, a battery LED, and an end cap. The base unit serves as a charger and communication interface.
Installation and Connection
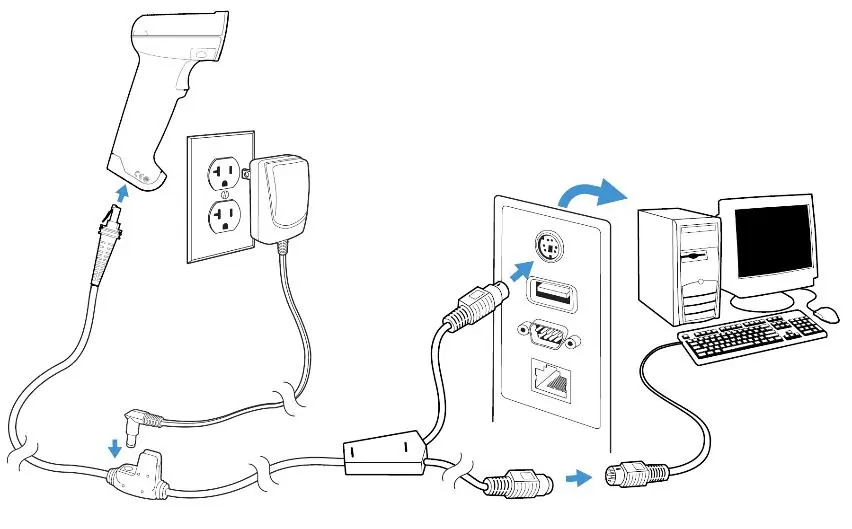
Corded Scanners: Connect the interface cable to the scanner, then to the host computer's USB, keyboard wedge, or RS232 serial port. Ensure the host is powered off before connecting keyboard wedge or serial cables.


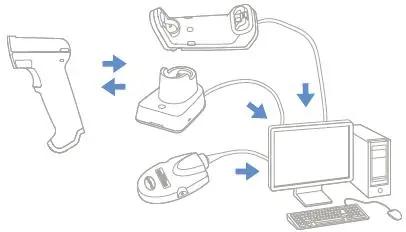
Cordless Scanners: Connect the power supply and communication cable to the base unit. Place the scanner in the base to automatically link it. Ensure the base is connected to a power source for optimal charging.
Operation and Configuration
Scanners are programmed by scanning menu barcodes. You can set custom defaults, configure interface types (USB, RS232, Keyboard Wedge), and adjust scanning modes like presentation mode or manual trigger. The manual provides extensive programming charts for symbologies, data formatting, and prefix/suffix settings.
Cordless System Management
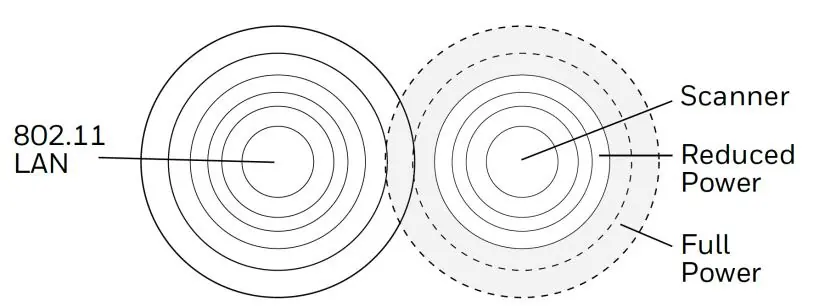
Cordless scanners link to a base or access point. Use the 'Find My' button on the base to locate the scanner. The system supports batch mode for data collection when out of range, which can be configured for automatic or manual transmission.
Maintenance and Troubleshooting
Clean the scanner window with a soft, damp cloth and mild detergent. Do not use solvents. If the scanner fails to operate, check cable connections, ensure the host is powered, and verify that the scanner is properly linked to the base. Refer to the troubleshooting section for specific LED error code interpretations.

Manufacturer information
Honeywell International Inc.
Practical help
Common problems
Scanner does not read barcodes
Check if the window is clean, the barcode is not damaged, and the symbology is enabled.
Cordless scanner not linking to base
Ensure the scanner is properly seated in the base and the base is powered.
Data not appearing on host
Verify the interface cable is securely connected and the correct interface is programmed.
Before use
- Inspect the package for shipping damage.
- Verify all ordered items are present.
- Charge the battery for at least 4 hours before first use.
- Ensure the correct interface cable is used for your host system.
- Power off the host before connecting keyboard wedge or serial cables.
Specs in practice
- Operating Temperature
- 0°C to 50°C (+32°F to +122°F)
Images and diagrams
- The manual provides diagrams for connecting the scanner via USB, keyboard wedge, and RS232.
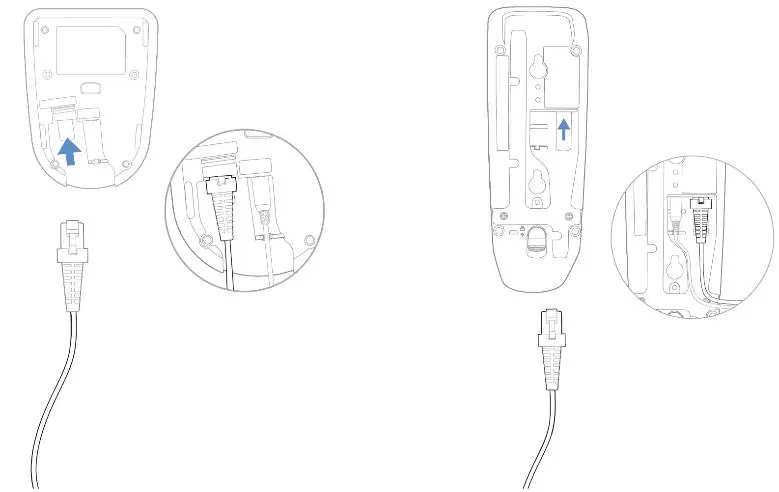
- Illustrations show how to replace the interface cable and the battery/supercapacitor.
- Diagrams illustrate the 'Find My' button and base unit LED indicators.
Model compatibility
- Compatible with various host interfaces including USB, RS232, and Keyboard Wedge.
- Supports Bluetooth Class 1, Class 2, and BLE communication.
- Use only Honeywell-approved battery packs (BAT-SCN11 or BAT-SCN11WC).

Manual page author
Michael Turner
Technical manual editor
Reviews PDF manuals for structure, safety notes, and practical product details so readers can find the right information quickly.