General / Other Manuals
User Manual for HP 100W G6 Docking Station
Quick guide for the HP 100W G6 Docking Station, covering setup, hardware components, firmware updates, monitor configuration, and troubleshooting steps.
Table of contents
Manual images
Jump to the sectionQuick guide from the manual
This document provides essential instructions for installing, configuring, and using the HP 100W G6 Docking Station. It covers hardware identification, power connection, computer integration, and troubleshooting common connectivity or display issues.
Device description
The docking station features various ports for connectivity:
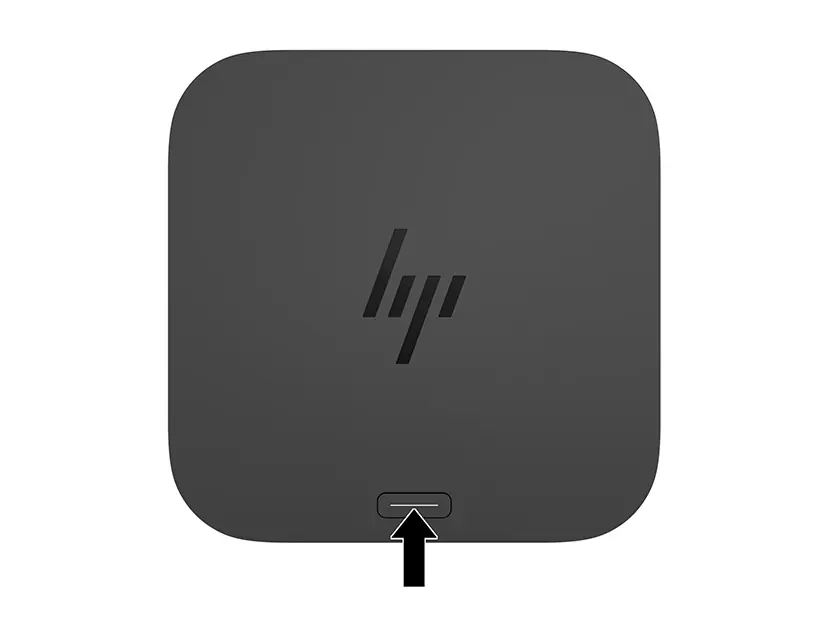
- Top: Power button and status indicator.
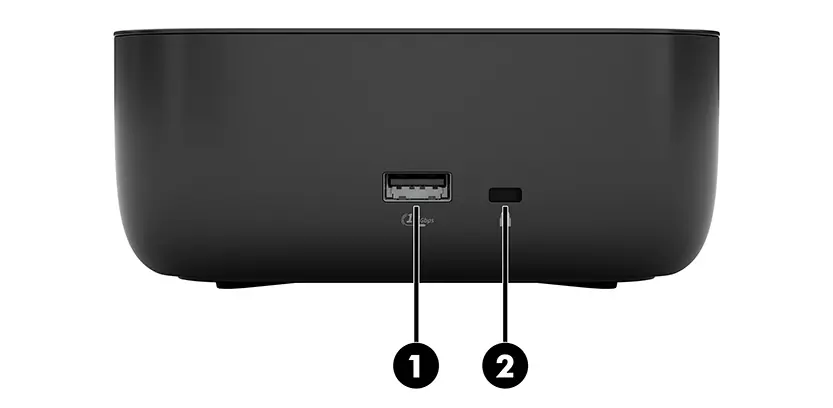
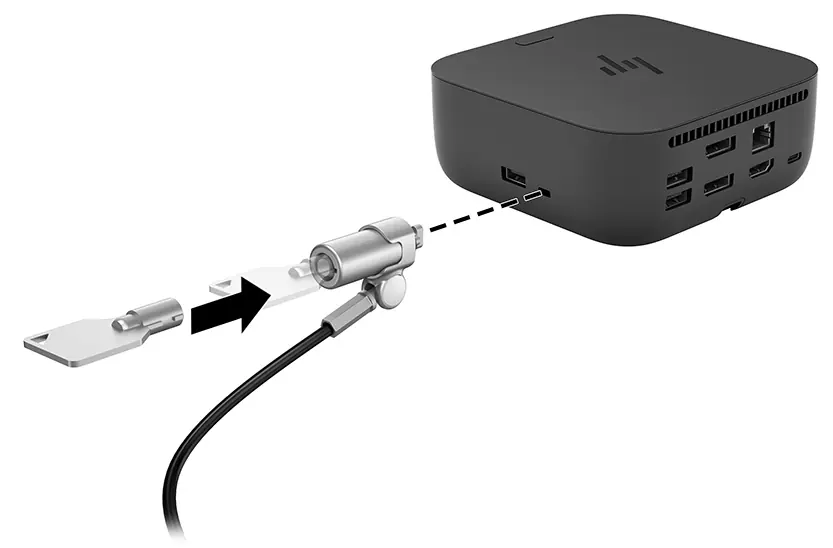
- Right side: 10 Gbps USB port and security lock slot.
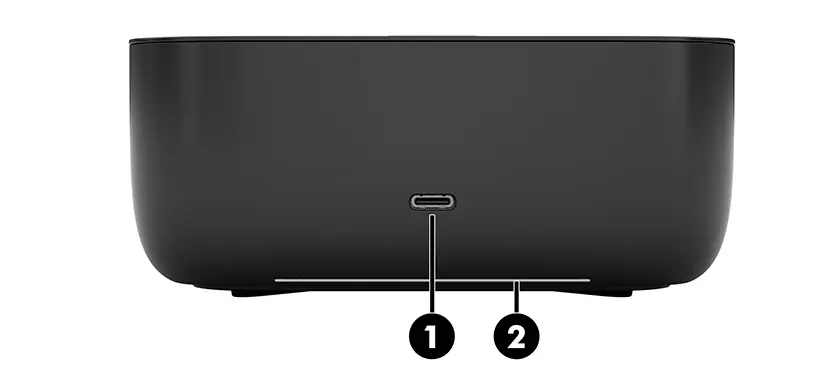
- Front: 10 Gbps USB Type-C port and light bar.
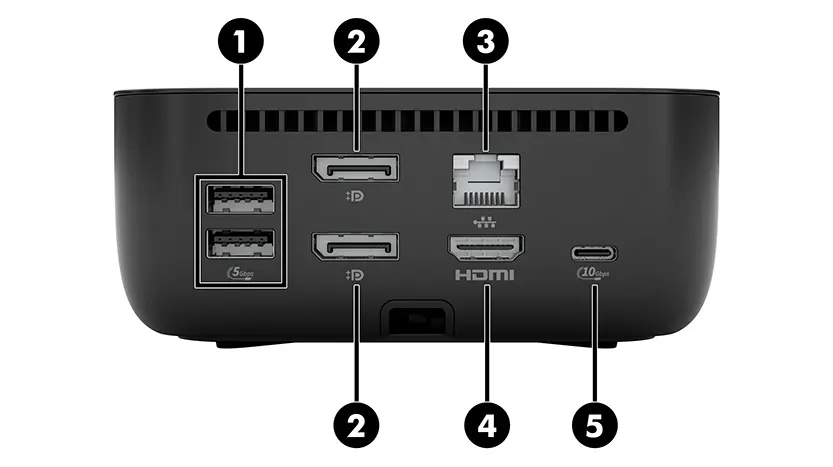
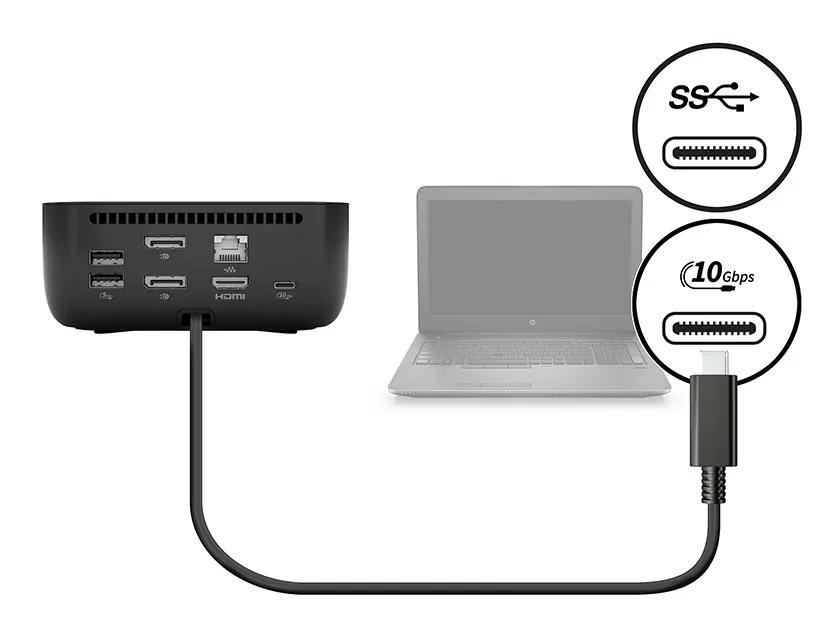
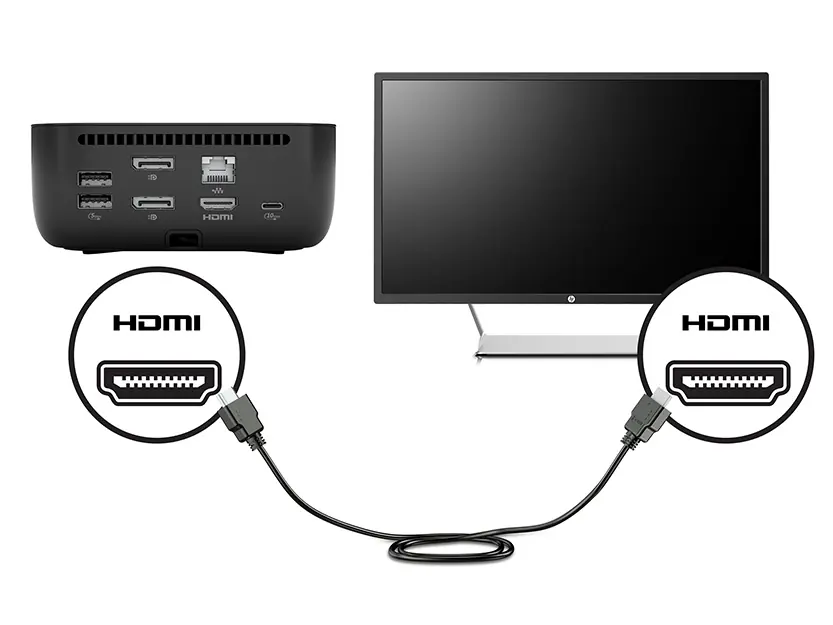
- Rear: Two 5 Gbps USB ports, two DisplayPort v1.4 ports, RJ-45 network jack, HDMI v2.1 port, and a 10 Gbps USB Type-C port.
Setup and installation
To set up the docking station:
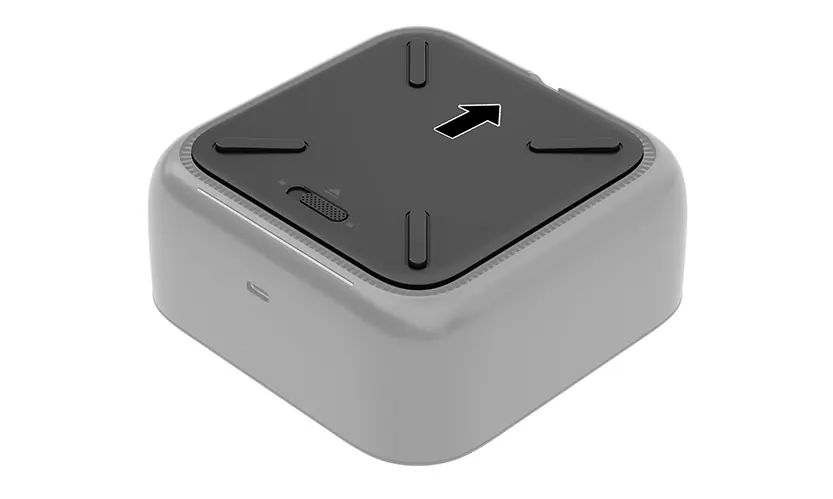
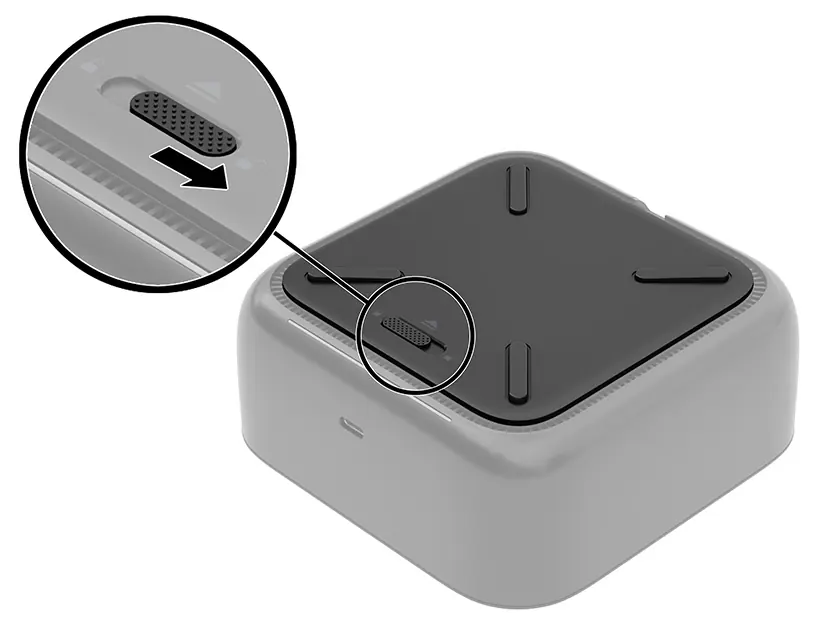

- Place the dock upside down and slide the lock switch to the unlock position.
- Slide the cover back and lift it off.
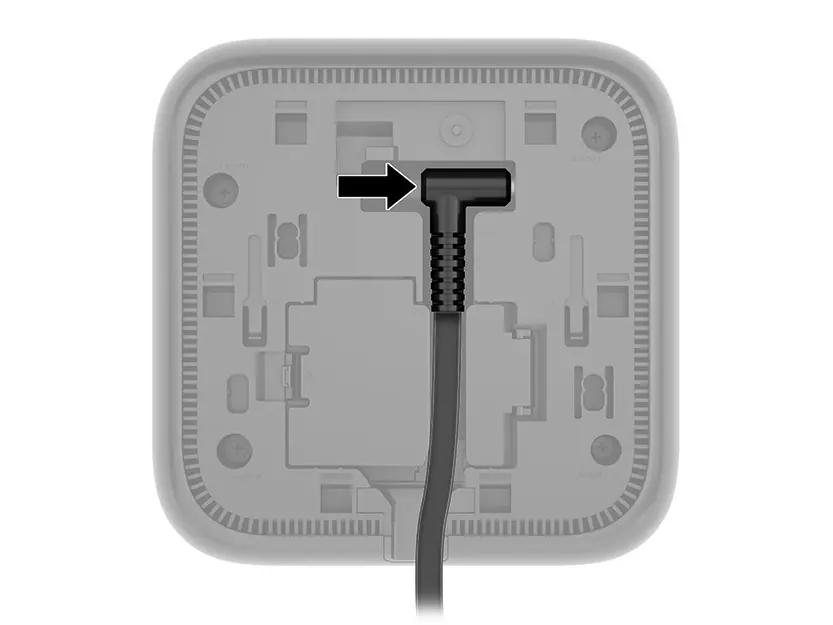
- Connect the power adapter to the port on the bottom and route the cable through the channel.
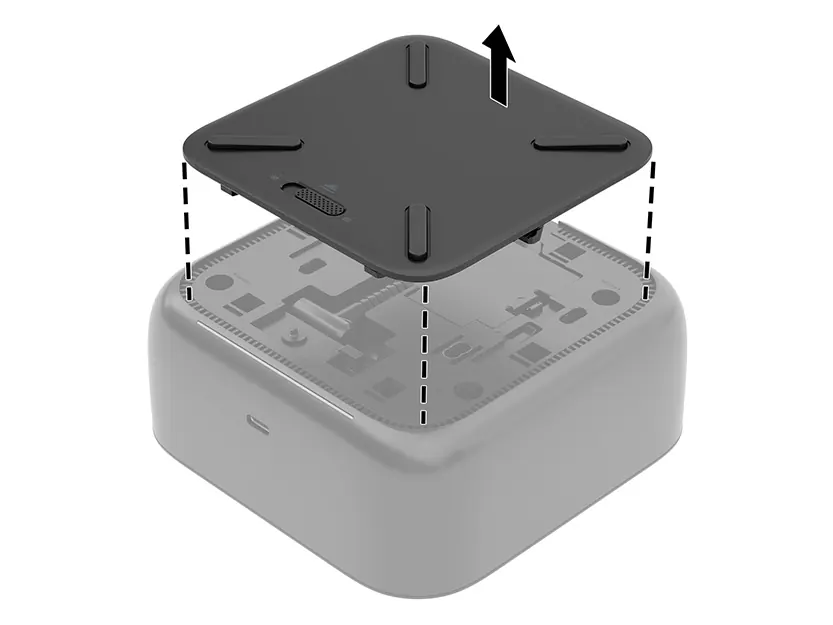
- Reattach the cover, slide it forward until it clicks, and lock the switch.
- Connect the power cable to an AC outlet.
- Connect the dock to your computer using the USB Type-C cable.
Software and firmware
Use the myHP app to access support and product information. Firmware can be updated via the dock's configuration page (accessible at http://hpdock/local/ after connecting via Wi-Fi) or by using the HP Firmware Installer (HPFirmwareInstaller.exe) on a connected computer.
Monitor configuration
You can connect up to three external monitors. Use Windows display settings (Start, Settings, System) or press the Windows key + p to toggle between display modes such as Extend, Duplicate, or Second screen only.
Troubleshooting
If devices are not working, ensure the dock is properly powered and connected. If a USB device fails, try resetting the port by disconnecting the device, the power cable, and the dock from the computer, then reconnecting them in order. For video issues, ensure the latest Intel drivers are installed or adjust the resolution settings.
Safety and maintenance
Always use the provided power cable. Do not connect modem or telephone cables to the RJ-45 network jack. Keep the dock in a well-ventilated area within the specified operating temperature range (0°C to 35°C).
Official resources from the manual
Manufacturer information
HP Inc.
Practical help
Common problems
Status light is off
Ensure the power cable is connected to a wall outlet and the dock.
Connected USB device not working
Reset the port: disconnect the device, unplug the dock's power, disconnect the dock from the computer, then reconnect everything.
External monitor not detected
Ensure the monitor is configured in Windows display settings or update Intel graphics drivers.
Video is distorted
Adjust the display scaling in Windows settings to a maximum of 225%.
Before use
- Verify the dock is connected to a power source.
- Ensure the computer is running a supported OS (Windows 11, Linux, macOS, ChromeOS, or ThinPro).
- Check that the USB Type-C cable is securely connected to both the dock and the computer.
- Ensure you have administrator rights on the computer for initial setup.
Specs in practice
- Power Delivery
- Provides up to 100W of power to the connected computer via USB Type-C.
- Operating Temperature
- Recommended range is 0°C to 35°C (32°F to 95°F).
Images and diagrams
- The top panel features a power button with a status LED that indicates connection and firmware update states.
- The rear panel contains the primary connectivity ports including HDMI, DisplayPort, and RJ-45.
- The bottom panel houses the power connection and the locking mechanism for the base cover.
Model compatibility
- Requires USB-C, HDMI 2.1/2.0, and DisplayPort 1.4 support on the host computer for full functionality.
- Some features may not be available on all computer models.
- Windows in S-mode may limit compatibility with certain third-party accessories.

Manual page author
Emily Carter
User documentation editor
Prepares concise manual descriptions and highlights the most useful setup, operation, and maintenance information for readers.