Tools / Welding Equipment
Operator's Manual for Lincoln Electric Invertec 165SX Welding Machine
Quick guide for the Lincoln Electric Invertec 165SX welding machine. Learn about installation, safety precautions, TIG and stick welding setup, maintenance, and troubleshooting.
Table of contents
Manual images
Click an image to enlargeQuick guide from the manual
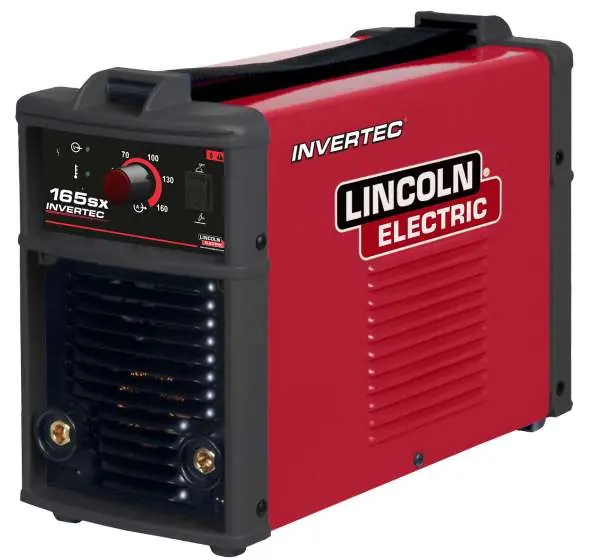
This document provides essential operating and safety instructions for the Lincoln Electric Invertec 165SX welding machine. It is intended for qualified personnel. The machine is designed for coated electrode (stick) and GTAW (TIG) welding. Always ensure the power supply matches the machine specifications before use.
Safety Precautions
- Electric Shock: High voltages are generated. Do not touch the electrode, work clamp, or connected work pieces. Insulate yourself from the equipment.
- Fumes and Gases: Welding produces hazardous fumes. Use adequate ventilation or exhaust.
- Radiation: Use a shield with the proper filter to protect eyes from arc rays. Wear flame-resistant clothing.
- Fire Hazard: Remove fire hazards from the welding area. Keep a fire extinguisher nearby.
- Pacemakers: Electromagnetic fields may interfere with pacemakers. Consult a physician before use.
Installation and Setup
Stick Welding
- Turn off the welder before making connections.
- Fit the electrode to the clamp.
- Connect the ground cable to the negative (-) receptacle.
- Connect the electrode cable to the positive (+) receptacle.
- Adjust the welding current using the ampere selector.
TIG Welding
- Turn off the welder before making connections.
- Preset the unit to Lift TIG mode.
- Connect the ground cable to the positive (+) receptacle.
- Connect the torch power cable to the negative (-) receptacle.
- Connect the gas hose to the regulator on the gas cylinder.
- Open the gas valve on the torch before starting.
Operating Functions
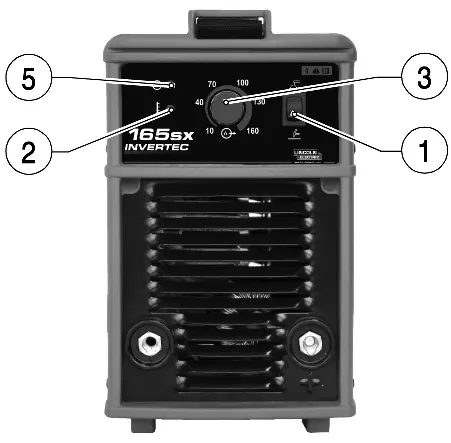
The front panel features the process selector, fault LED (yellow), current regulation potentiometer, and arc LED (green). The machine includes an anti-sticking device that disables power if the electrode sticks, allowing for easy detachment.
Maintenance
Disconnect power before performing maintenance.
- Every 3 months: Replace illegible labels, clean and tighten welding terminals, replace damaged gas tubing, and repair/replace cracked cables.
- Every 6 months: Remove dust inside the generator using a jet of dry air. Increase frequency if working in dusty environments.
Troubleshooting
If the generator does not weld, check if the main switch is off or if the power lead is interrupted. If the orange fault LED lights up, the unit has overheated; keep the machine on and wait 10-15 minutes for it to cool down. If welding power is reduced, check that wires are intact and the work surface is clean.
Practical help
Common problems
Generator does not weld (digital switch not lit)
Check if the main switch is off or if the power lead is interrupted.
Outgoing current interrupted (orange LED on)
Overheating has occurred. Keep the generator switched on and wait 10-15 minutes for the temperature to drop.
Welding power reduced
Check that wires are intact and pliers are applied to a clean welding surface (free of rust, paint, or oils).
Sticking electrode
The welding arc is too short or current is too low. Increase current values.
Before use
- Examine package and equipment for shipping damage.
- Verify the power supply corresponds to the machine requirements (230V).
- Ensure the work area is free of flammable materials.
- Wear appropriate protective gear (helmet, gloves, flame-resistant clothing).
- Check all cables for insulation damage.
- Ensure adequate ventilation in the welding area.
Images and diagrams
- 1: Process selector for choosing between stick and TIG welding.
- 2: Fault LED (Yellow) indicating overheating.
- 3: Current regulation potentiometer.
- 4: On/Off switch.
- 5: Arc LED (Green) indicating the machine is powered on.
Model compatibility
- Class A equipment not intended for residential locations using public low-voltage supply systems.
- Compatible with motor generators meeting data plate specifications (185-275 Vac, 50/60 Hz).

Manual page author
David Miller
Documentation analyst
Organizes user manual content into clear summaries, with attention to model details, product context, and everyday usability.