Electronics / USB Hubs & Docking
User Manual for OWC Mercury Elite Pro Dual 3-Port Hub
Quick guide for the OWC Mercury Elite Pro Dual 3-Port Hub. Learn how to install drives, configure RAID modes, connect to your computer, and troubleshoot common issues.
Table of contents
Manual images
Click an image to enlargeQuick Guide
The OWC Mercury Elite Pro Dual 3-Port Hub is a high-performance storage enclosure. To get started, ensure your computer meets the system requirements, install your SATA drives, configure the desired RAID mode using the rear dial, and connect the device to your computer via the USB-C host port. Always unmount drives properly before disconnecting to prevent data loss.
System Requirements
- Operating System: Mac, Windows 7 or later, Linux, iPadOS 13+, Android 10+, ChromeOS.
- Hardware: Any computer, tablet, or phone with a USB or Thunderbolt (USB-C) port.
- Supported Drives: 3.5" or 2.5" SATA HDDs/SSDs.
Front and Rear View
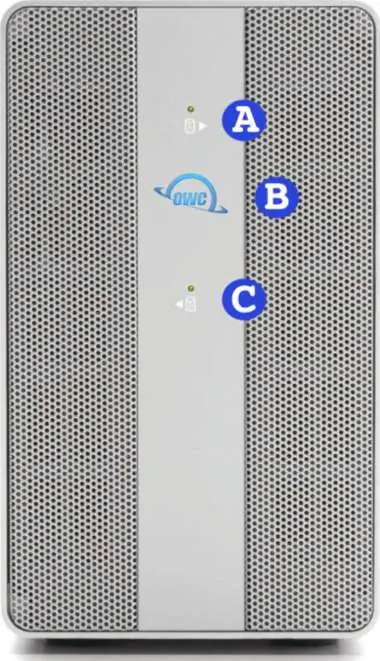
Front Panel: Features Drive A and Drive B status LEDs (blink green for activity, red for errors) and a Power LED (solid white for power, solid blue for active system connection).
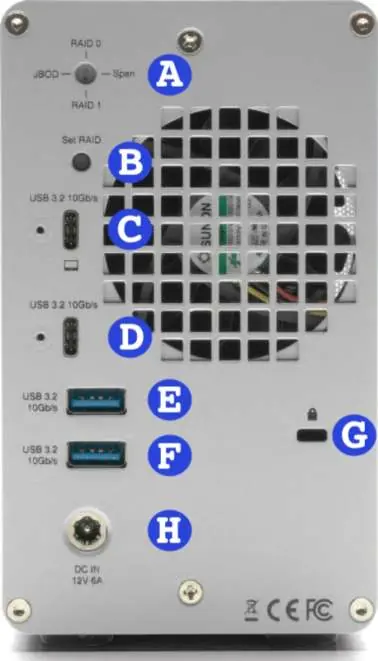
Rear Panel: Includes the RAID selector dial, RAID Set button, USB 3.2 Gen 2 Type-C Host Port, USB 3.2 Gen 2 Type-C Hub port, USB 3.2 Gen 2 Type-A Hub ports, Kensington Security slot, and DC IN power port.
Assembly
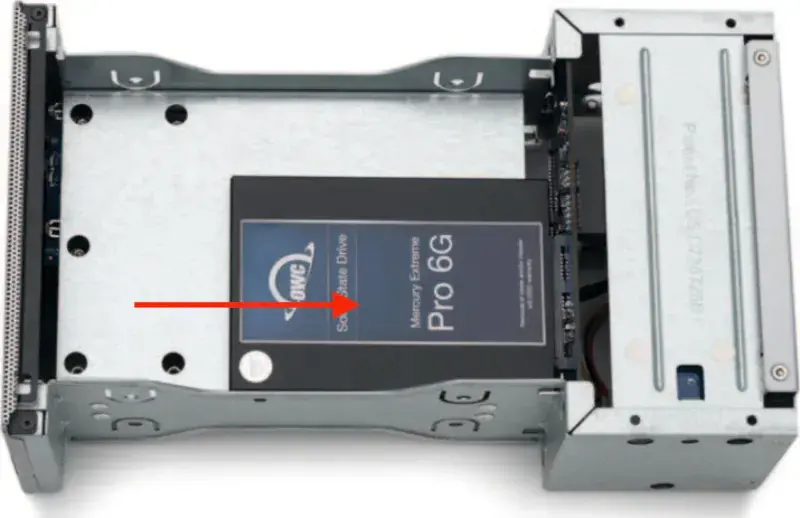
- Place the device on a static-free surface.
- Remove the two screws from the back of the enclosure and slide out the inner chassis.
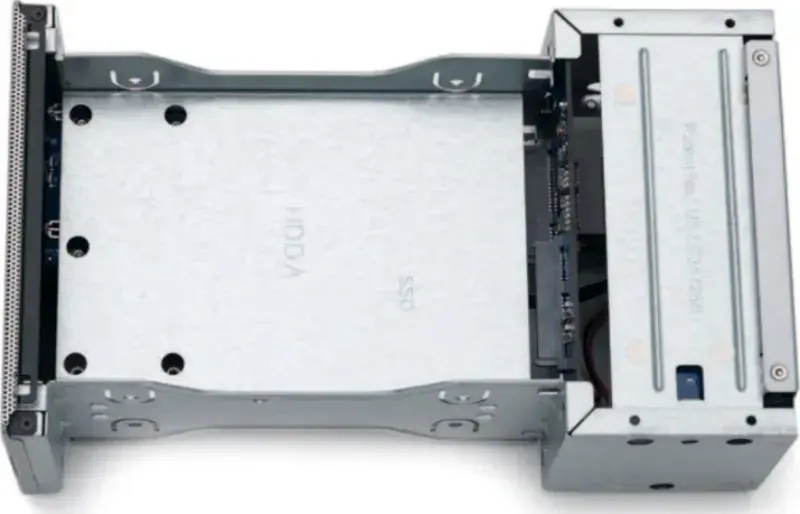
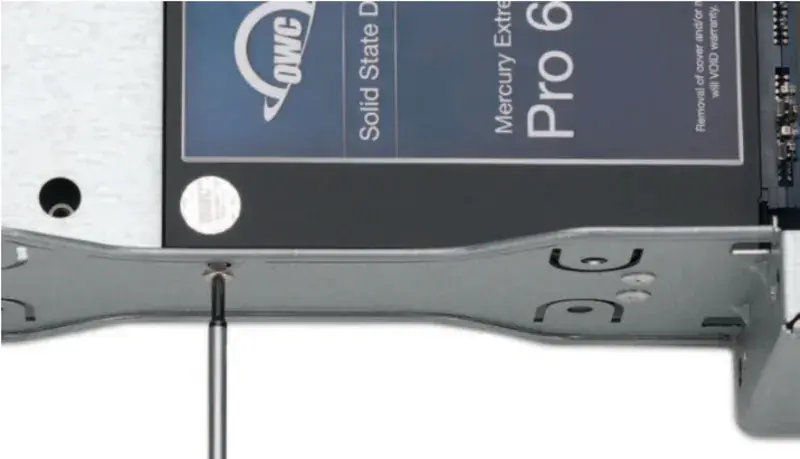
- Place your SATA drive(s) into the housing with the label facing upwards.
- Affix the drive to the inner chassis using the appropriate screw holes (red circles for 3.5" drives, yellow circle for 2.5" drives).
- Slide the chassis back into the enclosure and secure it with the screws removed in step 1.
Hardware RAID Configuration
The device supports RAID 0, RAID 1, Span, and Independent modes. Note: Changing the RAID mode will result in data loss if drives contain data.
- Connect the device to power and your computer.
- Use a paper-clip or flat-head screwdriver to rotate the RAID dial to the desired mode.
- Press and hold the RAID Set button for 3-5 seconds until the new volume(s) appear on your computer.
- Format the new volume(s) using your operating system's disk management tools.
Device Management
- Drive Failure: If a drive fails, the corresponding LED will light up solid red.
- Replacing Drives: In RAID 1, a failed drive can be replaced to rebuild the array. In RAID 0, Span, or Independent modes, data on the failed drive is lost.
- Unmounting: Always eject or unmount the disk(s) from your OS before powering off or disconnecting the device to ensure data integrity.
Troubleshooting
- If the device does not power on, verify the power cable connection and ensure the power strip is switched on.
- If a drive LED is solid red, the drive may have failed, be missing, or not be connected properly.
- If RAID mode changes are not working, ensure the drives are mounted; unmounting them puts them in a powered-down state that prevents configuration changes.
Practical help
Common problems
Drive LED lights up solid red
The drive has failed, is not fully connected, or is missing. Check the physical connection or replace the drive if necessary.
RAID mode change not working
Ensure the drives are mounted. Unmounting the drives puts them into a powered-down state, preventing RAID mode changes.
Device not powering on
Verify the power cable is connected to the device and a power source. If using a power strip, ensure it is switched to the ON position.
Before use
- Verify your operating system is compatible (Mac, Windows 7+, Linux, iPadOS 13+, Android 10+, ChromeOS).
- Ensure you have a USB or Thunderbolt (USB-C) port available on your host device.
- Prepare a static-free work surface for drive installation.
- Have a paper-clip or flat-head screwdriver ready for RAID dial adjustment.
- Ensure you have identical SATA drives (model, capacity, firmware) if setting up RAID 0 or RAID 1.
Images and diagrams
- Front View: Identifies Drive A/B status LEDs and Power LED.
- Rear View: Identifies RAID selector dial, RAID Set button, USB ports, and power input.
Model compatibility
- Requires identical SATA drives (model, capacity, firmware) for RAID 0 and RAID 1 configurations.
- Hardware RAID configurations are not supported with NVMe U.2 SSDs.
- USB ports are backwards compatible with USB 3.0 and USB 2.0 devices.

Manual page author
Michael Turner
Technical manual editor
Reviews PDF manuals for structure, safety notes, and practical product details so readers can find the right information quickly.