Lighting / Fixtures
Installation Manual for Parmida 18W 4FT T8 Type B LED Tube
Installation guide for Parmida 18W 4FT T8 Type B LED tubes. Includes step-by-step wiring diagrams for retrofitting inductive and electronic ballasts, single and double-ended connection methods, and safety precautions.
Quick answers from the manual
Quick answer
- This manual provides instructions for retrofitting existing fluorescent light fixtures with Parmida 18W 4FT T8 Type B LED tubes by bypassing the existing ballast. p. 3
Key actions
- Disconnect power at the breaker panel. p. 3
- Bypass the ballast by disconnecting wires between the tombstone and ballast. p. 3, 4
- Attach the Modification Replacement Cautionary Sticker Label. p. 5
First start
- Insert the LED tube, replace the diffuser, attach the warning label, and restore power. p. 5
Where to find it in the PDF
- Safety Warnings p. 3
- Retrofit Installation Steps p. 3, 5
- Wiring Diagrams p. 3, 4, 5
Table of contents
Manual images
Click an image to enlargeImportant Information
This document provides installation instructions for the Parmida 18W 4FT T8 Type B LED Tube. This is a retrofit kit that requires bypassing the existing ballast in the light fixture. Installation must be performed by a licensed electrician. This device is not suitable for use with emergency ballasts or dimming ballasts and is intended for indoor use only (damp or dry locations).
Installation Preparation
- Disconnect power to the light fixture at the breaker panel before starting.
- Remove the diffuser lens from the light fixture if applicable.
- Remove existing fluorescent tubes by rotating them a quarter turn and sliding them out.
- Remove the ballast cover (secured with screws or tabs).
Retrofit Installation (Type B)
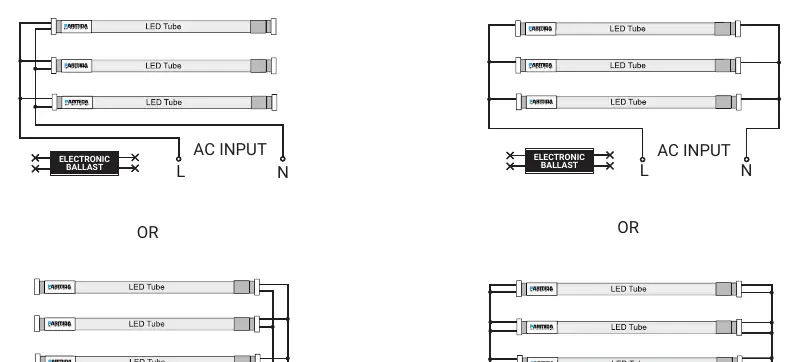
The installation method depends on the type of ballast currently in your fixture. You must disconnect the wires between the tombstone (socket) and the ballast, then connect the AC input (L and N) directly to the tombstones according to the specific wiring diagram for your fixture type.
Wiring Configurations
The manual covers the following configurations:
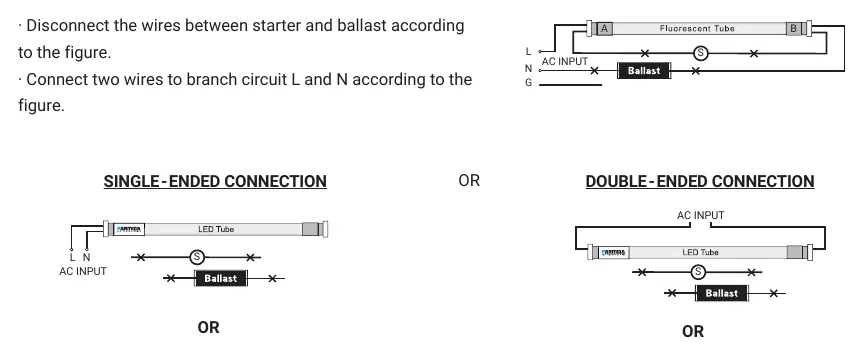
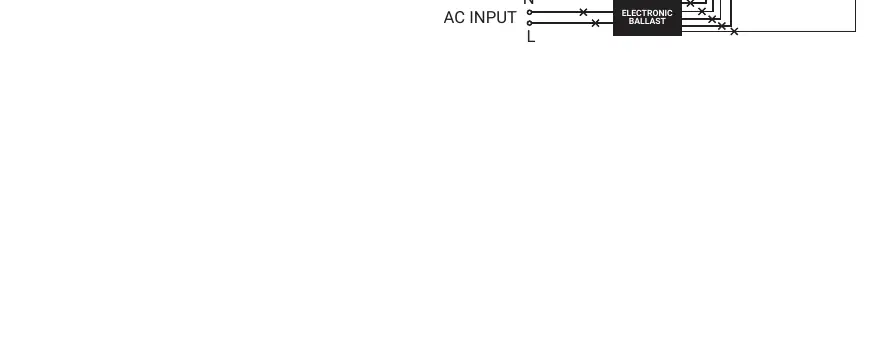

- Inductive Ballast: Requires disconnecting wires between starter and ballast.
- Electronic Ballast (1 Lamp): Requires disconnecting wires between tombstone and ballast.
- Electronic Ballast (2 Lamps): Requires disconnecting wires between tombstone and ballast.
- Electronic Ballast (3 Lamps): Requires disconnecting wires between tombstone and ballast.
- Electronic Ballast (4 Lamps): Requires disconnecting wires between tombstone and ballast.
For each configuration, you may choose between Single-Ended or Double-Ended connection methods. For single-ended connections, use only non-shunted sockets.
Post-Installation
- Insert the LED tube by sliding pins into sockets and rotating a quarter turn until it locks in place.
- Replace the diffuser lens if applicable.
- Attach the provided Modification Replacement Cautionary Sticker Label to a visible area on the luminaire.
- Mark the type of wiring (single or double-ended) on the luminaire label.
- Restore power to the circuit and test the light. Adjust the position of the LED tube if necessary.
Practical help
Common problems
Fixture does not light up after installation
Verify that the ballast has been completely bypassed and that the AC input (L and N) is correctly connected to the tombstones according to the diagram.
Socket compatibility
For single-ended connections, you must use non-shunted sockets. Double-ended connections can be used with either shunted or non-shunted sockets.
Before use
- Ensure power is disconnected at the breaker panel.
- Verify the fixture is not using emergency or dimming ballasts.
- Confirm the installation location is not a wet location.
- Ensure you have a licensed electrician for the installation.
- Check if your fixture uses an inductive or electronic ballast to select the correct wiring diagram.
Specs in practice
- Single-Ended Connection
- Power (L and N) is applied to only one end of the LED tube.
- Double-Ended Connection
- Power (L and N) is applied to both ends of the LED tube.
Images and diagrams
- Wiring diagrams illustrate how to bypass the ballast by cutting existing wires and connecting the AC input directly to the lampholder leads.
- Diagrams distinguish between single-ended and double-ended wiring paths.
Model compatibility
- Not suitable for wet locations.
- Not suitable for emergency ballasts.
- Not suitable for dimming ballasts.

Manual page author
Emily Carter
User documentation editor
Prepares concise manual descriptions and highlights the most useful setup, operation, and maintenance information for readers.