Electronics / Monitors
Quick Start Guide for Philips 243S7 Monitor
Get started with your Philips 243S7 monitor. This guide covers stand assembly, cable connections, OSD menu navigation, and tilt adjustments.
Quick answers from the manual
Quick answer
- The Philips 243S7 is a desktop monitor. Setup involves attaching the stand, connecting power and video cables (VGA, DVI, or HDMI), and using the OSD buttons for settings. p. 1
Key actions
- Attach the stand to the monitor base until it clicks. p. 1
- Connect power and video cables (VGA, DVI, or HDMI). p. 1
First start
- Connect the power cable to the AC IN port and the video cable to the appropriate port (VGA, DVI, or HDMI). p. 1
Show 2 more answers Show less
Technical specifications
| Parameter | Value | Meaning | Pages |
|---|---|---|---|
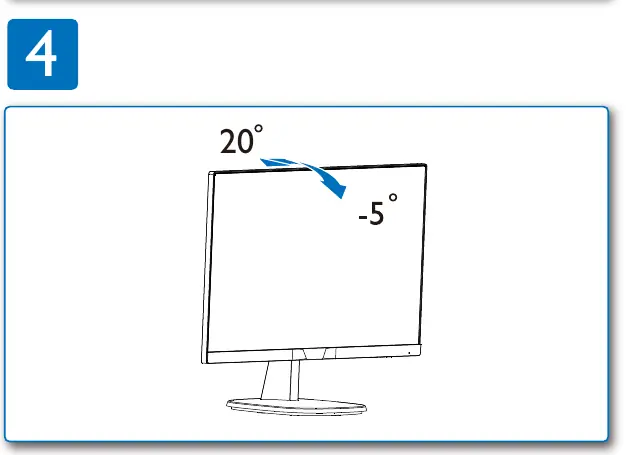
| Tilt | -5° to 20° | Vertical tilt adjustment range | p. 1 |
Where to find it in the PDF
- Quick Start Guide p. 1
Table of contents
Manual images
Click an image to enlargeQuick guide from the manual
This document provides essential setup instructions for the Philips 243S7 monitor. It covers the physical assembly of the stand, connection of power and video cables, and basic operation of the on-screen display (OSD) menu.
Assembly
To assemble the monitor:
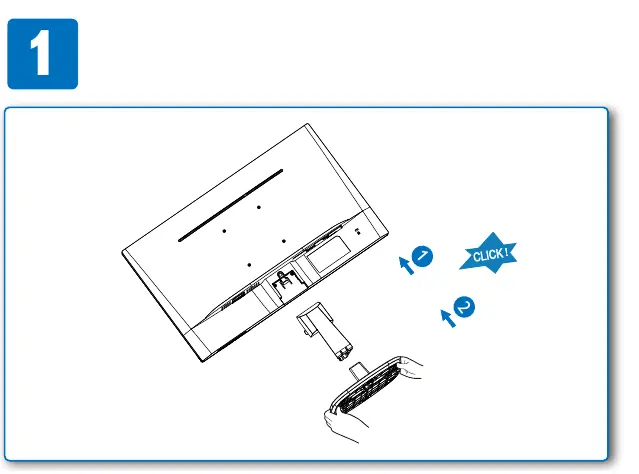
- Attach the stand to the monitor base.
- Ensure the stand clicks securely into place.
Connections
The monitor supports multiple input types. Connect your cables as follows:
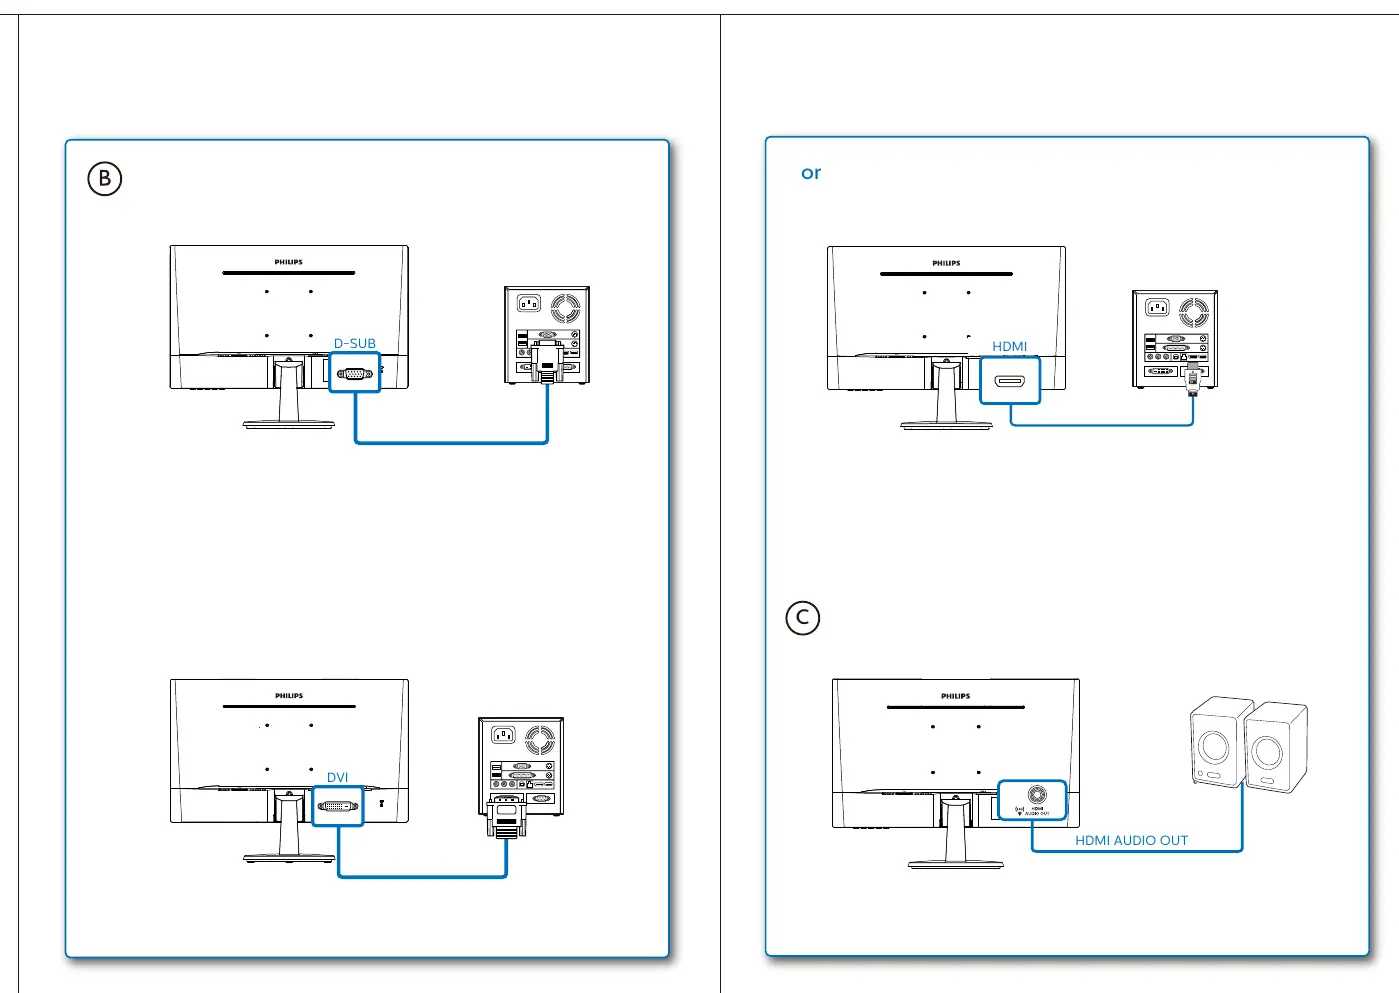
- Power: Connect the power cable to the AC IN port.
- Video: Connect your preferred video cable (VGA, DVI, or HDMI) to the corresponding port on the back of the monitor.
- Audio: An HDMI Audio Out port is available for audio output when using an HDMI connection.
Monitor Controls
Use the buttons located on the front or bottom bezel to navigate the OSD menu. The menu allows you to adjust settings such as:
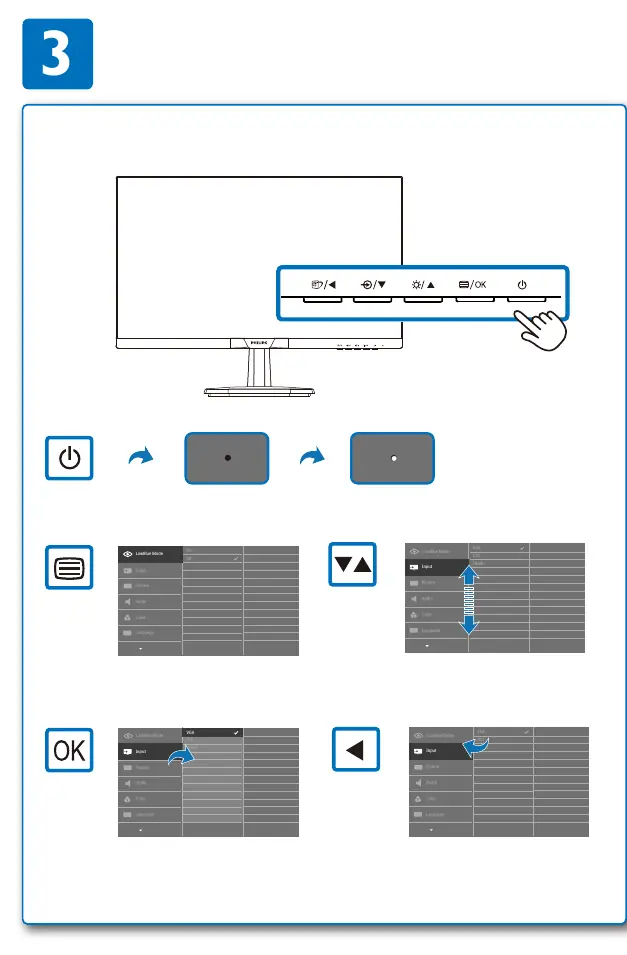
- Input: Select between VGA, DVI, and HDMI.
- Picture: Adjust brightness and other image settings.
- Audio: Manage audio settings.
- Color: Adjust color profiles.
- Language: Change the OSD menu language.
- LowBlue Mode: Toggle LowBlue Mode on or off.
- SmartImage: Select preset image modes (EasyRead, Office, Photo, Movie, Game, Economy, Off).
Adjustments
The monitor supports vertical tilt adjustment. You can tilt the screen from -5 degrees to 20 degrees to achieve a comfortable viewing angle.
Manufacturer information
Philips
Practical help
Before use
- Ensure you have the power cable
- Identify your video source (VGA, DVI, or HDMI)
- Place the monitor on a flat, stable surface
Images and diagrams
- Step 1: Stand assembly
- Step 2: Power and video cable connection
- Step 3: OSD menu navigation
- Step 4: Tilt adjustment
Show more Show less
Model compatibility
- Supports VGA, DVI, and HDMI inputs

Manual page author
Emily Carter
User documentation editor