Electronics / Monitors
Quick Start Guide for Philips 243V7 Series Monitor
Quick start guide for the Philips 243V7 series monitor. Includes assembly instructions, connection diagrams for D-Sub, DVI, HDMI, and DisplayPort, and an overview of OSD menu controls.
Quick answers from the manual
Quick answer
- This guide provides instructions for assembling the stand, connecting video and audio cables, and navigating the OSD menu for the Philips 243V7 series monitors. p. 1
Key actions
- Assemble the stand p. 1
- Connect video cables p. 1
First start
- Connect the power cable and the appropriate video cable (D-Sub, DVI, HDMI, or DP) to your computer. p. 1
Show 1 more answers Show less
Where to find it in the PDF
- Quick Start Guide p. 1
Table of contents
Manual images
Click an image to enlargeQuick guide from the manual
This document provides essential setup instructions for the Philips 243V7 series monitors. It covers the physical assembly of the stand, connection of video and audio cables, and basic navigation of the On-Screen Display (OSD) menu.
Assembly
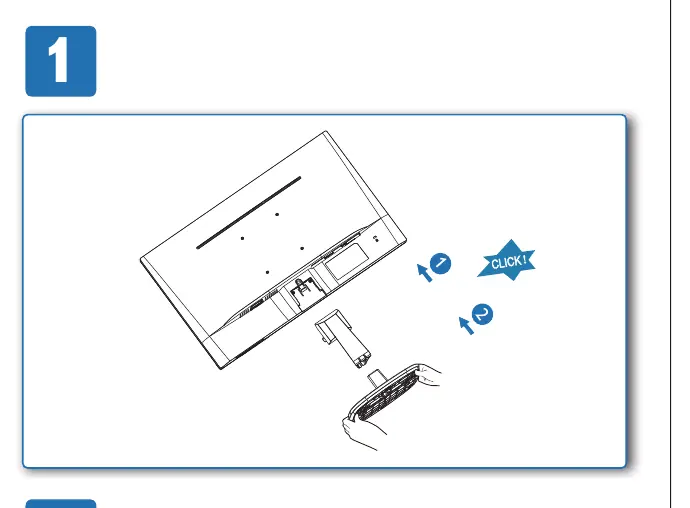
To assemble the monitor, align the stand with the monitor housing and snap it into place until you hear a click. Ensure the connection is secure before placing the monitor on a flat surface.
Connections
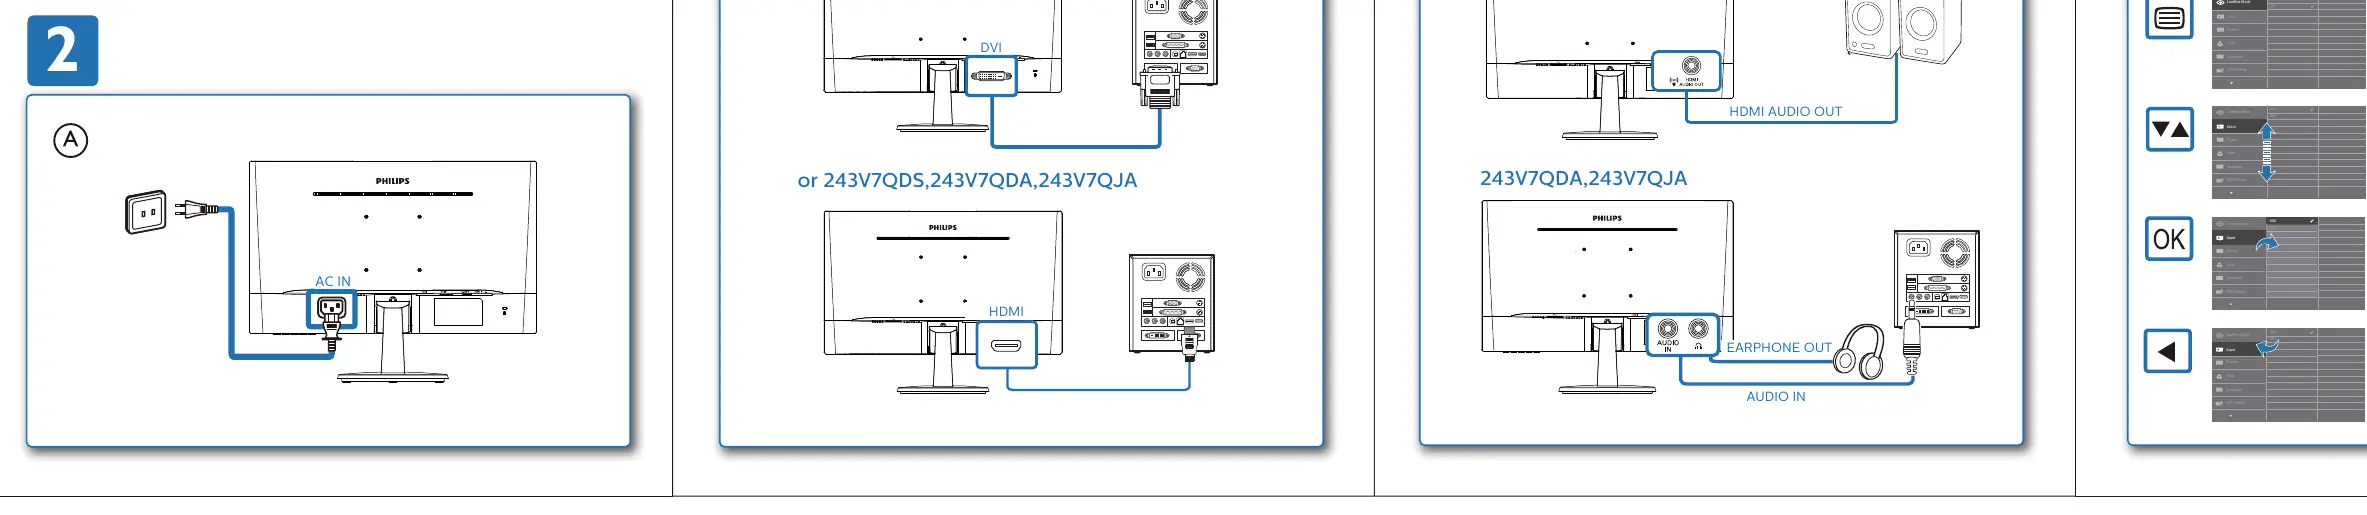
The monitor supports various input types depending on the specific model (243V7QS, 243V7QDS, 243V7QDA, 243V7QJA). Connect the power cable to the AC IN port. Depending on your computer's output, connect the appropriate video cable:
- D-Sub (VGA)
- DVI
- HDMI
- DisplayPort (DP)
If your model supports audio, you can connect an audio cable to the Audio In port or use the Earphone Out port for headphones.
OSD Menu Controls
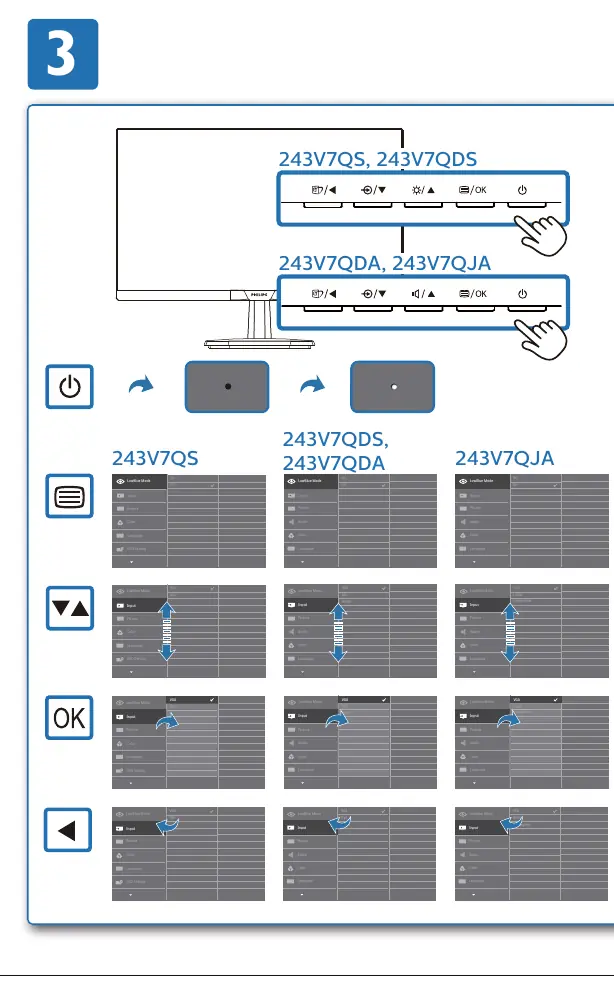
The monitor features a set of buttons on the bottom or back panel to control the OSD menu. Use these buttons to navigate through settings such as brightness, contrast, and input selection. The menu layout allows you to adjust display parameters to suit your viewing preferences.
Manufacturer information
Philips
Practical help
Common problems
No image on screen
Ensure the power cable is securely connected and the correct input source (D-Sub, DVI, HDMI, or DP) is selected via the OSD menu.
Audio not working
Verify that the audio cable is connected to the Audio In port and that the volume is adjusted in the OSD menu.
Before use
- Ensure the stand is securely attached to the monitor.
- Verify the power cable is connected to a wall outlet.
- Identify the correct video cable for your computer (D-Sub, DVI, HDMI, or DP).
- Connect the audio cable if you intend to use the monitor's audio features.
Show more Show less
Images and diagrams
- The guide illustrates the stand assembly process with a clear click-in mechanism.
- Connection diagrams show the specific port layouts for different models, distinguishing between those with and without HDMI/Audio support.
Model compatibility
- The 243V7 series includes multiple models (QS, QDS, QDA, QJA) with varying port configurations.
- Display design and included cables may differ according to the region.

Manual page author
Michael Turner
Technical manual editor