Home Appliances / Vacuum Cleaners
User Manual for Sencor SVC 0600GG Series 3-in-1 Cordless Vacuum Cleaner
Quick guide for the Sencor SVC 0600GG series 3-in-1 cordless vacuum cleaner. Includes assembly, charging, usage, maintenance, and technical specifications.
Table of contents
Manual images
Jump to the sectionQuick guide from the manual
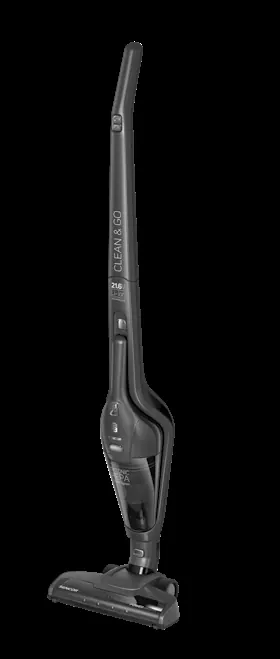
The Sencor SVC 0600GG series is a 3-in-1 cordless vacuum cleaner designed for household use. Key operational requirements include a 6-hour charging time for a full battery and regular maintenance of the HEPA filter and rotary brush to maintain suction performance. Always ensure the device is turned off and disconnected from the power adapter before performing any cleaning or maintenance tasks.
Description of the vacuum cleaner
The device consists of an upright vacuum body, a detachable hand vacuum, and various accessories. Key components include:
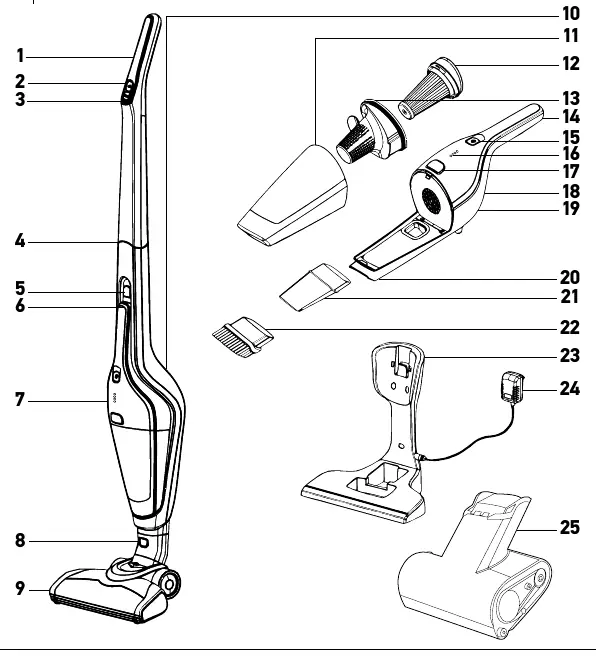
- A1-A4: Handle, On/Off button, power level/brush speed button, and connecting cable.
- A5-A7: Hand vacuum release button, main body, and bagless hand vacuum with Cyclone system.
- A8-A9: Floor nozzle release button and floor nozzle with electric rotary brush.
- A11-A13: Dust container, internal HEPA filter, and external filter.
- A21-A22: Slot nozzle and brush nozzle.
- A23-A25: Charging base, power adapter, and Cat&Dog Mini motorised brush.
Assembly and disassembly
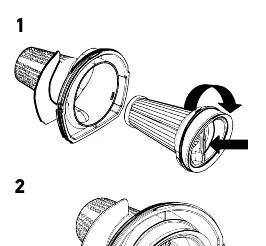
Hand vacuum: Insert the internal filter into the external filter and turn clockwise to lock. Attach the assembled filter to the dust container and connect to the motor unit.
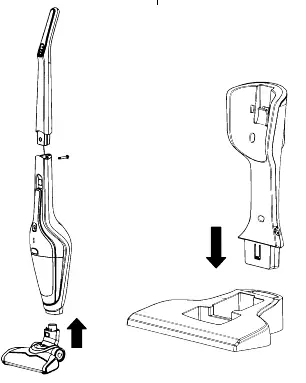
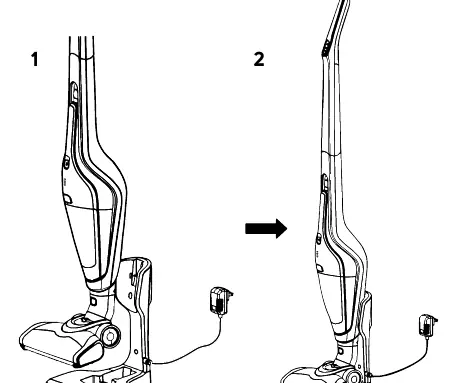
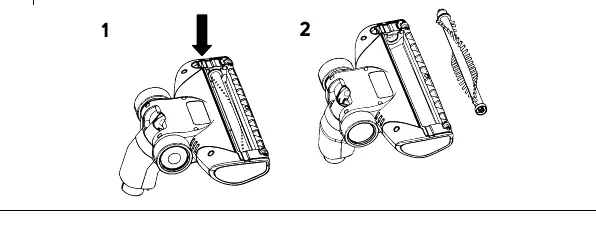
Upright vacuum: Connect the handle to the body, securing it with the supplied screw. Insert the hand vacuum into the body and attach the floor nozzle to the bottom. The nozzle connection is confirmed when button A8 slides out.
Charging base: Insert the top part into the bottom part. For stability, the base can be wall-mounted using screws.
Charging the vacuum cleaner
Place the vacuum in the parking position and insert it into the charging base. The LED indicators will signal the battery level. A full charge takes approximately 6 hours. The electronics manage the charging process, so the adapter can remain plugged in permanently.
Using the vacuum cleaner
Upright vacuum: Remove from the charging base by pulling upwards. Use button A2 to start and A3 to regulate suction power and brush speed.
Hand vacuum: Detach from the main body using button A5. Use button A15 to turn on/off. Suitable for furniture, car interiors, and hard-to-reach places.
Cat & Dog Mini brush: Attach to the hand vacuum for upholstery or removing pet hair.
Maintenance and cleaning
Dust container and filters: Disassemble the hand vacuum, empty the container, and rinse with water. Wash the external filter under running water. The internal HEPA filter should be washed under gentle running water and allowed to dry completely before reassembly. Replace the HEPA filter every 6 months.
Floor nozzle: If the rotary brush is tangled with hair, remove the nozzle, release the latch on the left side, and remove the brush to clean it.
Safety instructions
- Do not use to vacuum liquids, burning items, sharp objects, or building materials like plaster or cement.
- Do not submerge the vacuum, charging base, or adapter in water.
- Only use the original power adapter and accessories.
- If the power adapter is damaged, it must be replaced by an authorized service center.
Technical specifications
- Power input: 110 W
- Battery: Li-ion / 21.6 V / 2000 mAh
- Charging time: Approx. 4-6 hours
- Runtime: Up to 45 minutes (low power) or 20 minutes (high power)
- Dust container capacity: 0.5 L
Manufacturer information
Sencor
Practical help
Common problems
Vacuum stops running suddenly
The battery is fully discharged. All LED indicators will be off. Place the unit in the charging base.
Reduced suction power
Check if the dust container is full, filters are soiled, or if the suction opening is blocked.
Rotary brush not rotating
Hair or animal fur may be tangled in the brush. Remove the floor nozzle, open the brush cover, and clean the brush.
Before use
- Check that the power adapter voltage matches the wall socket.
- Ensure all filters are installed correctly in the dust container.
- Verify the vacuum is fully assembled before turning it on.
- Ensure air outlets and suction openings are free of blockages.
- Ensure all parts are completely dry after cleaning before reassembly.
Specs in practice
- Charging time
- Approximately 4-6 hours for a full charge.
- Runtime (High power)
- Approximately 20 minutes.
- Runtime (Low power)
- Approximately 45 minutes.
- Battery type
- Li-ion 21.6 V / 2000 mAh.
Images and diagrams
- Fig A: Exploded view of all vacuum components and accessories.
- Fig B: Filter assembly and disassembly steps.
- Fig C: Upright vacuum assembly and handle connection.
- Fig D: Charging base assembly.
- Fig E: Correct placement of the vacuum in the charging base.
Model compatibility
- Use only the original power adapter, charging base, and accessories supplied.
- Not intended for industrial use; for household use only.

Manual page author
Emily Carter
User documentation editor
Prepares concise manual descriptions and highlights the most useful setup, operation, and maintenance information for readers.